VirtualMV/Flash12 (CS6)/Basic/Graphics
| Flash12 (CS6) | ||
|---|---|---|
| Overview | What is Flash? | Resources | History | Quick reference | Upgrading | Design Examples | Journal | Troubleshooting | |
| Basics | Media Basics | Text | Graphics | Animation ( Timeline | Classic tween | Shape tween | Object tween | Motion guide | Movie clip ) | Audio | Video | |
| Text | Scrollbox | Stop Movie | Importing HTML | TLF Features | |
| Graphics | Spraybrush and Art Deco Tool | Fast Loading Photo Album | |
| Audio and Video | Audio ( Adding Sound to a button | Toggle Background Music | Toggle sound using buttons ) | Video ( Advanced Techniques | Alpha Channels | Video Resources ) | |
| Animation | Complex Animation | Mouth Animation | |
| Navigation | Introduction | Joke Book ( Adding Buttons ) | Journal Navigation | |
Overview
Create a new flash document
1. Create new Flash File (ActionScript 2.0), and, reset the layout to the default one.
Select Window > Workspace > Classic/Reset 'Classic' .
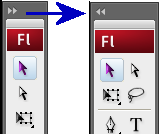
2. I like to have the compact tool bar, two columns wide so click on the double arrow on the top to change the layout (and if needed make the bar two columns).
3. Set the background colour to a green felt (like that found on a pool table)
Drawing a pool ball
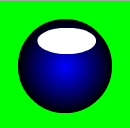
A basic pool ball is made up of three parts: The ball, the number and an oval containing the number. We would like all the pool balls to be the same size so we will save the initial pool ball into our library (to use as a template)
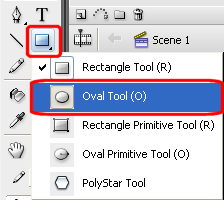
1. In the tool panel change the rectangle tool to an oval tool (click and hold on the rectangle tool and then select the oval tool)
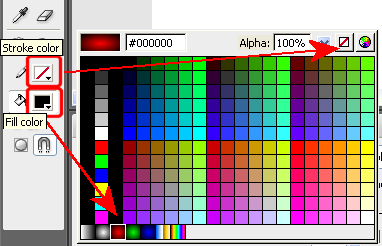
2. Now we do not want to have an outline on our ball so, on the tool bar in the Colors Area, click on the Stroke Color button. Select the No Colour option (see image below)
3. Now click the Fill Colour Button on the tool bar, and select the blue ball at the bottom of the color picker.
4. Draw a circle on the Stage by selecting the Oval tool and [Shift]-dragging on the Stage. Holding the [Shift] key constrains the Oval tool to a circle.
What we want to do is save a template of the ball so that we can create others the same size, so we are going to create a graphic symbol and place in the Library.
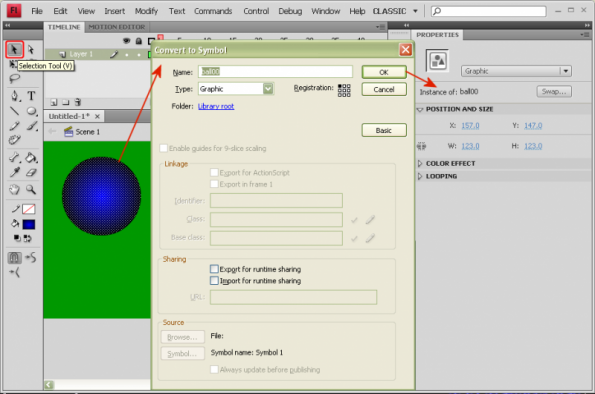
5. So, click on the “Selection Tool” in the toolbar (top left), then select the ball.
6. Left click on the ball (to give it focus), then right click on the ball, and select “Convert to Symbol” (also under the Modify menu)
7. In the Convert to Symbol dialog box, type ball00 into the Name text box. Set the type to Graphic.
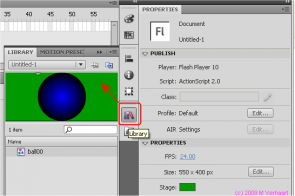
8. A new symbol will appear in the Library panel.
Follow these instructions carefully or the oval will hide behind the ball.
9. As the ball is actually a group of objects (when we converted it into a symbol), right click and select break apart.
10. Deselect the ball, by clicking on the “Selection Tool” in the toolbar (top left), AND then clicking on the stage (not on the ball).
11. Now reselect the Oval Tool again, and change the Fill color to white.
12. Draw an oval in the top quarter of the circle. (You may need to experiment a bit until it looks right - use [Ctrl]+Z to undo)
Adding the ball number
1. Click the Text Tool in the Tools panel.
2. Change the text colour to black (Property inspector)
3. Click onto the stage and type in 2.
4. Turn off the snapping setting (this makes aligning objects easier, but you cannot place objects exactly), use View > Snapping and uncheck Snap to Guides and Snap to Objects.
5. Click the Selection Tool, and drag the number into the white ellipse. You should be able to place the text nicely into the ellipse (you can use your arrows for more precise positioning).
6. If the text is too large (or small) for the white ellipse, use the property inspector and change the font size.
Save the ball as a symbol and clone to create other balls
You can turn your new artwork into a reusable asset by converting it to a Flash symbol and putting it into the documents library. A symbol is a media asset that can be reused anywhere in your Flash document without the need to re-create it.
1. Click the Selection tool in the Tools panel.
2. Click and drag the mouse around the ball. The ball, oval and text will be selected.
3. With the ball still selected, right click and select “Convert to Symbol” or press F8. (also under the Modify menu)
4. In the Convert to Symbol dialog box, type ball02 into the Name text box. The default type is Graphic.
5. Click OK. A square bounding box appears around the circle. You have now created a reusable asset, called a symbol, in your document.
6. The new symbol appears in the Library panel. (If the Library panel is not open, select Window > Library.)
Save and test your movie
It is probably about time to save what you've done.
13. Save this document as jnlGraphics.fla
14. Test ([Ctrl]+[Enter]) and Publish the flash document.
Create further unders pool balls
1. Drag the pool ball symbol (ball02) onto the stage from the library. You will now have two instances of the pool ball symbol.
2. Right click this new ball and select “Break apart”.
3. Click onto the stage to deselect the ball, then click on the actual ball.
4. Now change the Fill Colour to red starburst.
5. Double-click on the Text. The Text Tool should now be selected and you should be able to change the number to 3.
6. Select the Selection Tool and draw round the three objects that make up the ball.
7. Right Click and Select Convert To Symbol, and call it ball03
8. Create a green 6 ball
9. Change the amount of colour on the ball, by exploring the use of the Colour tab (and dragging the ink pots). note that [Ctrl]+[Z] will undo any unwanted changes you have made.
Create overs pool balls
1. Drag the ball00 symbol to the stage, and Break Apart.
2. Create a white ellipse next to the pool ball and drag to the center of the ball.
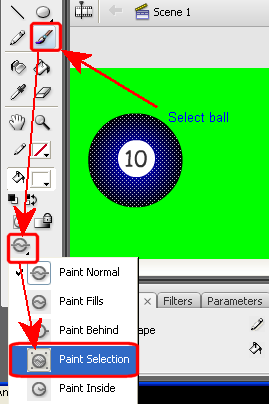
3. Change the number (blue = 10, red = 11 or green = 14)
4. Select the ball
5. Select the brush tool. In the options area on the Tool panel , then select the Brush Mode, and choose Paint Selection
6. Make sure the fill colour is white, then paint the top and bottom of the ball with white bands. Hold shift down and draw the brush across the ball to give a straight line.
Your finshed balls should look like ...
Finally, make all the balls graphic symbols in the library
 References
|
virtualMV | Superquick wiki guide | Please give me some feedback |
VirtualMV/Flash12 (CS6)/Basic/Graphics. (2025). In WikiEducator/VirtualMV wiki. Retrieved February 28, 2025, from http:https://wikieducator.org/VirtualMV/Flash12_(CS6)/Basic/Graphics (zotero)
|
