Word processing/Key concepts/WP functions
| Word processing | |
|---|---|
| Key concepts | Introduction | WP principles | WP terminology | WP functions | Key points | Assessment |
Contents
Temporarily Hide the Ribbon
- Want more room on your screen?
- Double click on the active tab. The groups will be hidden and only the tabs will be shown.
- Want the groups back all the time?
- Double click on the active tab again.
Note: if you single click on the active tab to get the groups back, it will show you the ribbon while you are working in the ribbon, but as soon as you go into the document and start working, the ribbon will be hidden again.
To see the ribbon permanently double click on the active tab.
Status Bar
The Status Bar at the bottom of the screen indicates Page Number & Total Pages, Number of Words, Language, Layout View, and Zoom Level.
Adjusting the Page Layout View
The different options for Page Layout View are located on the Status Bar:
Click once on each button to adjust the view.
- Change to Print Layout View to see how layout, text, graphics, and other elements will be positioned on the whole printed page.
- Change to Draft View for keying in, editing, and formatting text. Draft view shows text formatting but simplifies the layout of the page so that you can key in and edit quickly.
- Change to Web Layout View when you are creating a Web page or a document that is viewed on the screen. This view looks the same as Draft View.
- Change to Outline View to look at the structure of a document and to move, copy, and reorganise text by dragging headings. You need to have used Word Styles for this view to be effective.
- Change to Full Screen Reading View to see the whole page.To close the Full Screen Reading View click on the Close button located in the top right hand corner.
Zoom Level
The Zoom feature is located on the Status Bar at the bottom of the screen:
You can adjust the Zoom level by clicking on the Zoom mover and dragging it to another location on the Zoom Level Bar.
You are also able to change the Zoom by clicking on the View tab and using the Zoom functions.
Keyboard shortcuts – Closing a Document
- Ctrl + F4
- Closes the active document but does not close the program.
- Alt + F4
- Close the active document - if only one item is open it will quit the program.
Note: You will need to re-open Word if you closed the program!
See the Shortcut keys page for a comprehensive list of shortcut keys available in Word.
Retrieve a Document and Save with a New Name
- Click on the Open icon
 from the Quick Access Toolbar
- Navigate to the My Documents folder and double click to open it
- Locate the Word file Club Med which you saved earlier, and double click to open
- Click on the Office Button (2007), or File Button (2010) select Save As
- Notice that the file will be trying to save automatically back into the My Documents folder. Save the file with a new name and to a different folder or drive such as a removable USB drive.
Page Setup and Margins
|
Please note: the following tutorial will open in a new window/tab. When you have finished the tutorial, simply close the window/tab and you'll return to this page. If you are totally new to word processing, you might like to check out this online tutorial before you go on: The tutorial includes a short video which demonstrates some key skills.
|
Margins
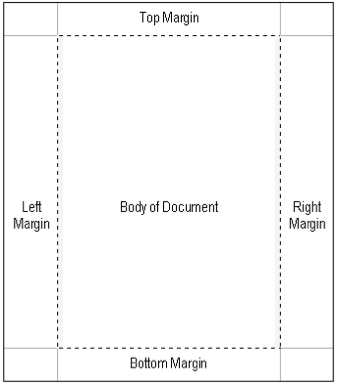
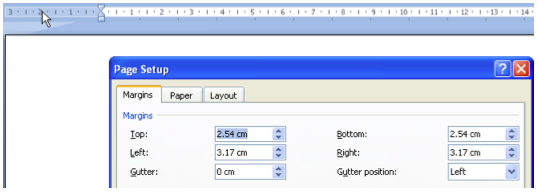
The margins are the white space between the text and the edges of the paper.


