Modifying column widths and row heights
| Working with Spreadsheets in OpenOffice.org Calc | |
|---|---|
| Working with cells | Selection | Inserting | Deleting | Widths and heights | Entering data | Changing contents | Copy, move, delete | Shifting cells | Sorting data | Speeding data entry | Find and replace | Practice | Summary |
There may be times when you will need to adjust the size of the cells in the columns and rows of your worksheet. Typically this is required if the existing size cannot adequately accommodate the amount of data included. You will therefore need to adjust the width of the column and/or the height of the row. Resizing may be done in either of two ways. To resize a single row or a single column, you may use the mouse. To resize one or more than one column or row, you may use Format on the menu bar. You can choose between the two methods for resizing a single row or column, but you must use the Format option for more than one row or column.
Resize the width of a column using the mouse
Use the right hand border to increase or decrease the width of a column.
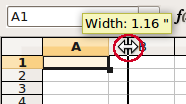
- Position the cursor on the right hand border of the column letter box, until you see a double headed arrow.
- Hold down the left hand mouse button and drag the border to the left or right to make the column narrower or wider as required.
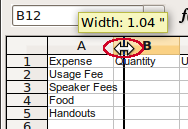
As you carry out this action, the width of the column displays.
| If you are unfamiliar with using a mouse to grab and drag something, take a moment to try out making a column wider or narrower. |
Resize the height of a row using the mouse
Use the lower border to increase or decrease the height of a row.
- Position the cursor on the lower border of the row number, until you see a double-headed arrow.
- Hold down the left hand mouse button and drag the border down or up.
The height of the row displays.
Resize one or more columns using Format
- Select the column(s) whose width you wish to change
- Select Format > Column > Width...
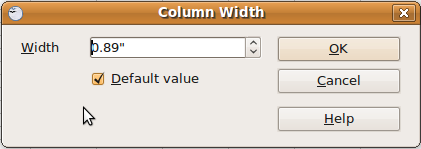
The Column Width dialog displays.
- Enter a value in the Width window or check the Default value check box to select the default column width.
- Click OK.
The selected columns display with the new width.
Resize one or more rows using Format
Similarly to resizing columns...
- Select the row(s) whose height you wish to change.
- Select Format > Row > Height...
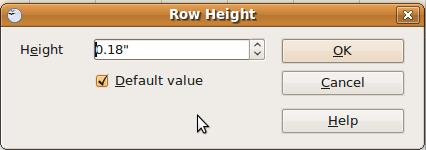
The Row Height dialog displays
- Enter a value in the Height window or check the Default value check box to select the default row height.
- Click OK.


