VirtualMV/Digital Learning Technologies/Examples/Adobe Connect
| Digital Learning Technologies | ||
|---|---|---|
| DLT Examples | Software (Text | Images | Audio | Animation | Video ) | |
| Cloud (StoryTelling: StoryTelling | Poster: Glogster | Video: YouTube | Presentation: Prezi | Screen animation | Webinars : Adobe Connect ) | Classroom Management | ||
| Hardware ( Tablet | iPad | Android ) | ||
Contents
To follow up
- Social Learning using Adobe captivate/Twitter http://blogs.adobe.com/captivate/2012/11/social-learning-using-twitter.html
- Adobe Captivate Course Companion Twitter widget
Setting up Adobe Connect for virtualMV
Some Instructions
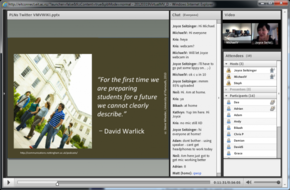
Using Adobe Connect
- Start up the Computer
- Plug in the web cam facing you/whiteboard
- Start up connect
- use web browser and http://eitconnect.eit.ac.nz/virtualmv
- user xxx password: xxx
- Set up microphone
- Meeting > Audio setup wizard (usually have to select web camera microphone)
- Activate the web cam
- Click start My Webcam (top right panel)
- Click to share it
- Close the right panel (with Sharing/Discussion/Collaborate ) – gives more room
- Click on the Microphone button (top middle of the screen) so everything you say & do on the monitor is sent out to the world
So now choose what you want to share with the students Either Share whats on your screen Now share My Screen (big button in middle) > Choose Share my screen > Check Desktop + [Share] Or if a presentation has been uploaded/converted Share My Screen > Recently Shared > what you have uploaded (for ITWD I have uploaded the Powerpoint (2012ITWD6400 … ppt )
If you want to allow students at home to talk to you activate their microphones (Right click on them under Participants – right panel) and enable audio. Watch out for students adding text comments in the chat window
If you want to record the meeting Meeting > Record Meeting … > Give it a name (I usually use 20120309_ITWD i.e. yyymmdd_subject)
Don’t forget to turn the record off when you finish the class (Red button top right)
Tip
As presenter, your attention is being called in many places especially if you have a live audience as well as a virtual one. A good tip provided by Adobe Connect trainers, and one they utilise themselves, is to have another person monitor the chat. Use an 'in class' participant to monitor the chat and to bring attention to it if necessary. Another method, also used, is to get the virtual participants to raise their hands if attention by the presenter is required. This separates out genuine questions from general participant chatter. It is also possible to hide the chat window and prevent chat altogether while a presentation is taking place.
A cool Adobe Connect activity
If you would like a class to interact with an online document/ web2.0 tool, this is how this can be achieved;
- Add a weblinks pod to the current layout
- Enter the URL that you would like to share and interact with, eg google drawing/spreadsheet/doc, online whiteboard / wiki page etc (delete the http:// or https:// bit)
- At the appropriate time, click on Browse To
This will force that URL to be displayed in a new browser window for all participants (including yourself). Participants can interact with the content etc. As presenter, share your newly opened window displaying the URL. When you call the students back to the classroom (The Adobe Connect room remains active in another window), you will have their creation inside Adobe connect to share and discuss.
Breakout Rooms
Breakout rooms are sub-rooms that can be created within an Adobe Connect session. They are used to split large groups into smaller groups for specific activities. In the breakout room, the attendees have full presenter rights, ie they can speak to each other, use the whiteboard and upload files.
Resources
- Adobe Connect Visual Quick Start Guide for Hosts
- Adobe Connect Visual Quick Start Guide for participants
- Understanding roles and permissions
 References
|
virtualMV | Superquick wiki guide | Please give me some feedback |
VirtualMV/Digital Learning Technologies/Examples/Adobe Connect. (2025). In WikiEducator/VirtualMV wiki. Retrieved February 28, 2025, from http:https://wikieducator.org/VirtualMV/Digital_Learning_Technologies/Examples/Adobe_Connect (zotero)
|
