Integrating office applications/Mailmerge/Creating the merge
From WikiEducator
| Integrating office applications | |
|---|---|
| Mailmerge | Introduction | Overview | Preparing to merge | Creating the merge | Key points | Assessment |
Contents
Displaying the merged letters
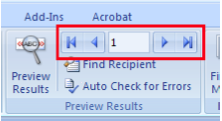
We are now going to look at how we can preview the merged letters.
Printing the mail merge
The final step in a mail merge is to print all the letters. However sometimes it’s handy to be able to edit individual letters before the print. So, rather than merging to the printer we are going to show you how to merge to a document.
|
|
Please note: the following tutorial will open in a new window/tab. When you have finished the tutorial, simply close the window/tab and you'll return to this page. You might also like to check out the section on mailmerge (from page 58) in this workbook: Although the workbook uses Open Office rather than Microsoft Office, the process is very similar.
|

