CCNC/CCNC Module 6/Creating views/Subsection 6 Master View
| Views and Workspaces |
Workspace views |
Layout slides |
Placeholders |
Adding Textboxes |
Outline view |
Master view |
Show Me |
Contents
Tutorial 6 - Creating a Master View for your Presentation
If you work for a company, you may be asked to prepare long presentations. Or, you may want to prepare slides about a special event or occasion. The Master View allows you to create a presentation with different types of slides but enable them to all have the same "look".
The elements that you add to the Master View - such as a company logo, background, and font color - will be applied to all of your slides.
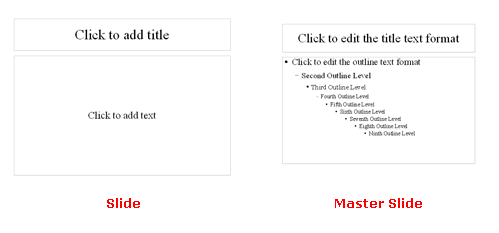
How a Master View is presented in your presentation depends on how the presentation was initially created. Empty presentations generate a Master View with a plain, white background. On slide 1 you saw a reference to “Click to add title” and “Click to add text.” These three elements – background
color and two text placeholders – are contained on the Master View. These three elements are available on every new slide that you add to your presentation.
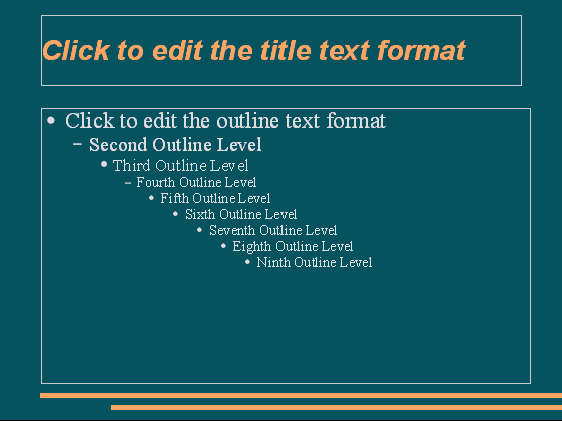
If, however, you created a new presentation with a coloured background or from a template, the Master Slide of that presentation will also display those unique style definitions and/or color scheme.
Background Fills
The default background fill for empty presentations is a plain, white color in Impress. You can choose to retain this background or change it to a different color, gradient, hatching, or image.
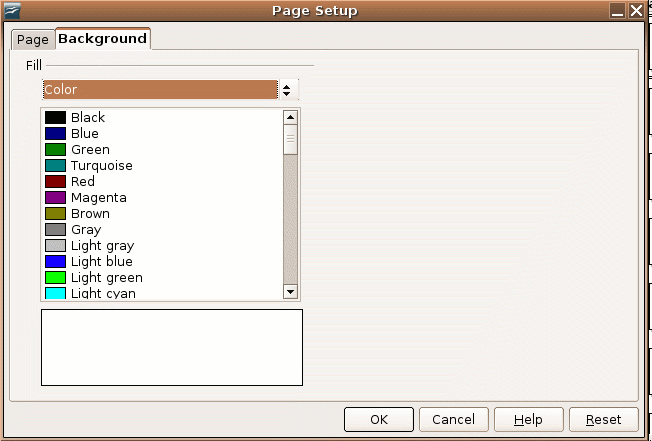
The background fill is defined on the Page Setup dialogue box.
Regardless of the background fill category you select (color, gradient, hatching, or image), Impress gives you many choices in each category. For example, if you choose Color, Impress provides different colors that you can choose to apply to your presentation.
Changing the Slide Background Fill
You can change the background color or the background fill of the slide you are working on or of all of the slides in your presentation. For a background fill, you can use hatching, a gradient, or a bitmap image. As you make these changes, Impress will ask you want to apply this background change to only the current slide or to all slides in the presentation. If you apply a background fill to a single slide, it overrides the master page background. However, objects on the master page remain visible.
To use a bitmap, color, gradient, or hatching pattern for the slide background:
- Start a new presentation or open an existing one.
- Click Format|Page on the menu bar.
- Click on the Background tab on the Page Setup dialogue box.
- In the Fill area, do one of the following:
- Select Color, and then click a color in the list.
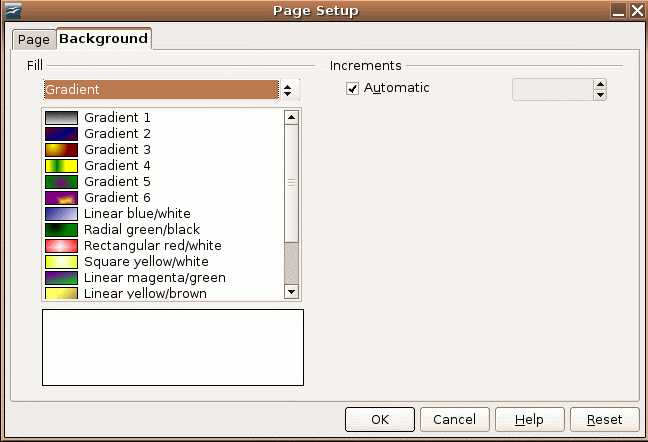
- Select Gradient, and then click a gradient style in the list.
- Select Hatching, and then click a hatching style in the list.
- Select Bitmap, and then click a bitmap style in the list.
- Click the OK button.
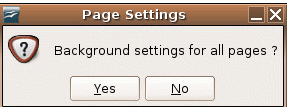
- Click either the Yes or No buttons in the Page Settings dialogue box to answer the question to change the “Background settings for all pages.”
- The slide, or all slides in the presentation, will then assume the fill attributes that you have defined in this procedure.
Viewing the Master View Elements
After creating or making changes to your Master View, you can view all of the basic design elements in your presentation. To see the Master View elements:
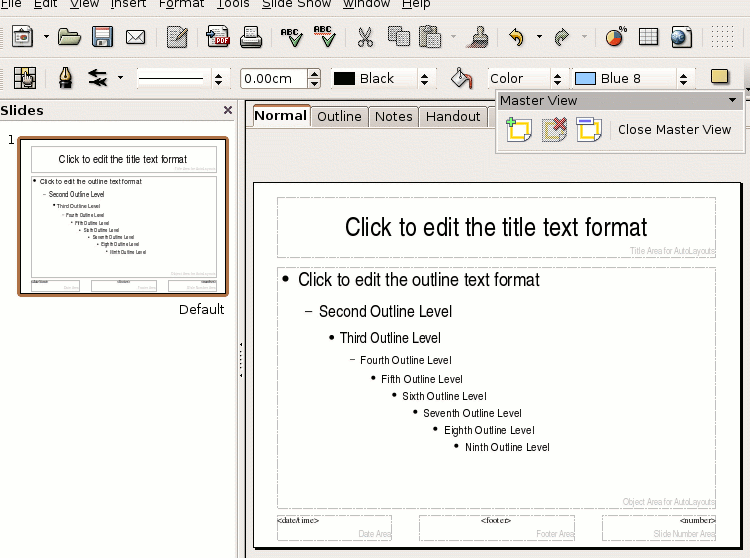
- Click on View|Master|Drawing from the menu bar.
- A slide appears showing the design elements of the Master Slide.
- The top text placeholder is reserved for the title text on every slide in the presentation.
- The bottom text placeholder shows a series of bullets, or nine different outline elements available for you to use in the presentation.
Changing Master View Fonts
As you continue working on your Master View, notice that the Master text-styles placeholder contains a model of up to nine bullets. The text becomes smaller for each bulleted level. Font sizes are pre-selected in the Master View. The sizes are based on what a normal person is able to read from a reasonable distance. You can change the font size, but this is fine-tuning that you might want to do later. Generally, the text should remain the same color for the title and all text levels.
To Edit the Text Styles on the Master View:
- Click View|Master|Drawing on the menu bar.
- The Master Slide showing background placeholders appears.
- Select to highlight the text (title text or body text) that is subject to formatting change.
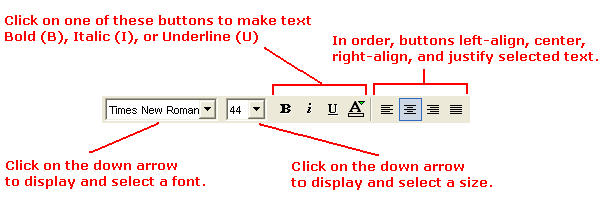
- Format the selected text by changing its fonts, size, appearance (bold, italic, underline), and alignment using the Formatting Toolbar.
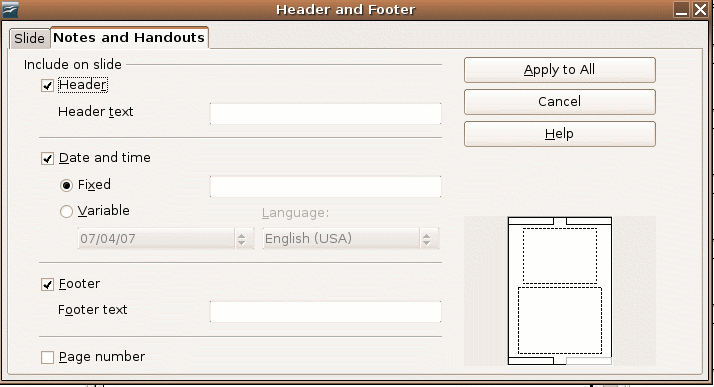
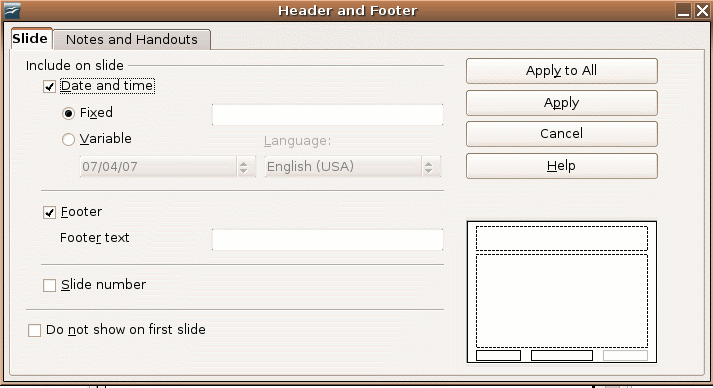
You can add a Header or Footer as a text object on the master page in your presentation in the following way:
To add a Header and Footer to all your slides,
- Click View|Header and Footer on the menu bar
- Select the Notes & Handouts tab
- Type in your header and footer in the various text boxes
- Press Apply to All tab to save changes
To add only a Footer to your slides,
- Click View|Header and Footer on the menu bar
- Select the Slide tab
- Type in footer in text box provided
- Press Apply or Apply to All depending if you want to add it to one slide or all slides of your presentation

