Text and Images/Working with images/Adjusting images

Text and Images
An introduction to creating and enhancing word-processing documents, including working with special text, tabs and images.
An OP Online course from the National Certificate in Computing (Level 2) programme.
| Text and Images | |
|---|---|
| Working with images | Introduction | Inserting images | Adjusting images | WordArt | Objects | Key points | Assessment |
Contents
Picture Tools
When an image is inserted the ribbon will change and a new tab called Picture Tools will appear.

Using this tab you are able to format the image.
Changing the image's layout
When you insert an image it may not appear where you would like it to. You are able to adjust the Text Wrapping of the image so that it will appear aligned with text or as an object on its own.
Outlined below are the Text Wrapping options:

To change the text wrapping:
- Click on the image to select it
- From the Picture Tools Tab select Text Wrapping
- Click on the text wrapping format you would like to use
Resizing Images
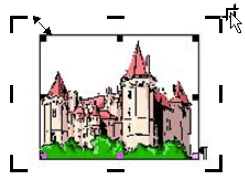
- Click anywhere on the picture to select it and bring up the black frame around it
- Then place your mouse on top of the black squares on a corner of the border
- A double -headed arrow will appear: you can then drag in or out to resize the picture

Cropping Images
- Click anywhere on the image to select it
- Choose the Crop option from the Picture Tools Tab
- Your image will have cropping handles:
- Place your mouse cursor over the cropping handles. Click and drag the sides, top or bottom of your image

Deleting Images
If you would like to delete the picture from your document click on the picture to select it and then press the Delete key.
|
Please note: the following tutorial will open in a new window/tab. When you have finished the tutorial, simply close the window/tab and you'll return to this page. You might also like to check out the following tutorial: Don't forget to check out the video included in the tutorial.
|