Moldy Food
| Instant wiki maker | Making handouts | Editing tips |
Contents

Biology In Elementary Schools is a Saint Michael's College student project from a course that ran between 2007 and 2010 and fully described in this book chapter. The student-created resources have been preserved here for posterity. Link under 'toolbox' for printer-friendly versions of the exercises. Click on handouts to print full resolution versions. Please see Wikieducator's disclaimer, our safety statement, and the Creative Commons licensing in English and in legalese.
Moldy Food
Student worthiness
Tried and trusted
Primary Biological Content Area Covered
- Food pyramid
- Healthy eating habits
- Fungus/mold growth on food
- Refrigeration
- The fungi
- Spores
Safety
Mold can cause health problems such as allergic reactions, mycotoxin poisoning, and fungal infection. Because of these risks it is important that the plastic bags remain sealed once mold growth has occurred. Also, do not allow students to play with toothpicks. Teachers should handle all sharp objects.
Source: Mold Mania
Materials
Teacher Materials
- Some old bread allowed to grow mold for some weeks in advance as mold source
- Sharp knife
- Cutting board
- Disposable plastic gloves
- Colored food pyramid
- Big sheet of paper with a blank bar graph
- Camera
Student Group Materials
- Sharpie maker
- Crayons, markers, or colored pencils (to color in food pyramid)
- Cut-outs of the different foods
- 1 item from each food group, for example:
- Cooked chicken
- Apple (cut into eights)
- Cake or cupcake
- Cheese (couple slices/cubes)
- Bread (one slice of whole grain bread)
Individual Student Materials
- Ziplock bag (one bag per food item) either clean or with a spooonful of dirt/mold mixture to represent "dirty" environment
- Use the moldy bread as a source of mold spores. Do this in a well ventilated space or in a sealed plastic trash bag.
- Blank food pyramid (Figure 1)
Handouts
Figure 1 is a possible handout of a food pyramid that could be used when explaining the food pyramid to students. It is blank in order for the students to fill it in with the correct colors and labeling as the teacher explains it. This provides for a hands-on learning experience. This image can be found at http://www.mypyramid.gov/kids/index.html.
Description of Activity
Students will begin by being introduced to the food pyramid.
This will include a coloring activity to emphasize the different food groups.
Next, students will take part in an experiment showing the process of growing mold on food.
Figure 2 shows an image of moldy nectarines, an example of desired results wanted for this experiment.
Source of figure: http://commons.wikimedia.org/wiki/Image:Moldy_nectarines.jpg Wikimedia Commons

Lesson Plan
- Each student will receive a blank food pyramid (see Figure 1)and will be instructed to color in the pyramid to differentiate between the different food groups.
- While coloring the teacher will briefly discuss the message being portrayed by the different parts of the pyramid.
- The teacher will then describe how it is equally important to take care of foods as it is to eat the right food as well as the right quantities of food. Here, the stairs can be used to stress the importance of excercise (if you take care of your food (ie, keep it mold free), it will take care of you in return).
- To demonstrate the importance of taking care of food, students will be learn how mold can grow on a variety of foods.
- Each student will be given 2 ziplock bags and 2 pieces of the same food from one of the different food groups.
- One bag will be empty and represent a "clean" environment.
- The other bag will have a little potting soil (pre-mixed with mold) to represent the "dirty" environment.
- To prevent cross contamination, have students make and seal the clean bags fast.
- They will then place their food in the bag and seal the bag making sure to leave a bit of air in the bag to allow for moisture and mold to grow.
- Students will then label their bag with their name, the food, whether it is a "clean" or "dirty" environment as well as the date.
- Students will hypothesize which food and in which environment they think will grow mold faster and why.
- Students will record this hypothesis by sticking a sticky note in the corresponding column on the PREDICTIONS bar graph (See Figure 2).
- Students will be instructed to take their baggies of food back to their classroom and keep them in a warm area but not near a window as that will most likely be cold and possibly drafty.
- Each day students should observe the growth of their mold and are welcome to record data if there is any mold present including the color, shape, texture and number of colonies or percent coverage.
- Once a food has started to grow mold students should record how many days it took by coloring up to the corresponding number on the RESULTS bar graph (See Figure 3).
- If their teacher has a camera, taking visual documentation of the mold growth (or possibly lack there of) would be excellent as well. Photos can be used with an overlay grid to help estimate percent covered.
- At the end of 2 or 3 weeks students should determine whether their hypothesis was supported. It is important to explain to students that even a rejected hypothesis is a good result. It simply proves that what you thought was going to happen didn't happen.
- Don't forget to remind your students to throw their bags away at the end of the experiment!!
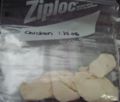
Here are some of the pictures we took right after the food went into our bags:
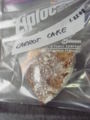
Cake

Lemon Bar
Chicken
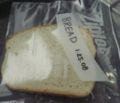
Bread


Here are some pictures of the mold we grew after 3 weeks (in clean bags):
Moldy chicken
Moldy lemon bar

Moldy carrot cake


Potential Pitfalls
After doing a test run of our mold growing experiment with only clean bags, we came back to the labs after one week to discover that no mold had been grown. One group had added a bit of potting soil (in the hopes of adding some moisture to the bag) but they also had limited success with this. However, mold will eventually grow on foods so have no fear! Perhaps it will take a bit of time for the mold to appear but it will eventually happen.
Due to lack of mold growth we decided to edit the experiment in hopes of getting results faster. In addition to supplying the students with a clean empty ziplock bag we supplied them with one with a little bit of potting soil mixed with mold as described above. This did speed up the process of mold growth. We explained this portion of the experiment by telling the students that the empty bag represents a clean environment and the dirty bag represents a dirty environment. This helped us to emphasize the importance of keeping your food clean. Due to limited time, as well as buying the wrong baggies (ones that didn't ziplock shut) students were only able to label and collect food in one bag- the dirty environment. It was considered to split the group half and half, some with clean bags and some with dirty bags, however it was decided that all students would want to have a dirty bag. As a result, we made a group decision to have each student only do one bag, a dirty one, and then sent one sample clean bag of each food back to the classroom with the teacher to use a comparison when recording results. If more time was available it would have been ideal to have each student be responsible for a clean bag and a dirty bag.
Math Connections
Students will be working together to create a bar graph with their PREDICTIONS of which food in which environment will grow food faster. Also, they will be given a RESULTS poster to fill in a bar graph of "How many days it took to grow mold" on each food in each environment. The empty bar graphs are shown below.
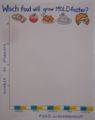
Figure 2:
Prediction Bar Graph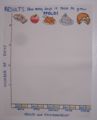
Figure 3:
Results Bar Graph


Literature Connection
If time permits read a story about mold. At least have the book available for students to look at pictures of what mold looks like. The book listed below is a suggestion:
Pascoe, Elaine, 1998, Nature Close Up Slime, Molds and Fungi, Blackbirch Press.
Connections to Educational Standards
- 3.5 Students make informed, healthy choices that positively affect the health, safety, and well-being of themselves and others.
- 7.1 Students use scientific methods to describe, investigate, explain phenomena, and raise questions
- 7.13 Students understand the characteristics of organisms, see patterns of similarity and differences among living organisms, understand the role of evolution, and recognize the interdependence of all systems that support life.
Next Steps
After performing this experiment, students can continue by doing further research about mold growth. Another experiment could include the same materials but each baggie would be under a different condition (ie, cold, light, warm, dark, etc.) in order to determine which conditions foster mold best.
Reflection
I found after doing this experiment that first graders are more excited with instant results. They weren't as excited with our experiment once they found out they had to take it back to the classroom with them and wait to see results. However, if this had been done in their classroom with their teacher it would be easier to make it more exciting because it could be guaranteed that the food would be observed everyday.
It was frustrating when mold didn't grow on our food during our test run of the experiment. However, it allowed us edit our experiment in a way that was more beneficial for discussing the importance of keeping your food "clean". It also stressed that sometimes your projects won't work out and that you always have to be prepared to make changes.
On the day of peforming the experiment with the students we realized we had the wrong bags. The bags we had did not seal shut and as a result would not provide adequate conditions for growing mold, especially since we were planning on putting soil in some of the bags. This required us to modify the experiment right there and make use of any ziplock bags that were hanging around the classroom. This stressed the importance of remaining calm and making sure that you are always prepared.
Some students did not find the coloring activity to be enjoyable and it did not keep their attention. Once the hands-on part of the activity began, those students sudddenly became much more interested. Our group tried to both incorporate the learning objective of "healthy eating habits" with something concrete that the students could take part in and physically see. It is important to note however that sometimes this may not be as successful. If repeated, it may be beneficial to concentrate more on how mold grows and what mold actually is, rather than coming from the perspective of mold being something bad and unhealthy.
I agree that the lack of immediate results was something which took away from our project. Here are two ideas I have since thought of, which might have enhanced our project. If we had had the time, the mold which we grew in our test run would have grown and so we would have been able to show it to the students, let them explore, talk about it, and perhaps use it to enhance their predictions of which food would grow the most mold. The other activity we could have done would have been to look at mold under a microscope. One group used a microscope to look at something else and the students really responded to it. Most students would think of mold as a thing and not realize that under a microscope they can see it move. To go along with this, we could also have had the students draw what they saw on a piece of paper.
Perhaps if mold growth had been part of a unit of some sort, it would have been easier experiment because the time needed to grow the mold could have been supplemented with other projects while the students waited for and documented their results.
That said, the students did like the interactive part of the experiment such as picking their food, and putting a sticky on the table under which food they thought would grow the most mold. When we had the students mark their prediction, interestingly enough, it appeared that students were simply following the trend of students who had come before them. With a couple exceptions, most of the students put their stickies where everyone else had put them in previous groups. In the future, have students make a predication, and be able to articulate why. Let them know that there isn’t a right or wrong answer to this question and that it is simply a prediction. Then after they have solidified their answer, have them put their sticky on the chart. Maybe this will promote individual learning and thought instead of just doing what the rest of the group says without any ideas as to why.