Desktop publishing/Project 1/Create

Desktop publishing
An introduction to using desktop publishing software to produce documents.
An OP Online course from the National Certificate in Computing (Level 2) programme.
| Desktop publishing | |
|---|---|
| Project 1 | Introduction | Plan | Create | Evaluate | Key points | Assessment |
Now we will create the publication we planned in the previous section. Luckily, MS Publisher includes a wide range of publication templates, including one which is very suitable for our purpose and visual layout.
Contents
Creating a new publication
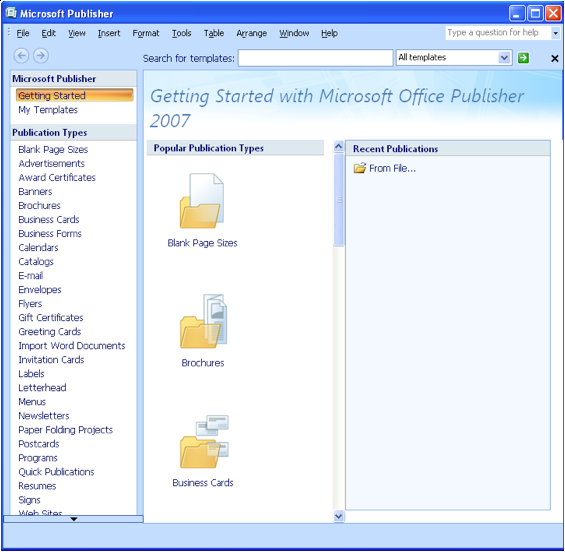
- Start MS Publisher from the Start ⇒ All Programs ⇒ Microsoft Office menu. The Publisher window will appear:
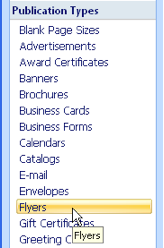
- From the Publication Types task pane, choose Flyers:
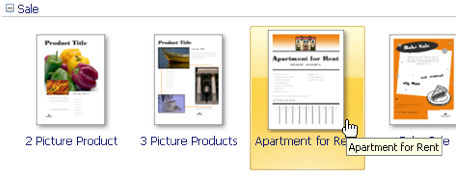
- Scroll down to this section and choose Apartment for Rent:
- When you click Create, your new publication window will appear, with placeholder text and graphics as appropriate:
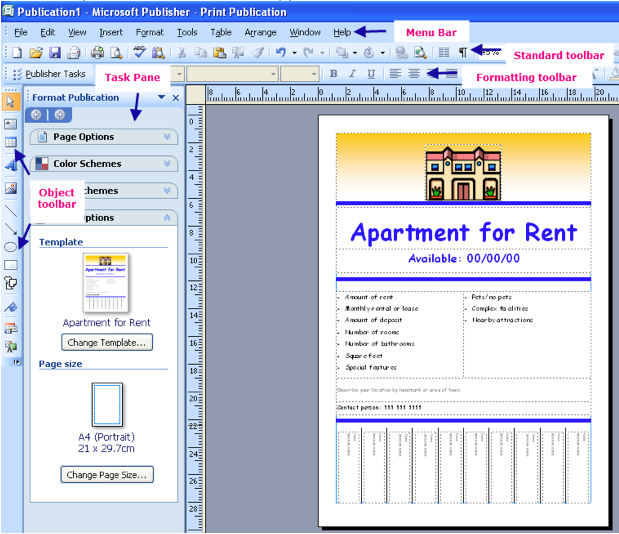
Note also the key parts of the Publisher interface: the menu bar, the toolbars and the task pane. We'll use these in the sections below to build our finished publication.


| We already knew which template we wanted to use, which allowed us to go straight to it. At other times, you will need to search through the templates for one which is right for your planned publication. You'll find it helpful to spend a bit of time getting to know the template options and exploring some of the other templates that MS Publisher provides.
|
Publisher tools
The Object toolbar
The Object toolbar at the left hand side of the window provides quick access to tools for working with different types of elements:

The Object tool bar can be dragged off the sidebar to float above your page. You can also turn it off and on using the menu View ⇒ Toolbars ⇒ Objects.
The Task pane
The Task pane, also at the left side of the page, provides quick access to common commands and functions:

You can turn it off and on using the menu View ⇒ Task Pane.
Graphics and clip art
Move the mouse into the top part of the flyer and over the house graphic without clicking. You will see a tooltip telling you this element is a “Picture”:

To select the graphic, click the mouse on the graphic - handles will appear on the corners of the graphic:

To move the graphic, click and hold the mouse on the picture and drag the picture to the left of the top area. Release the mouse and the graphic will move:

Tip: To move it up or down just a little, you can use the ⇓ or ⇑ keys on the keyboard when the handles are shown:

To resize of the graphic, click and drag a corner handle:

Release the mouse button when the graphics is the correct size.
Tip: avoid using the centre handles as this will distort the graphic -eg:

Tip: the Edit ⇒ Undo command or shortcut (Ctrl-Z) can be handy here!
Inserting clipart graphics
Since our publication plan and brief specify three graphics at the top of the flyer, let's look at adding two more clip art graphics. We'll need to find images which are relevant, because we need to make sure that everything we include helps our publication achieve its purpose.
Note: make sure no other elements are selected (ie have handles) before you insert a new element. Click on a blank part of the white page to un-select any selected objects. If you don’t do this, any selected element will be replaced when you insert the new element.
Tip: if this happens, this is another situation when the Edit ⇒ Undo command or shortcut (Ctrl-Z) could be handy!
From the Task Pane window, click the Format Publication down arrow to see the other panes that are available, then click on Clip art:

In the Search for field, type the word apartment, then click on Go:

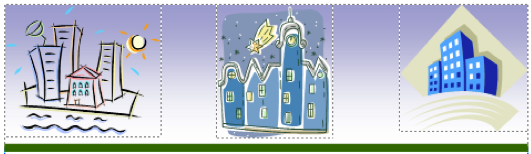
Publisher will start searching the clip art library on your computer for clip art related to your search text. Be patient - it may take a while to display the search results as below:

If you have an Internet connection, you can search online libraries in addition to what's available on your own computer:
- Click on Clip Art on Office Online
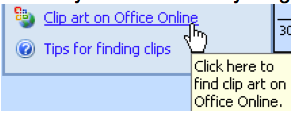
- Type your search term again and click Search

- When the results of your search appear, you may need to scroll down to see them all.


Tip: If you move the mouse across a graphic, information about it will appear as a tooltip:

Note how each graphic has a down arrow next to it - clicking on this provides a menu with command commands. You can insert a graphic into your publication, or add it to your collection if you want to use it elsewhere.

Choose Insert:

Tip: you can also just click on the graphic and it will insert automatically.

- Move the new graphic alongside the first graphic.
- Resize the new graphic to match the first graphic.
- Click off this graphic - remember that if you don’t click off this graphic first, inserting a new graphic will replace the one that you have selected.
- Locate and Insert a third graphic. Move the third graphic beside the other two. Resize to match the other graphics. Change the order if you want to by dragging the graphics around.

Well done! You have met the requirements of the publication brief by including 3 graphics. If you decide they need more work, you can always come back and adjust or replace these later.
Zoom
Sometimes we need to zoom in to give us a close-up view of part of our document. This gives a lot more precision if we want to move or resize a graphic element, for example.
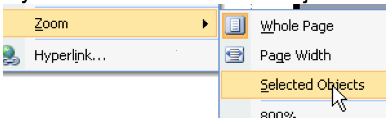
- Zoom in
- Right click on the object and choose Zoom ⇒ Selected Objects

- Zoom out
- Right click on the object and choose Zoom ⇒ Whole Page
Tip: You can also press F9 to zoom in and out - although zooming in this way is not quite so close-up.
Text boxes
Each block of text lives within a container called a text box, and you build publications by arranging text boxes on your pages.
You can place a text box anywhere you want on a page, make it any size you want, divide it into columns, and connect one text box to another so text flows between them - even if the text boxes are on different pages.
Editing text
Let's look first at replacing some of the default text in the text box elements:
The bullet points
- Click on the first bullet point placeholder ( Amount of rent ) in the text box
- If all the text is not selected, select it using Ctrl + A
- Press the delete key
- Key the correct text ( $200 per week )
- Press the Enter key to go to the next line and continue keying each item in turn. Note that the cursor will automatically go over to the second column as necessary..
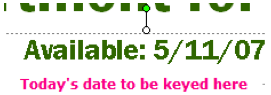
The date
- Click on the blank date (00/00/00) to edit it:
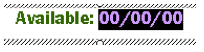
- Key in today's date:


Spell check
When you key data in, to check the integrity or correctness of the data, you should run Spellcheck.
- Highlight the text in the text box of bullet points. ( Ctrl + A or drag the mouse across)
- Click on the Spellcheck icon:

- When Publisher finds a spelling error, it will make suggestions to you. If the suggestion is correct, click on Change.
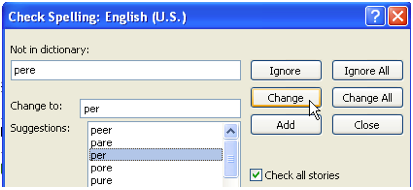
- When Publisher has finished checking the selected text, it can also check the rest of the document. When spelling check is complete, click on OK

Resizing a text box
This is the text box for the bullet point information about the apartment. Before we enter the correct information, let's start by resizing the text box - we only have 4 items to key in each column, so the box is too big:
Click and drag the  handle up to change the text box size so that only four items appear in the columns:

Positioning a text box
Move the object (the text box of bullet points) down to balance your flyer.
You may also need to resize the width of this object, and move it to make sure it is centred on the page.
Note: Text boxes behave a bit differently from graphics elements: to move a text box your mouse pointer must be on the line:

Tip: You can use the Print preview view at any time to check the layout of the publication:
- Click on the Preview icon:

- Click anywhere on the page to zoom in, or choose the amount of zoom from the drop down menu

- Zoom out by clicking in the flyer again, or click on Close to close the preview

How's it looking?
Your publication probably looks something like this now:

Finishing the job
Let's work on the other text boxes, adding and formatting the text.
Location
- Click in the text box with the placeholder text Describe your location.... If necessary, press Ctrl + A to select all the text:
File:Mspub-locationbox.png - Press the delete key to remove the default text
- Press F9 to zoom in (or right-click and choose Zoom if you prefer)
- Type the correct location information (Dunedin inner city apartment)
- Click on the Align center icon
 to centre the text
- Resize the text box to fit the text and drag up and into the centre of the page:
File:Mspub-draglocationbox.png
Contact info
- Click in the Contact person text box and delete the default information
- Zoom in if necessary and type your own name and phone number as contact details
- Centre align the text and drag the text box up and centre it below the location text box:
File:Mspub-dragcontactbox.png
Tear-off slips
- Click on the first tear off slip - press F9 to zoom if necessary.
- Type your name, press Enter, then your phone number
- Click outside of the tear-off slip and your details will the rest of the tear off slips automatically:
File:Mspub-tearoffslips.png - Right click on the page and choose Whole page. Your publication should look something like this:
File:Mspub-layoutstage2.png
Save your work before you go on!
Font styles
Remember that our design brief calls for you to use the fonts Arial, Papyrus and Bradley Hand - one for the main heading and date available, another for the bulleted list, the third for the rest of the flyer. You can decide which font you are going to use on each of the different parts.
- Click on the main heading text box and select the text Apartment for Rent
- Click on the Font Style on the formatting toolbar and choose the font of your choice - eg Bradley Hand
- Select the text for the Available date and choose a different font.
Now go through the rest of the publication and set the fonts so that you have used all three font styles as required by the brief.
Font sizes
- Select the text for the Available date and choose a different font size. You can do this in several ways:
- Click on the font size down arrow and choose of of the standard sizes:
File:Mspub-fontsize1.png - Type a font size
- Click on the increase or decrease font size buttons:
File:Mspub-fontsize2.png
- Click on the font size down arrow and choose of of the standard sizes:
Now go through the rest of the publication and set the font sizes - make sure the layout looks well balanced and is legible and readable.
Note: after changing the font size, you may need to resize or move a text box to fit the text inside it.
Print preview and evaluate the changes you have made
Colour schemes
Our design brief calls for the publication to be printed on light blue paper. So we will need to make sure that the colours we use will be in harmony with a light blue background.
Publisher provides a range of tools to manage the colours of a publication.
- On the Task Pane, click on the down arrow next to Format publication to see the other available panes. Choose Color Schemes:
File:Mspub-colorpane.png - Choose Marine color scheme - this set of colours should harmonise well with the light blue:
File:Mspub-marine.png
To check out how the publication will look when printed on the coloured paper, it can be useful to add a background to the flyer:
- Click on Format ⇒ Background ⇒ More colours. We're not going to choose one of the preset textures or pictures for now.
- Choose a light blue colour from the colour wheel
File:Mspub-colourwheel.png - The new colour will appear in the task pane Apply a background ⇒ More colours section
- Click on the new colour in this part of the task pane to make it appear in your publication
Let's see how that looks:
- Click on preview. Notice that some of the text boxes may be filled with white - this will not look great when printed!
- Close the preview
- Click on one of text boxes with the white fill in it.
- Click on the Fill icon down arrow and choose No Fill. Alternatively, you can set the fill by right-clicking a text box and selecting No fill from Format text box
- Repeat on all other text boxes to remove the white fill.
- Click on preview. Notice the difference - the text boxes are filled now with the background colour.
Create custom colour scheme If you don’t like one part of the colour scheme you can create a Custom Colour Scheme
Go to other Task Panes Choose the Colour Schemes Task Pane
on link at the bottom of the task pane
The Colour Scheme dialog box will open.
Change the colour of the Main scheme and Accent 2
DO NOT CLICK OK YET!! YOU ARE GOING TO SAVE THE COLOUR SCHEME ON THE NEXT PAGE!
If you DID CLICK ON OK, on to go back and complete the save!
Key YOURNAME1, then on Save
Your new colour scheme will appear in the Colour Scheme task pane and will apply to your publication
Better?
If not, go back and change your colours again and re save – choose to replace your original YOURNAME1 scheme.
Save the changes to your publication. Preview to check the publication. Click on to close the preview. <-->