Frames & Thumbnails
| Obsolete WikiEducator Rich Text Editor Tutorials (this editor is no longer in use) | ||
|---|---|---|
| Tutorial 6 | Introduction | Licenses | The Basics | Frames & Thumbnails | Show me how | |
The previous page demonstrated the simplest method for adding an image into a page but you may have noticed that the inserted image overwhelmed the rest of the page. In this subsection we cover some additional attributes, which you can add in the Image Properties dialog box, to:
|
Contents
Introducing the options
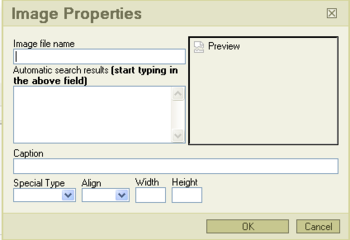
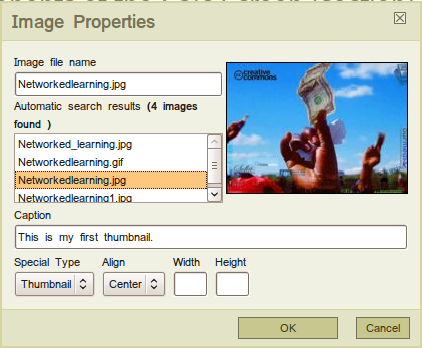
There are five options, located in the bottom portion of the Image Properties dialog box, for manipulating an image on the wiki page:
- Caption displays the description typed in the text box under the published image.
- Special type provides options for how to display your image: thumbnail, framed or bordered.
- Align specifies where on the page the image should appear: right, left, or center.
- Width specifies the width at which the image is displayed on the page.
- Height specifies the height at which the image is displayed on the page.
None of the five options are required; an entry in Image file name is the only requirement. A common practice is to include an image with "thumbnail" specified in the Special Type field, along with some text entered in the Caption text box (without specifying a width or height). But sometimes the default thumbnail size is too small or distorts the image, and a larger size is preferable.
The following table summarises the different options and their effects on images. Practice activities for each of these are included below.
| Image Attribute | Options |
Action | Example |
| Special Type | Thumbnail, Frame, Border, or leave blank |
Displays an image with specific formatting (see the examples below). |
|
| | |||
| Align | Right, Left, Center, or leave blank |
Determines the placement of the image on the page. If left blank (and Special Type is also blank), image is displayed on the left. |
|
| | |||
| Width | {width}px or leave blank |
Scales the image to the given width in pixels, while keeping its aspect ratio. |
|
| | |||
| Height | {height}px or leave blank |
Scales the image to the given height in pixels while keeping its aspect ratio. |
|
| | |||
| Caption | Text box |
Any text provided, including wikitext, will become the caption text. | |
Examples and activities
The purpose of the following activities is to demonstrate and experiment with different options to manipulate images on the page.
Here is an image inserted using just the Image file name:
Inserting a thumbnail image with a caption
Using the same image, if we select "Thumbnail" in the Special type menu, "Left" in the Align menu, and type "Creative Commons makes it flow." in the Caption text box in the Image Properties dialog box, the image displays as:
Note that the default image size for a thumbnail is 180 pixels. Clicking on the image will take the user to the larger size.
| Insert a thumbnail image
Using the same image above (hover your mouse over the large version above to display the image file name for this image), go to your sandbox or your User page and insert the image with the following attributes:
Note that in the Rich Editor, the image will display properly aligned in the edit window, but the caption will not be visible. Click Show preview to see the image properly specified. Not sure what to specify? | ||
Inserting an image with a frame
This is an image with the frame attribute:
When you use the frame attribute, the embedded image is shown with its actual size enclosed by a frame, regardless of the "width" or "height" attribute, and the caption, if any, is visible in the frame. Without the options left or center, the image is displayed on the right.
| Insert a framed image
Using the image you uploaded in the previous subsection, go to your Sandbox or your User page and insert the image with the following attributes:
|
Changing the size of the image
To control the size of the image, use the width and height attributes to designate the desired width or height in pixels. Here is our example image resized to a width of 300 px and centered:
| Insert sized image
Part 1: Add the example image (above) to your Sandbox or your User page with the following attributes:
Your result should look like... Part 2: Try adding some further image attributes to the image you previously uploaded and added into your User page or sandbox. Highlight the image and click the Insert/Edit Image button, to adjust the settings.
| ||


