CCNC/CCNC Module 6/Text and Text Formating/Subsection 1 Formatting Toolbar
| Formatting Text |
Formatting Toolbar |
Bulleted and Numbering Lists |
Show Me |
The Formatting Toolbar
The Formatting Toolbar allows you to make changes to your text to give it the preferred look of your presentation. The Formatting Toolbar can be used to set the color, size, and overall look of your text. It doesn't matter whether the text is an original slide or is in a preset layout. Here are some of the formatting options:
- Font type, Font size, Bold, Italics, Underline, Font color
- Center, Align Left, Align Right, Justified
- Increase Font Size, Increase Spacing, Decrease Spacing
You will notice that Impress’ default font or text type for titles is Times New Roman. The Title defaults to a 44-point font; the slide text defaults to a 32-point font. You can change the font type, font size and more.
Using the Formatting Toolbar
To Format Text, Follow the Steps Below:
- To make formatting changes to text that you have not entered yet, click on the down-pointing arrow (e.g., Font Type. Font Color) OR the format button that you want to apply to the slide (e.g., Bold, Italic, Underline, etc).
- To make formatting changes to existing text, highlight the text and click on the down-pointing arrow OR button.
Take some time to experiment with the different formatting options to decide what's best for your presentation.
Using the Format Menu
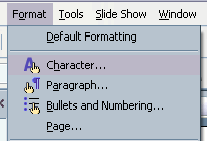
You can also use the Format menu to make formatting changes to the text in your presentation.
To Format Text, Follow the Steps Below:
- Highlight the text that you want to format.
- Click on Format|Character on the menu bar.
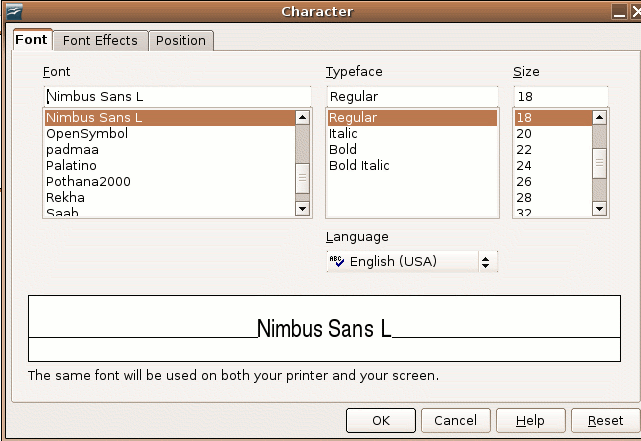
- The Character dialogue box will appear.
- Select the desired Font, and/or Typeface, and/or Size.
- Click the OK button.


