Bag of Life
| Instant wiki maker | Making handouts | Editing tips |

Biology In Elementary Schools is a Saint Michael's College student project from a course that ran between 2007 and 2010 and fully described in this book chapter. The student-created resources have been preserved here for posterity. Link under 'toolbox' for printer-friendly versions of the exercises. Click on handouts to print full resolution versions. Please see Wikieducator's disclaimer, our safety statement, and the Creative Commons licensing in English and in legalese.
Student worthiness
We have been testing four different biomes, two in light and two out of light. We have found that the containers which are out of life have more growth than the containers in light.
Primary biological content area covered
Life Science- we will be focusing on how a tiny environment creates and builds a living organism.
Materials
- 2 liter soda bottle, cut in half
- gallon-sized resealable storage bag
- Dixie® cups (4 oz waxed paper cups)
- pebbles
- potting soil
- seeds-grass, beans, or what is available
- water
Handouts
Before beginning this experiment the students will be making a hypothesis about whether or not the seeds in the biome will grow, and if so how high. They will also be sharing their ideas about how their biome will grow in sunlight verses not in sunlight.
Another handout that the students will be receiving is a "Biome Checklist." This is a checklist of the 7 steps involved in building a biome. This is a great way to keep the students organized throughout the lab time and allowed them to stay on track!
The last handout to give students is the water cycle that occurs right in the biome! This shows the condensation, precipitation and evaporation that happens right inside of the plastic bag.
The handouts are below! Feel free to print these off and use them in your classrooms!
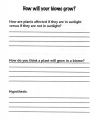
Figure 1: "How Will Your Biome Grow?"
Students will be able to predict what they think will happen in their biome. They will also discuss how their plant will be affected by sunlight if they choose to place it near a window.
Figure 2: "Biome Checklist"
This checklist will help the students stay organized and on track while building their biome!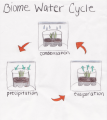
Figure 3: "Biome Water Cycle"
This is a great handout to show students after you have completed the experiment. Students will be able to see the water cycle that will be occurring right inside of their plastic bags!


Description of activity
Students will be creating a biome, which is an ecological community, like a rainforest, desert, or prairie. Biomes are plant environments which are completely independent once created. This is possible through the process of precipitation, condensation, and evaporation. Each group of students will break up into small groups of two or three. The individual groups will work together to predict how their biomes will survive in a plastic bag. Then they will pick which seed they want to plant and begin building their biomes!
Lesson plan
- First, pour about a 1/2 inch deep of pebbles into the bottom half of the soda bottle.
- Next, pour potting soil over the pebbles. Each biome should have about twice as much soil covering pebbles.
- Thirdly plant the seeds by making a trench down the center of the soil that's as deep as your fingernais.
- Then sprinkle four seeds in the trench.
- Cover it up with the soil.
- Water the soil just until you see the water collect at the bottom of the pebbles.(About 1 1/2 dixie cups of water).
- Put the biome in a plastic bag and seal it.
- Place the Biome in a sunny place so your seeds can grow! Plant growth should be visable with in 4 days.
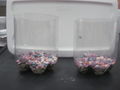
Figure 1: Pour pebbles in container
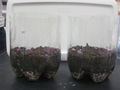
Figure 2: Pour soil into container
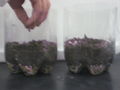
Figure 3: Place seeds in soil
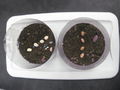
Figure 4: Make sure seeds are spread out
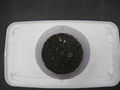
Figure 5: Make sure seeds are covered with soil
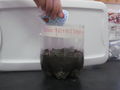
Figure 6: Water the soil

Figure 7: Put biome in plastic bag and seal it
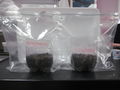
Figure 8: Make sure bags tightly sealed


Potential pitfalls
After running the activity several things went very well, however there were some pitfalls that we did encounter. Throughout the trial weeks we practiced making biomes. We wanted to be able to demonstrate to the students that a biome can in fact grow inside of a plastic bag. Each week before the actual date the students came in, we had to create a new biome because we were unable to create the perfect biome. Problems that we ran into while trying to create a biome that successfully grew a plant was putting too much water in the biome, planting the correct type of seed, using enough soil, and putting the plant in either artificial light or no light. The week before students came in we were able to create a biome that worked. We discovered that planting fresh bean seeds would be the best plant to grow because they grow quickly. Also, we discovered that you need less water than you think you do, the seed grew faster in no light, and a total of two dixie cups is a sufficient amount of soil.
During the actual activity we ran into a few pitfalls. At first we had students creating the biomes in groups because we were worried that we would not have enough bottles for each student to make their own. After realizing that we had enough bottles for students to make their own biome we had some students making their own. However, in the end we probably could have had each student make their own. If students were able to make their own biome it would have made it easier for the teacher to allow students to bring their biomes home. Instead they had to leave their biomes in their classroom to be fair. Ultimately it is not a huge problem, but it would have been fun if after a period of time students were able to take their biomes home to their family.
Math connections
When students are creating their biomes they must pay careful attention to the specific measurements on their check list. Students will use their measurement knowledge when putting in the soil, seeds, water, and pebbles.
Literature connections
Some great books to use in your classroom during this experiment include:
What Is A Biome? (The Science of Living Things)by Bobbie Kalman
Many Biomes, One Earth by Sneed B. Collard III
Amazing Biome Projects You Can Build Yourself by Donna Latham
The KidHaven Science Library -Biomes by Renee Kirchner
If you would like to buy these books for your classroom simply click on the link and it will connect you to Amazon!
Connections to educational standards
S1-2:34 Students demonstrate their understanding of Energy Flow in an Ecosystem by… •Experimenting with plant growth under different conditions, including light and no light.
Enduring Knowledge: Energy enters an ecosystem in the form of sunlight and flows through the system to each cell. Matter interacts, changes and recycles in an ecosystem. Populations of organisms survive by maintaining interdependent relationships with one another and by utilizing biotic and abiotic resources from the environment.
Next steps
The Biome in a Baggie is a great experiment for classrooms because there are so many activities which can branch from creating a biome. These activites can range from one lesson to multiple lessons to work at home, making the experiment extremely flexible for teachers! One way students can further experiment with their biome is through using the scientific method to observe, predict, and hypothesis their biome's progress. Students can connect their knowledge of the water cycle to the biome, and explain how the biome works or doesn't work in the same way as the water cycle. Each student could create a second biome and experiment how the biome does inside and outside of light. They can also observe how the plant grows (or doesnt grow) differently in seperate climates. Students could also journal how the biome grows over a specific amount of time. The biome is extremely fasinating for teachers and students, making this experiment particularly engaging for all members of the classroom! So many activities can be created from making biomes, and experimenting with them may interest students to test out other hypothesis!
Reflections
Our project went really well! Students had a great time getting their hands dirty building their biomes. The activity filled the twenty minute time slot perfectly. We had great organization and had the children build their biomes in a fashionable manner. First we had students complete the worksheet before building their biome. By having students complete the worksheet prior to building their biomes we were able to discover what the students already knew about the water cycle and build off of their prior knowledge. The worksheet also allowed us to guide the students to develop a hypothesis and to predict the outcome of their biome. Once they were done completing the worksheet, we took the students through each step of building a biome. We supplied students with a checklist of how to build their biomes which was very helpful for each of the students and their group. As students and groups went through each step of building their biomes they checked off each of the steps. Once students sealed their biomes, we showed them our completed biome and asked the students if any of them would like to change their hypothesis. Doing this was great, because we got to see how their thinking changed or didn't change! What is great about building biomes is that they can be taken back to the classroom or home and used to further experiment with! They also are completely independent, therefore do not require a lot of personal care and attention! Our lesson was extremely successful and can be kept as a mini lesson or turned into a unit!
Our project went extremely well! Here is a gallery of pictures from our lab time with 3rd grade students:
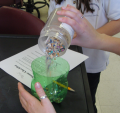
Figure 1: Pouring the pebbles in container
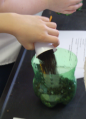
Figure 2: Pouring the soil into container
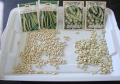
Figure 3: The seed selection!
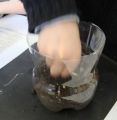
Figure 4: Placing the seeds inside the container
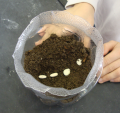
Figure 5: Make sure seeds are spread out
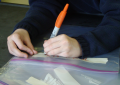
Figure 6: Don't forget to put your name on the bag!
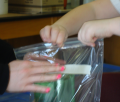
Figure 7: Put biome in plastic bag and seal it tight
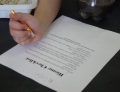
Figure 8: Students filling their hypothesis about their biome.
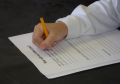
Figure 9: Students making sure their checklist is complete.
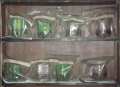
Figure 10: All of the biomes made during our lab!


