BES/Worked example
| Instant wiki maker | Making handouts | Editing tips |
Biology In Elementary Schools is a Saint Michael's College student project from a course that ran between 2007 and 2010 and fully described in this book chapter. The student-created resources have been preserved here for posterity. Link under 'toolbox' for printer-friendly versions of the exercises. Click on handouts to print full resolution versions. Please see Wikieducator's disclaimer, our safety statement, and the Creative Commons licensing in English and in legalese.
This page is temporary and established just for demo purposes. It will be deleted after July 22 2010.
Arbitrary passages have been inserted from random pages. Mistakes have been inserted to illustrate how grading templates might work.
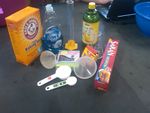
Materials
Safety Equipment
- Plastic Wrap (mold volcano on plastic wrap for easy clean up; wrap flask with plastic wrap so clay does not stick to glass flask)
- Plastic bin (add ingredients for your volcano's eruption inside a plastic bin for easy clean up)
Additional Materials for Each Group of Student
- 250ml Erlenmeyer Flask
- 60ml of water
- 1tbs of baking soda
- 60ml of vinegar
- red food coloring
- few drops of dish soap
- 1 tbs
- 1/4 cup
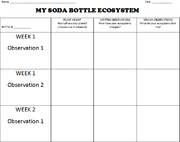
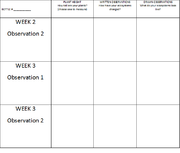
Handouts
This worksheet can be adjusted and modified to fit other grades and age levels.
Description of activity
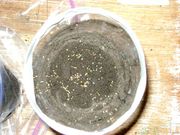
This activity begins with the construction of an ecosystem. Students will love being able to watch what they made grow. These ecosystems consist of layers; the first layer is gravel, followed by dirt, sand, and then more dirt. In the final layer of dirt there is a series of plants, such as grass, clovers, and beans, which will grow over time. Along with the layers of soil and plants there are also a couple of worms living in the bottle. These worms will help to mix the layers together and, along with the water and plants, will help to keep the ecosystem alive over a long period of time.
BEFORE BEGINNING THE LESSON
- Gather materials needed
- Cut all 2 liter bottles where the neck starts to form. (see figure #) Place a piece of masking tape along the edge of the bottom half.
- Number all 2 liter bottles. Measure out in plastic baggies the necessary amounts for each of the steps below (this will save lots of stress and time during the lesson)
- Moisten the bags of dirt (water will soak into damp dirt better then dry dirt)
- Prepare an example bottle following the directions below (works best about a week in advance because there will be plant growth)
citations


