Come fly with me/K-6/Activities 1 - 44
Come Fly With Me! - Exploring science through aviation / aerospace concepts
- David C. Housel and Doreen K.M. Housel, 1983.
- Reproduced with permission
Contents
- 1 KINDERGARTEN - OVER THE RAINBOW
- 2 FIRST GRADE - WAY UP HIGH
- 3 SECOND GRADE - ABOVE THE CHIMNEY TOPS
- 3.1 17. BALLOONS THAT FLY - BALLOONS THAT DON'T
- 3.2 18. MOTION
- 3.3 19. GROWING A BALLOON
- 3.4 20. WHAT GOES UP MUST COME DOWN
- 3.5 21. UP, UP AND AWAY OR HOW TO BUILD A HOT AIR BALLOON
- 3.6 22. PAPER AIRPLANES
- 3.7 23. PAPER AIRPLANE GOLF
- 3.8 24. GLIDING HIGH
- 3.9 25. PARTS OF AN AIRPLANE
- 3.10 26. A VISIT TO THE AIRPORT
- 4 THIRD GRADE - BIRDS FLY WHY CAN'T I?
- 4.1 27. THE FOUR FORCES OF FLIGHT
- 4.2 28. MEASURING THE FORCE OF GRAVITY
- 4.3 29. GO FLY A KITE
- 4.4 30. MORE WITH MODEL AIRPLANES
- 4.5 31. JET ENGINE THRUST
- 4.6 32. WHAT DO YOU KNOW ABOUT THOSE FUNNY FORCES?
- 4.7 33. WILD AND CRAZY ROCKET MODELS
- 4.8 34. CONSTRUCTION OF AN ACTION-REACTION MODEL
- 4.9 35. ROCKET PROPULSION I
- 4.10 36. ROCKET PROPULSION II
- 4.11 37. BOOM!
- 4.12 38. WEATHER PICTURES
- 4.13 39. SIMPLE WIND VANE
- 4.14 40. SOCK IT TO ME
- 4.15 41. MEASURING THE WIND
- 4.16 42. TEMPERATURE TAKING TIME
- 4.17 43. WEATHERPERSON FOR A DAY
- 4.18 44. WEATHER CENTER
KINDERGARTEN - OVER THE RAINBOW
1. WHAT FLIES?

SUBJECT: Science
GRADE: Kindergarten
GROUP SIZE: Large or Small
TIME: 45 minutes
TYPE OF ACTIVITY: Discussion
TEACHING STRATEGY: Guided Discovery
CONCEPTS: What Flies?
SKILLS: Observing Recall Classifying
Objective: to improve observation and classification skills.
Materials: Worksheet. Crayons.
Procedures
Duplicate and distribute worksheets (following next page) and ask if students have seen any of the items.
As they say, "Yes," to some, ask what they have noticed about it when they saw it. Ask what they notice now in the picture of it. Ask whether some of the items are similar and, if so, how they are alike. What do you notice that shows alikeness? Ask how they are ALL alike? Ask if some are different from others and ask in what ways they are different.
After similarities and differences have been talked about, discuss classifying the items into living and non-living groups. Have children circle living things in one color and non-living things in another color. Ask questions like: "Which of these is a living thing?" "Which is not a living thing?" "What is it about the item that made you decide it is (or is not) living?" After they have finished, they can color the items as they choose.
Extensions
Do other classifications like SOUND (Noisy and Quiet or SIZE (big and little). Make your own worksheet using items like the rocket, airplane and helicopter for noisy, and the balloon, snowflake and seed for quiet. For example: Dr, you can use the same items for big and little but make sure you draw the items appropriately larger and smaller. As much as you can, let these activities involve active interaction with the item itself. Listen to a helium balloon rising or to a floating snowflake or take the time to listen when a plane flies over.
For TEXTURE, you might have children use cotton balls to make clouds and then draw a picture using the clouds in the sky. Or attach cotton ball clouds to colored pipe
cleaners that have been formed to make an arc for a nifty clouds and rainbow that can be hung. Or, have children touch a balloon filled full with air and one not so full and discuss what they notice. They can touch green leaves and leaves that have turned brittle and yellow and talk about the changes. Ask what specific differences they notice between the two.
Use the worksheet as an Inventory List. Have students look for items for real, or in magazines or on TV and have them cross the item off as they see it. Ask them about what they noticed when they saw it and, when they've found pictures or the actual item, have them bring it in for a flying bulletin board. Let them tell you and other children what they noticed about the item.
Discuss which items students can fly now and the ones which they can fly when they are older. Take a minute to talk about what it might be like to be a pilot or a hot-air balloonist and how they might get to be one. Ask if they know any pilots or balloonists. If they have flown, ask them describe it. What did they notice? How did they feel?
For first grade, ask students to use the worksheet to find different classifications themselves. Ask questions like, "Which of these do you think belong together?" "What did you notice that made you think so?" "What other things do you see in some of these items that could make another kind of group?"
2. ROCKET SHAPES

SUBJECT: Science
GRADE: Kindergarten
GROUP SIZE: Individual
TIME: 20 minutes
TYPE OF ACTIVITY: Puzzle Student Investigation
TEACHING STRATEGY: Guided Discovery
CONCEPTS: Shape Size
SKILLS: Observing Motor Coordination
Objectives: to reinforce student's concept of triangle, circle, and rectangle (square): to have student apply concept of size.
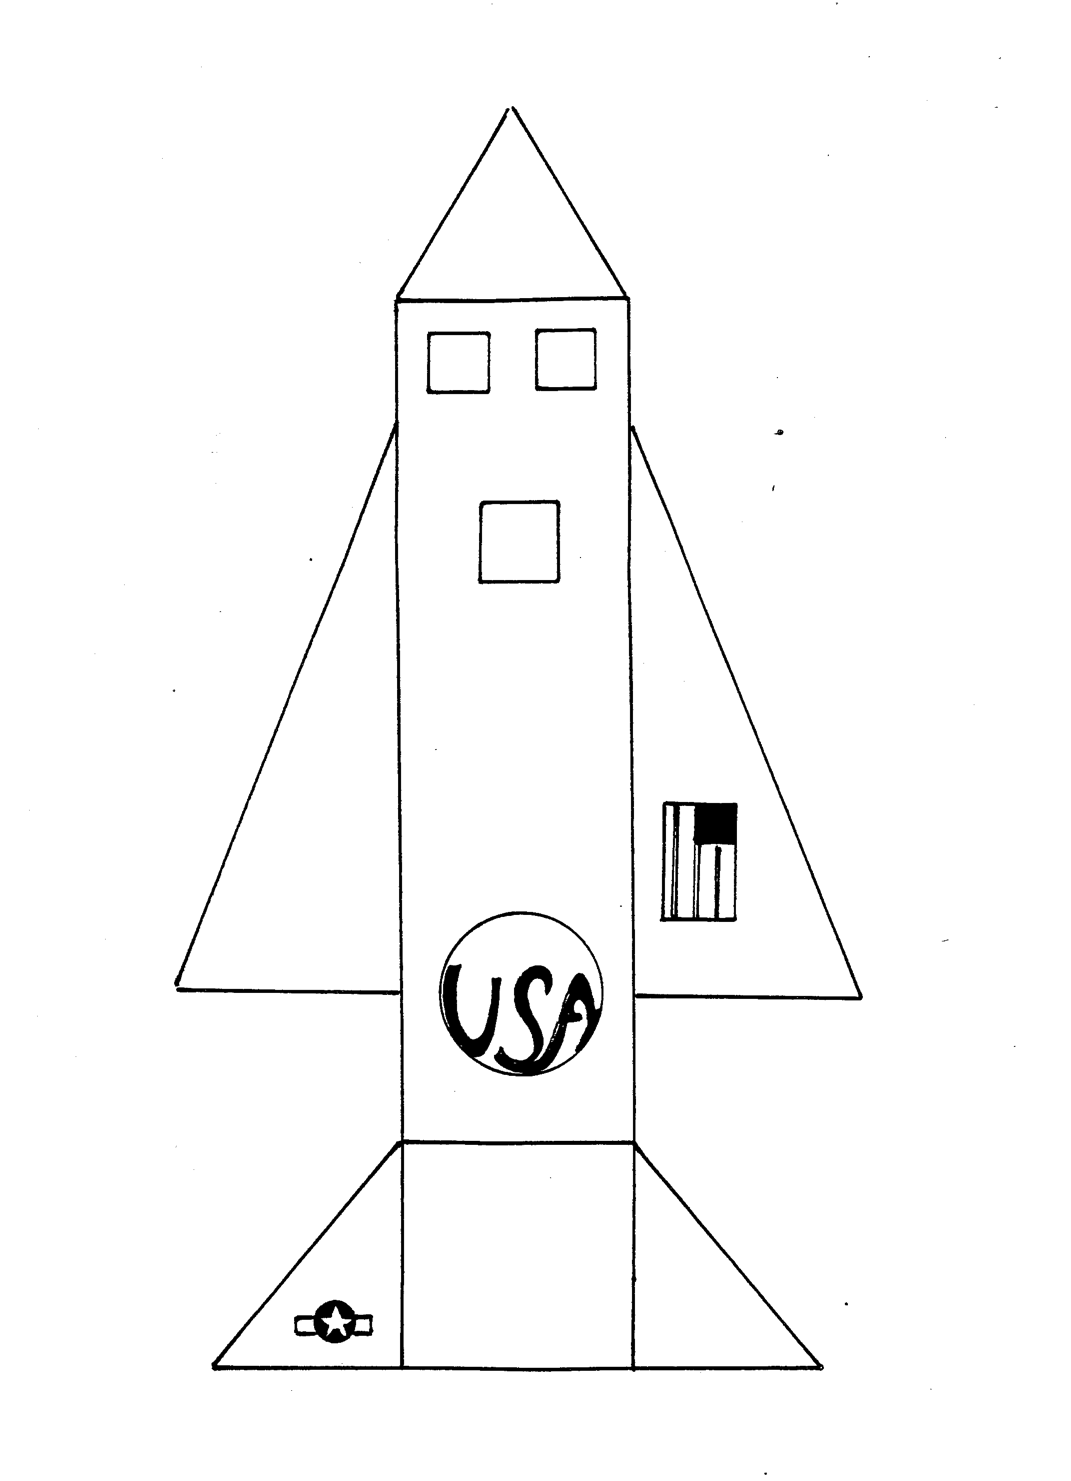
Materials: Picture of completed rocket and rocket separated into eight basic pieces (5 triangles, l square, l rectangle, l circle insert) (See worksheet), Teacher Back round Information: Make the pieces by gluing to car oar an cutting out the larger (including the USA circle) basic shapes. Protect with clear contact paper.
Procedures:
Give student the "puzzle" pieces to play with and arrange in whatever fashion he or she wishes. Talk with student about the shapes, asking which are circles, squares, rectangles and triangles. Have student trace around some of the pieces to get a feeling of the shape. Give the student the worksheet showing a possible arrangement and ask him or her to make the pieces look like the picture.
Ask if the student can find more of the shapes on the drawing that weren't cut out. Ask student if he/she can find a small circle and a big one; a small square and a bigger one; a big triangle and a smaller one; and the large rectangle and the small one hidden as the flag. Afterward, have student color the worksheet as he or she wants.
Extension: Have student count the number of circles, triangles, squares and rectangles. Have student make a graph of the numbers of each shape.
3. WHAT'S UP?

SUBJECT: Science
GRADE: Kindergarten
GROUP SIZE: Large or Small
TIME: 30 minutes
TYPE OF ACTIVITY: Discussion
TEACHING STRATEGY: Guided Discovery
CONCEPTS: Position Color
SKILLS: Observation
Objectives: to introduce the concept of up and down; to enhance group discussion skills.
Materials: Copies of worksheet, crayons.
Procedures:
Distribute copies of the worksheet. Talk with the students about the boy's and girl's position to the balloon and the kite as it relates to up and down. Ask questions like, "What do you notice about where the balloon is?" "What do you notice about where the kite is?“ “Are the balloon and kite in the same place?" "A different place?" "What do you notice that tells you where they are?"
Ask what other things are up (in the classroom) and what other things are down. Ask them to recall what was up and what was down when they were outside. Ask what they have to do physically to see what's up and what's down.
After a short discussion, have the students look again at the pictures and read the captions to them. Talk about the two colors and point out the color words in the caption. Ask them to find the two colors in the room and then find the two crayons and color the balloon red and the kite blue.
Then finish the pictures as they wish.
Extensions: You can get into other positions like "near and far" with questions like, "Have you ever had a helium-filled balloon get loose? What happened?" Get one and go out side and let one go. Hold it near and then far and then...
gone. Or use the kite picture for behind or in front. Again hold a kite or something else in front and behind and then let them experience in front or behind them by placing things themselves.
For older levels, you can change the caption to read "How come my balloon flew up?" or “Why did my kite come down?" and get into wind and gravity and the variables that affect those things.
4. ORDERING ROCKETS

SUBJECT: Science
GRADE: Kindergarten
GROUP SIZE: Small
TIME: 30 minutes
TYPE OF ACTIVITY: Student Investigation
TEACHING STRATEGY: Guided Discovery
CONCEPTS: Size-Height
SKILLS: Observing Ordering by height
Objectives: to develop student's ability to order objects by height; to show students sample of the variety of launch vehicles used.
Materials: 6 sets, Launch vehicle shapes (cut out, glued to cardboard and protected with clear contact paper made by teacher). 6 sheets of paper with base line drawn, crayons and a sheet of drawing paper for each child.
Procedures:
Distribute sets of shapes of rockets. Talk with students about rockets and what they do. Ask where they've seen rockets and what they noticed about them. Ask about the differences in sizes of the rockets that make up the set you've given them. Ask how they might arrange the rockets from longest to shortest. Ask how they decided to place the rockets where they did. If a child has trouble, suggest he/she find the shortest and the tallest and put them on the base line at opposite ends. Help order the rest in between.
(Note: The Delta and the Atlas/Agena are the same height. You may want to remove one of them if it's confusing or ask student to find the two that are the same and put them side by side on the baseline.) When they have the rockets ordered, discuss other differences in the rockets. Discuss the similarities and then ask the children to draw and color their own special variety of rocket.
Extension:
Color the background portion of the rocket sets so you have 6 blue, 6 red, 6 yellow, etc. and use the rockets for counting or making sets as well as for working on colors.
For older level, use the feet/meter part of worksheet to show the relationship between feet and meters. The rockets are drawn to the scale on the sheet, so they can determine about how tall each is in both meters and feet.
5. CHARTING THE WEATHER

SUBJECT: Science
GRADE: Kindergarten
GROUP SIZE:
TIME:
30 minutes initially/5-8 minutes after for month
TYPE OF ACTIVITY:
Discussion
TEACHING STRATEGY: Expository
CONCEPTS:
weather‘s affect on flying Symbols
SKILLS:
Collecting/recording data Inferring Group consensus
Objectives: to apply observation and inference skills; to introduce collecting and recording data with pictograph.
Materials: Large month-long calender. Cut outs of weather symbols (from set provided, glued to cardboard and protected with clear contact paper). Large sheets of paper for two graphs. 8 x 10 sheets of paper for each child to make paper airplane. Rubber cement.
Teacher background information:
Make the weather symbols and a large calendar. Make two large graphs. One should have the number of days up the left side and five columns across for Rainy, Snowy, Sunny, Cloudy and Windy. The second should have the number of days up the left side and two columns for "Flying Today" and "No Flying Today" across.
Too rainy, too windy and too snowy days are the days most small plane pilots do not fly. Your students will be basing their decisions on paper airplanes, but that's not too far different from the small plane without the fancy instrumentation of the larger ones.
Procedure:
Help the children make simple paper airplanes. Let them fly their planes inside when they are done. Put up the calendar and the graphs and explain that you will be charting the weather and deciding each day whether it's a good day to fly the paper airplanes outside. Ask questions like, "What have you noticed about the weather today?" "What did you notice yesterday?" "Similarities?" "Differences?" "What could happen outside that would make it a good day to fly?" "A bad day to fly?"
Show children symbols for the weather conditions and explain that the class will have to decide on one of them for each day. Before afternoon recess, have students first make the decision about the kind of weather. Put the symbol on the calendar with rubber cement (on one side only, so you can pull it off easily.) Have a student color the appropriate square on the first graph. Decide, given the weather conditions, if it would be a good day to fly their planes. Talk about WHY they think so. Color appropriate square on second chart. Encourage students to fly their planes on good days. At end of month, tally the different weather days and the flying and no flying days and discuss the overall conditions for the month.
6. ROCKET RULER

SUBJECT: Science
GRADE: Kindergarten
GROUP SIZE: Small
TIME:
45 minutes
TYPE OF ACTIVITY: Discussion Student Investigation
TEACHING STRATEGY: Guided Discovery
CONCEPTS: Size-length, height
SKILLS: Measuring with non-standard units Group participation
Objectives: to develop estimating and measuring skills; to promote group participation skills.
Materials: Cardboard, glue, clear contact paper and rocket ruler outline.
Teacher Background Information: Make at least six rocket rules
using outline here. Cut out shapes and glue to cardboard.
Cover with contact paper. Make several extra copies of the rocket outline so that each child will have enough to tape together to make his or her height. The outline is 20 cm high.
Procedures:
Show students the rocket rulers and let them handle them. Ask questions like, "How can we find out how long the desk is?" Measure it in various ways--with hands or pencils, etc. Then, estimate how many rockets long the desk might be. Measure it. Do the same with other things in the room asking the students what they would like to measure. If they don't suggest themselves, you do so and let them measure each other while you record the measurements for each.
When they finish, have them cut out the number of rockets and fraction of rocket that corresponds to their height. (Rocket is divided in quarters.) Have them color the rocket and print their name on them, tape together and hang or put on large paper in a pictograph arrangement from tallest to shortest.
FIRST GRADE - WAY UP HIGH

- THE CONTEMPLATION OF THIS WORLD BECKONED LIKE A LIBERATION
--ALBERT EINSTEIN, l949
- LOOK, I'M TESTING EVERYTHING
--LAURA, AGE 8, Seed Time: A Celebration of Childhood
7. COME DOWN TO EARTH

SUBJECT:
Science
GRADE:
First
GROUP SIZE:
Small or Large
TIME:
45 minutes
TYPE OF ACTIVITY:
Teacher/Student Discussion
TEACHING STRATEGY:
Expository
CONCEPTS:
Gravity Evidence
SKILLS:
Observation Experimenting Inference
Objectives: to introduce the concept of gravity; to provide students the opportunity to observe the effects of gravity.
Materials: Coloring worksheet (next page). Crayons. Balls (different sizes). Glass and liquid.
Procedure:
Distribute the worksheet. Ask the students to describe the activities in the picture. Ask them to notice what objects are falling. What is being held to the earth? (The apple, leaves, ball and water are all falling; the children, dog and liquid in the glass are being held by gravity to the earth.) Talk about the pull of gravity toward the earth. Discuss why gravity is a good and helpful thing (milk stays in glasses and we don*t float away, etc.) and how gravity is sometimes not helpful and has to be overcome (apples fall on our heads and that plane had to work like the dickens to get free of the earth, etc.).
Discuss how we know gravity exists even though we can't see gravity itself. (We can see what it does.) Explain that other planets have different amounts of pull and ask if students have ever seen pictures on TV of astronauts free (partially) of gravity in their capsules in space or on the moon. Explain the moon is smaller than the earth and does not have as much pull. Ask what that might mean for someone on the moon. (They would weigh less and they could jump higher, for example.)
Take 2 balls of different sizes, one large and one small Give balls to two students and have one of them stand on a chair and the other sit on the floor to observe when the balls hit the floor. Have the first student drop balls at the same time. Do the balls land at the same time? Have students try to explain why.
Have students color the picture and title it.
8. THINGS THAT FLY (Aircraft and Spacecraft)

SUBJECT:
Science
GRADE:
First
GROUP SIZE:
Small or Large
TIME:
30 minutes
TYPE OF ACTIVITY:
Discussion
TEACHING STRATEGY Expository Discussion
CONCEPTS:
Diversity Aircraft Spacecraft System
SKILLS:
Describing Comparison Matching
Objective: to learn the names and characteristics of -
different aircraft and spacecraft; to introduce the idea of systems.
Materials: Worksheets. Pencils. Crayons.
Procedure:
Distribute the worksheets to the students. Ask them to describe the characteristics of each of the crafts. Ask what they notice about the items that is the same or similar and what is different about some of the crafts. Ask them to note that each object is made up of different parts (the monoplane has 1 set of wings, body, wheels, propeller, etc.) and these basic parts put together make a system called a monoplane.
Ask the students if they have actually seen any of the crafts and to describe the experience. Ask if they have ever flown in any of the crafts and, if so, to describe what it was like and what they noticed during the experience Have the students complete the first worksheet by printing the rest of the letters for the word that matches the picture. Assist to the degree that the student needs help and wants your guidance.
After the names are printed and talked about, have the students color the pictures. Then have them cut out the drawings and match them with the descriptions on the next page of the worksheets. Depending on the language ability of your students, you may include or exclude the names of the craft with their description.
AIRCRAFT AND SPACECRAFT
- A Monoplane is a plane with one wing
- Some balloons are filled with hot air
- A helicopter has a wing that turns
- A biplane is a plane with two wings
- A rocket lifts things into space
- The space shuttle carries people into space.
9. IT'S A BIRD ... IT'S A PLANE!

SUBJECT:
Science
GRADE:
First
GROUP SIZE:
Large
TIME:
30 minutes
TYPE OF ACTIVITY;
Discussion
TEACHING STRATEGY Guided Discussion
CONCEPTS:
Similarities Differences System
SKILLS:
Comparison Observation
Objectives: to observe and describe similarities between birds and planes; to understand people copied birds to achieve flight.
Materials: Pictures of airplanes and birds in flight.
Procedure:
Compare pictures of birds and airplanes in flight. Ask students to tell what they notice about the similarities between bird and plane systems. For example, they both have bodies, flat tails, wings and “feet." After the discussion of similarities between the system called "birds" and the system called "planes," students will be able to list at least four ways that men copied the bird's system to achieve flight.
10. FOOLIN' AROUND WITH AIR
SUBJECT:
Science
GRADE:
First
GROUP SIZE:
Small or Large
TIME:
60 minutes
TYPE OF ACTIVITY:
Student Investigation
TEACHING STRATEGY
Guided Discovery
CONCEPTS:
Properties of air Evidence
SKILLS:
Observation Experimentation Inference
Objectives: to learn that air has a number of properties;
to understand that, though air cannot be seen directly, what it does can be observed.
Materials: Plastic sandwich bags. Twisters. Garbage bags. Straws. Large Jar. Aquarium. Glass. Soda bottle. Cardboard. Perfume.
Teacher Background Information: There are several ways to let students observe that air has physical characteristics.
A number of ways follow. Choose those that work for you.
Procedure:
- Ask students to catch some air in a plastic sandwich bag by holding the mouth of the bag open and swishing it through the air. Quickly close the mouth and twist it tightly to trap the air. Fasten with twister. Have the students
- Squeeze the trapped air and notice how it feels. Have them describe it.
- Look through the sandwich bag filled with air. Can they see through it?
- Have students smell the air in their bags by opening a bit. Let them squeeze out the air and catch other air from different places in the school or outside and ask them to describe what the air smells like.
- Have students submerge an empty soda bottle with the top up, into an aquarium of water. Ask them to notice what happens. Have them determine whether the soda bottle was indeed "empty."
- Have students feel the air by swinging their hands through the air. Ask them to notice the difference as they swing their hands faster and to describe what it is that they feel. Give them pieces of cardboard to swing, and ask them to notice the difference in feeling and how the cardboard pushes against something. What is that "something?" Talk about indicators of something present, even though it cannot be seen directly.
- Have students blow up balloons. Ask them to partially fill the balloons and feel them. Hard? Soft? What's in there? Ask them to completely fill the balloon. Notice how it feels. Let the balloon open a bit and ask them to feel the air being released.
- Have students blow up two balloons to equal weight and tie. Attach each balloon to balance scale and notice that it balances. Prick one balloon with a pin and ask the students to notice what happens as the air rushes out. Discuss weight as a property of air that indicates its existence.
11. AIR MOVES
SUBJECT:
Science
GRADE:
First
GROUP SIZE:
Large
TIME:
30 minutes
TYPE OF ACTIVITY:
Experiment
TEACHING STRATEGY:
Expository
CONCEPTS:
Air moves in currents Evidence
SKILLS:
Observation Inference Drawing conclusions
Objectives: to observe the flow of air in a room using indirect evidence.
Materials: Cotton balls. Strong perfume and/or other strongly scented material.
Procedure:
Put scent on a piece of cotton. Ask the students to raise their hands as soon as they smell the scent. Try having a student fan a piece of paper near another scent. Does the odor travel faster through the room? Explain air currents and movement if students can not conclude that scent travels in the moving air.
Extensions:
Have students observe the movement of leaves on trees, dust on the ground, or flags on poles. Ask them to notice other indicators that show when air is in motion. You might tell them that moving air is called wind. (If they have the language ability, you can go further and explain that the smell moving throughout the room is called diffusion and that currents is another name for air movement.)
You can have students brainstorm ways to make air current detectors: pinwheels, candle flames, soap bubbles in the air, circle of paper cut into spirals and hung, tissue paper hung from a stick, etc. Have them make some and use to detect the air currents in warm and cold places, high and low places, indoors and outside, in calm and windy weather, etc.
12. AIR PRESSURE
SUBJECT: Science
GRADE: First
GROUP SIZE: Large
TIME:
30 minutes
TYPE OF ACTIVITY:
Student Activity
TEACHING STRATEGY:
Expository and Guided Discussion
CONCEPTS:
Air can do work Pressure Evidence
SKILLS:
Observation
Drawing conclusions Experimenting
AIR PRESSURE 1
Objective: students will construct a simple device which uses air pressure to move an object.
Materials: Plastic drinking straws. Plastic bags. (Sandwich size) Textbooks.
Procedure:
Give each student a straw, bag and book. Ask student to invent a way to raise the book using only the materials above. Give the students ample time to explore ways of moving the book - l5 to 20 minutes.
Note: The book can be raised by placing the plastic bag under the book and blowing air into the bag with the straw.
More: Find evidence of air pressure being used to lift objects.
Extension: By using large garbage size bags, a student sitting on a flat table or board on the floor with bags under it, can be raised if several students all blow into their bags at the same time. See Activity # 15
AIR PRESSURE 2
Objective: to observe and conclude that air can exert pushing once.
Materials: Water glass. Water. A square piece of thin, flat cardboard or tag board about 6" square. Plastic dish pan.
Procedure:
Completely fill a glass with water. Place card board over the glass. Carefully turn the glass upside down over the dishpan, holding the cardboard tightly against the glass. Take your hand away from the cardboard. (The cardboard should stay in place.) Discuss the concept that the push of air against the cardboard is greater than the push of the water.
13. IT'S A HOLD UP!!
SUBJECT:
Science
GRADE:
First
GROUP SIZE:
Large or Small
TIME:
45 minutes
TYPE OF ACTIVITY:
Demonstration
TEACHING STRATEGY:
Expository
CONCEPTS:
Air resistance
SKILLS:
Observation Inference
Objective: to demonstrate that objects fly only when the force of air upward (resistance) is greater than the force of gravity downward.
Materials: Balloon. Kite materials (2 sticks, paper, glue, long strip of cloth, string).
Procedure:
Discuss with the students the idea that gravity is always working to keep things on the earth and that objects can fly only when the force of the air upward is great er than the force of gravity. Ask them to recall what they have seen flying or floating in the air. Leaves. Seeds. Balloons.
Fill a balloon with air. Ask if the balloon will rise. Let the balloon go and ask the students to note what happens Try to keep the balloon up by blowing on the bottom of it with a fan or a vacuum hose hooked up to blow air out. what happens?
Make a kite (or purchase one) and take the students outside to fly it. Explain that wind pressure beneath the kite tends to hold it up but gravity tends to pull it down and that the person flying it has to hold the kite at an angle to the wind so that the air strikes against the under surface of the kite. Explain that the tail keeps the kite upright and the flyer uses the string to keep the kite headed into the wind. If there is less wind than optimum, the flyer can pull the kite to make wind pressure greater. Explain that if the string is released, the kite will fall because of gravity. It falls because the angle at which the surface of the kite has been held toward the wind has been changed. The lift upward caused by the angle at which the kite attacked the air is now less than the pull of gravity downward.
Ask them if they'd like to make and fly their own kites. Do it.
Extension:
Do the parachute activity, "Safe Landing." Extend that by using different objects - a feather, a piece of paper, a pencil, etc. - and do the experiment both indoors and outside, in relatively calm and in windy weather. Compare how objects fall with and without a parachute. Explain that the parachute slows down objects by "capturing" air but not enough pressure is created to keep the object up.
14. DOES SHAPE MATTER?

SUBJECT:
Science
GRADE:
First
GROUP SIZE:
Large or Small
TIME:
45 minutes
TYPE OF ACTIVITY:
Student Investigation
TEACHING STRATEGY:
Guided Discovery
CONCEPTS:
Air resistance Shape as variable Evidence
SKILLS:
Observation Comparison Inference Prediction
Objective: to demonstrate that the shape of an object can reduce air resistance.
Materials: Two pieces of construction paper for each student.
Procedure:
Give each student two equal size sheets of construction paper. Ask students to notice the equality of the paper in size and weight. Crumple one and leave the other as is and ask students to do the same with their paper. On cue, have students drop both pieces of paper and notice which reaches ground first. Ask students to explain why one takes longer to fall when both are the same weight. (One has more surface area and must push more air aside as it falls). Ask students to think about air resistance and what kinds of shapes would stay in the air longer and what shapes would be more likely to fall faster. Ask what implications that has to airplanes, rockets, parachutes, kites, etc.
Using the figure at the bottom as a guide, have the students make whirlybirds. By tossing the heavy end into the air, students will see that air affects the whirlybird’s fall.
Extension: Follow up with parachutes, paper airplanes, kites, etc.
15. LIFT OFF

SUBJECT: Science
GRADE: First
GROUP SIZE: Large
TIME: 45 minutes
TYPE OF ACTIVITY: Student Investigation
TEACHING STRATEGY: Guided Discovery
CONCEPTS: Air pressure
SKILLS: Observation Inference
Objective: to observe that air can be used as a force to do work.
Materials: Plastic bags (quart size for each child ) Two rather large tables. Student chair.
Procedure:
Place approximately 20 plastic bags (number depends on size of table; bags should be approximately one foot apart) between the two tables - opening toward the outside. One table is to be turned upside down on top of the other table. Have a student sit in the chair placed on top of the inverted table. Station students one to a bag. On the count, each student is to blow into their bag. The air should lift the table. Take turns with students in the chair.
Discuss what students notice as they do the experiment Ask what conclusions they can draw from the experiment as it relates to using air to do work. Discuss how air does similar work in other places.
16. SAFE LANDING

SUBJECT:
Science
GRADE:
First
GROUP SIZE:
Large or Small
TIME:
45 minutes
TYPE OF ACTIVITY:
Student Investigation
TEACHING STRATEGY:
Guided Discovery
CONCEPTS:
Parachutes Slow Falling Objects Air Resistance
SKILLS:
Constructing Models Collecting Data Hypothesizing
Objective: to make and compare the effects of different parachutes on the speed of falling objects.
Materials: Cloth or handkerchiefs of different sizes. String. Small objects which can be tied to the string like erasers, tiny toys, pencils.
Procedure:
Tie string to four corners of a square of cloth and then attach the other ends to a small toy or other object. Drop two similar objects from the same height, one with a parachute, the other without a parachute. Have the students observe which objects fall to the ground first.
Try two different size parachutes with the same weight. which falls first?
Discuss the role the parachute plays in the safety of a person jumping from a plane or in the recovery of a space capsule.
Extension: Try different shapes of parachutes, multiple parachutes or parachutes of different materials.
SECOND GRADE - ABOVE THE CHIMNEY TOPS
- WE CAN LIFT OURSELVES OUT OF IGNORANCE; WE CAN FIND OURSE AS CREATURES OF EXCELLENCE AND INTELLIGENCE AND SKILL WE CAN BE FREE WE CAN LEARN TO FLY
--RICHARD BACH, Jonathon Livingston Seagull
17. BALLOONS THAT FLY - BALLOONS THAT DON'T
SUBJECT:
Science
GRADE:
Second
GROUP SIZE:
Large
TIME:
45 minutes
TYPE OF ACTIVITY:
Demonstration
TEACHING STRATEGY:
Guided Discovery
CONCEPTS:
Variables Properties of Gases Heavy/Light Float Interaction
SKILLS:
Observation Identification of Variables Inference
Objective: to demonstrate that different gases affect the behavior of balloons in different ways.
Materials: Carbon dioxide (dry ice, which can be obtained from ice cream packing plant, to be handled with tongs only) Helium or helium-filled balloons. Balloons.
Procedure:
NOTE: This is a demonstration by the teacher as students should not handle dry ice.
- Using heavy gloves and tongs, insert a piece of dry ice into a balloon. Tie the top.
- Have students blow air into their balloons and tie.
- If you have a tank of helium available to you, fill a balloon for each student with helium.
- Students will observe the carbon dioxide filled balloon expands and remains on the floor, the air-filled balloons will move about easily, remaining aloft briefly, the helium-filled balloons will quickly rise to the ceiling.
- Ask how they think the gasses interact with the balloon. Note: Interaction is when something does something to something.
Extension: If you have enough helium-filled balloons for each student, attach a card to the balloon giving student's name and address and request the card be returned by mail giving location found. This will let the student know how far the air carried the balloon and the wind direction at the time the balloon was launched. (See Activity # 20 ).
18. MOTION
SUBJECT:
Science
GRADE:
Second
GROUP SIZE:
Large
TIME:
60 minutes
TYPE OF ACTIVITY:
Demonstration
TEACHING STRATEGY:
Guided Discovery
CONCEPTS:
Motion Air as force
SKILLS:
Observation Inference
Objectives: to help students understand some of the causes of movement or motion; to develop the ability to differentiate between push and pull; to develop an understanding of the importance of air as a force.
Materials: Children's toys (ball, wind-up toy, spring toys, electric toys like cars, trucks, boats, model airplanes, rockets, helicopters, trains). Skateboard. Plastic pail and water. Light-weight paper. Balloon.
Procedure:
Start with a walk with the students to observe motion in every-day circumstances. Ask them to notice movement of papers, cars, leaves, swings, wires, water, animals, etc. Talk with them while on the walk about what they notice and when you return to the classroom ask them to recall what was seen and what caused the movement. Make an experience chart showing what they saw and what caused the motion.
Do some experiments with push-pull. Hold a ball straight out and let it fall. Ask what caused the ball to fall. Why did it bounce? (Force of gravity was not strong enough to cause it to stop immediately.) Have a student pick up an empty pail. Ask if it was easy to lift. what did she/he have to do to lift it? Fill pail half-full of water. Repeat. Ask student to tell what he/she noticed this time. was it harder? why? what was used to lift the pail? (Force from muscles. Energy from muscles to arm to hand to pail.) Throw ball up in the air. what was used to throw the ball up?
Examine toy cars, boats, airplanes, etc. Ask how they move. How does the force operate? (Engines are the force on or in the cars, trucks, boats, etc. Wheels turn on the floor and push vehicle. Airplane propellers spin on the front of planes, push against the air and pull the plane through the air. Spinning boat propellers push on the water and pull the boat forward.)
Stand on the skateboard and jump off. Notice the direction the board moves in relation to the person's direction as he/she jumps off. Ask why this happens..
Do some experiments with the force exerted by air. Inflate a balloon and allow escaping air to push against a small pile of feathers. Why did they move? (Air became a force). Hold sheet of paper in front of mouth. Blow across paper. Observe lift of paper. Ask how paper moved. Ask where air should be directed to move or lift paper up. Where to move it down? Have children experiment to find answers.
Attach an inflated balloon to a toy car. Let air rush out of balloon. why does the car move?
19. GROWING A BALLOON

SUBJECT:
Science
GRADE:
Second
GROUP SIZE:
Large or Small
TIME:
30 minutes
TYPE OF ACTIVITY:
Experiment
TEACHING STRATEGY:
Expository Guided Discovery
CONCEPTS:
Heat causes air molecules to move apart Interaction Energy Transfer
SKILLS:
Observation Inference
Objective: to observe the expansion of air when heated.
Materials: Balloons. Soda bottles.
Procedure:
Distribute the bottles and balloons to each student or group of students. Ask them what is in the "empty" bottle or in the balloon. Have them smell the air in each. Look at the inside of each to see that nothing is there except air. You can talk with them about the air that they can feel in the balloon when they close it, trapping air inside when they have discussed those characteristics of air and are quite certain there is nothing except air in either the balloon or the bottle, have them place the mouth of the balloon over the opening of the bottle.
If there is enough space near a sunny window, leave the bottles sitting in the sun until students notice change taking place. If it is winter when your heat source is on, you might place them near or over your hot air vent. when the students notice the balloons are expanding, dis¢ cuss the implication that holds for hot air ballooning. what might cause the balloon to expand? what happens when the bottle and balloon are put in a cool place?
Extension:
Blow some soap bubbles or bring a burning candle flame near a hot radiator or other heat source. Let students observe the movement as the bubbles or flame are placed in different positions, When they note that the air above the heat source travels upward while the air near the floor moves downward, ask them to connect the "Growing a Balloon" activity to this and to hot air ballooning.
20. WHAT GOES UP MUST COME DOWN
SUBJECT:
Science
GRADE:
Second
GROUP SIZE:
Large
TIME:
45 minutes
TYPE OF ACTIVITY:
Student Activity
TEACHING STRATEGY:
Guided Discovery
CONCEPTS:
Air currents Lighter than air Interaction
SKILLS:
Collecting/recording data Inferring
Objective: to provide students with an understanding of air
Materials: Helium-filled balloons (one per student). Stamped post card or index cards (one per student). String.
Procedure:
- Have balloons filled with helium.
- Each student should self-address postcard giving school address. On back of postcard, put information similar to the following:
EXAMPLE:
This balloon was released (date)
as part of a class experiment in aerospace education. Please detach and mail postcard after completing this information.
Balloon was found (date)
at (place) _____________________________
by____________________________.
Thank you for helping.
- Punch hole in top left-hand corner of postcard. Attach string (approximately six to eight inches in length. Tie securely to balloon.
- When all balloons, cards, etc. are ready, they should be released in unison from open area around school.
- As postcards are received back in mail, show location on area map using map pins with student‘s name attached. Give prize for balloon traveling farthest distance.
- Discuss how the helium interacted with the balloon.
- What interacted with the balloons to carry them to their ultimate destination?
Note: You may want to enclose postcard in a baggie just in case of rainy weather.
21. UP, UP AND AWAY OR HOW TO BUILD A HOT AIR BALLOON
SUBJECT:
Science
GRADE:
Second
GROUP SIZE:
Large or Small
TIME:
2 hrs to construct. 45 min. to fly
TYPE OF ACTIVITY:
Demonstration
TEACHING STRATEGY:
Expository
CONCEPTS:
Hot air rises Lighter than air flight Energy transfer
SKILLS:
Observation Inference
Objective: to demonstrate that hotter air rises; to demonstrate lighter than air flight.

Materials: 4 packages of art tissue paper (in various colors if you like). Rubber cement and brush. Light wire (approximately 110 cm.). Scissors, pencil, string and a long pole.
Teacher Background Information:
A significant property of a gas is its expansion when heated and contraction when cooled. A mass of hot air is less dense and therefore buoyant in a mass of cold air. If the mass of hot air is contained in a lightweight balloon, the hot air will impart lift to the balloon. The principle can be demonstrated in this activity.
This activity can go on for some time depending on how involved the students are with the construction, designing, and testing of a balloon that really does what they want. Kits are available, but the construction and redesigning can be more valuable for students.
NOTE: whenever you use an open flame, keep a fire extinguisher nearby and follow common sense rules for safety. If you have grave concerns about using flame, you can use a hair dryer for your source of hot air, although they usually do not provide sufficient hot air for a flight of any satisfactory duration or altitude.
Procedure:
- Cut tissue into 20 sheets 50cm. by 150 cm. Join pairs end to end to give you 10 sheets 50 cm. by 300 cm. (See directions on page 62)
- Arrange the 10 sheets one above the other in the desired color sequence. Trace a pattern like the one shown on page 62, #2.
- Cut out the pattern through all 10 sheets at the same time.
- Glue one edge of the top sheet to the same edge of the sheet below (See step 1). Glue the other edge of the second sheet to the third sheet. Continue until all are glued then glue the top sheet to the bottom sheet.
- Tie the top leaving a loop. Inflate using a fan.
- Enclose a wire hoop at the bottom of a fold of the lower edge. Attach two nylon strings (about 160 meters long) to use to guide, if necessary, the balloon in flight.
- Suspend about 30 cm. above a Coleman type stove using a long pole. When the balloon is fully inflated, remove the pole. The balloon will rise quickly to an altitude of about 150 meters.
Discuss the transfer of heat energy from the source to the air in the balloon.
NOTE:
The hot air balloon should be flown outdoors only, and with adult supervision. Fly on a windless day.
Conditions for flying are also better in colder weather--
winter or early morning.
Other things to do with hot air balloons:
- Make a scale model/drawing.
- Determine the height it can attain.
- Determine how much it can lift?
- Determine whether the outside temperature affects it's lift.
- Determine how hot the inside air gets.
- Determine what material is best for making a balloon.
- Determine best (efficient and safe) method to use for heat source.
22. PAPER AIRPLANES
SUBJECT:
Science
GRADE:
Second
GROUP SIZE:
Large
TIME:
45 minutes
TYPE OF ACTIVITY:
Student Activity
TEACHING STRATEGY:
Guided Discovery
CONCEPTS:
Design variables Flight principles Energy Transfer Interaction
SKILLS:
Design/Construction Testing/Modifying
Objective: to demonstrate that various airplane designs will result in different flight principles.

Materials: Flat paper sheets (scrap paper), Paper clips (for balance). Scotch tape. Glue or stapler.
Procedure:
Have the students fold an airplane of their own design. Ask the students to test fly their planes for such things as accuracy, duration or acrobatics. Have them modify their designs if they feel it is necessary. when they are ready, participate in the following contest:
- a. Accuracy: Winner must fly the farthest along a straight line.
- b. Duration: winner must stay aloft the longest.
- c. Aerobatic: Winner must perform a maneuver named by the student before he/she launches it.
Award prizes to winners in each category and discuss why the winners' planes worked as well as they did and why some others worked less well. Discuss how the planes were set in motion. Where does the energy come from? what interacted with the planes?
23. PAPER AIRPLANE GOLF
SUBJECT:
Science
GRADE:
Second
GROUP SIZE:
Small or Large
TIME:
45-60 minutes
TEACHING STRATEGY:
Guided Discovery
TYPE OF ACTIVITY:
Game
CONCEPTS:
Variables wind Air Change Interaction
SKILLS:
Observing Describing Measuring Manipulation of variables
Objective: Discover variables which affect the flight of a paper airplane; Discover that changes in the configuration of a paper airplane affect flight.
Materials: Sheets of 8 x 11 paper (used is OK).
Teacher Background Information: This game, similar to "Frisbee" golf, is played with paper airplanes. Resist telling the students what they should be finding out during the activity and encourage them to explore which variables affect the flight of their airplane.
Procedure:
Number the cans from 1-9 and place them outside from 10-50 feet apart. Have the children fold paper airplanes and, starting at a point about 15 feet from the first can, throw the plane toward the can. The object of the game is to get the plane into each can with as few throws as possible.
Have the students discuss what factors seemed to affect how accurately their plane flew. Encourage the students to invent ways to make their plane fly better so they can lower the number of throws required to get them around the course.
Extensions:
You may wish to enlarge the course or design it so there are hazards as the students improve on their planes. Some students may want to fly their planes indoors to control for the variable of wind and then move outdoors. ~
Try graphing the results of the flight of different designs.
Measure distances in meters or feet.
Explore the effects of the wind on other objects like balloons or clouds, for example.
24. GLIDING HIGH


SUBJECT:
Science
GRADE:
Second
GROUP SIZE:
Large or Small
TIME:
45 minutes
TYPE OF ACTIVITY:
Student Investigation
TEACHING STRATEGY:
Guided Discovery
CONCEPTS:
Changes Flight path Variables Interaction Energy transfer
SKILLS:
Experimentation Observation
Objective: to learn that changing movable parts of an airplane changes the flight pattern.
Materials: Outline of glider. Light cardboard. Paper clip.
Procedure:
Have students make a copy of the diagram with tracing paper. Distribute a folded piece of thin cardboard to each student and have him/her trace the diagram on it, placing the long straight line on the folded edge. Cut along the traced line. Bend the wings and tail as indicated. Using drawing B.,outline the ailerons, rudders and elevators. lines. Cut along the solid lines and score the dotted The finished glider should look like this:
Try each of the following and find out what the glider does:
- a. Bend both rudders right.
- b. Bend both rudders left.
- c. Bend both elevators up
- d. Bend both elevators down
- e. Bend the right aileron up and the left one down.
- f. Bend the right aileron down and the left one up.
What conclusions can the students draw from the results? Do they use the terms "Interaction," "Energy transfer," or "Variable?" They should have enough background in those concepts, if they have done the previous lessons, to begin to use the terms and concepts to draw new conclusions.
Suggestion: It might be helpful, as the students construct their glider, to have them use The Main Parts of an Airplane illustration as a reference of a more complicated model. Students should be better able to "see" how their model, and its parts, corresponds to a small plane.
25. PARTS OF AN AIRPLANE
SUBJECT:
Science
GRADE:
Second
GROUP SIZE:
Large
TIME:
60 minutes
TYPE OF ACTIVITY:
Discussion
TEACHING STRATEGY:
Guided Discovery
CONCEPTS:
Definitions Systems Sub-systems
SKILLS:
Observation
Objectives: to learn the names of various parts of the airplane; to give operational definitions for those parts.

Materials: Worksheets. Crayons. Glue. Cardboard. Scissors. Assembled plane to use as model.
Procedure:
Assemble a plane from the outline. Do not color it but use it when you and students look for the various parts to color as a model of the completed plane. Distribute the worksheets with plane parts and definitions. Ask the students to go through the worksheet of definitions with you. Read the definition and focus on what the part (system) of the plane does as well as its name and where it is located. After the class has found the specific part, have them find the appropriate color and color the part just discussed. Do each one with them and monitor the accuracy so they don't get confused later. Take it slow.
Discuss the concept of systems with them. Explain that the airplane is a system composed of sub-systems. Ask what they might be (wings, tail, fuselage, landing gear, etc.). Explain that sub-systems often have their own sub-systems like the tail which is made up of the rudder, horizontal stabilizer and the elevator. (These have sub-systems too, but that's for later.)
When the students have finished finding the parts and coloring them in, have them paste the paper pieces to cardboard. Have them cut out the pieces and assemble their own planes. Fly them. Hang them as mobiles. They're VERY colorful and having them around keeps the names and definitions of the parts in mind.
PARTS OF AN AIRPLANE
- FUSELAGE - Central body portion of airplane. Designed to carry the crew, passengers or cargo.
- COCKPIT - Usually the space in the fuselage for the pilot and passengers in some aircraft it is the pilot“s compartment.
- PROPELLER - A rotating blade on the front of the plane. The engine turns the propeller. The propeller most often pulls the plane through the air.
- WINGS - The parts of the plane which provide lift and support the weight of the plane and its passengers, crew and cargo while the plane is in flight.
- FLAPS - Movable sections of the plane's wings closest to the fuselage. They move to enable the plane to fly more slowly.
- AILERONS - Movable sections of the plane's wings found on the outer part of the wing. They move in opposite directions (one up and one down) and are used to make turns. (bank)
- RUDDER - The movable (vertical) section of the tail which controls lateral.(side) movement. (Right & Left)
- HORIZONTAL STABILIZER - The horizontal stabilizer is the horizontal (level) surface of the rear part of the fuselage. It is used to balance the airplane.
- ELEVATOR - The movable horizontal section of the tail which allows the plane to move up and down.
- LANDING GEAR - Located underneath the plane, it allows the plane to land and supports it while on the ground.
Color the parts of the airplane pieces as follows:
- FUSELAGE - White
- AILERONS - Red
- COCKPIT - Black
- PROPELLER - Brown
- WINGS - Yellow
- FLAPS - Blue
- RUDDER - Purple
- HORIZONTAL STABILIZER - Orange
- ELEVATOR - Green
Where's the LANDING GEAR when a plane is cruising along? Where can a plane land? On what?
Extensions:
If the students would like to, you can make up more outlines to cut out and paste onto cardboard but before assembling, students can score along the lines that would allow the movable parts to move appropriately: the flaps to move down, the ailerons to move up and down,-the rudder to move side to side, etc.
The students could make their own design in the same way changing wing configuration or elongating the fuselage, etc. Have them take into account, however, the basic parts of the airplane in their own designs.
26. A VISIT TO THE AIRPORT
SUBJECT:
Science
GRADE:
Second
GROUP SIZE:
Large (grouped with adult aides)
TIME:
Day-long trip
TYPE OF ACTIVITY:
Field Trip
TEACHING STRATEGY:
Open Discovery Guided Discovery Expository
CONCEPTS:
System Sub-system Airport jobs
SKILLS:
Observation Participation Investigation
Objectives: to understand the airport is a system made up of sub-systems; to learn about some of the jobs at the airport.
Materials: "Stuff" to prepare children cognitively and effectively prior to trip. Story books on airports and airplanes. Model airplanes, gliders, etc. Pictures of airplanes and airports. Model airport.
Teacher Background Information.
This activity can be one of the most exciting experiences for students, especially if it is planned well and children have participated in a lot of aviation activities that have given them the chance to anticipate what they will do and see. Arrange the trip with the public relations department of the nearest large airport or the Public Relations Department of one of the airline companies. Get plenty of adults to accompany the students and, if they can, have them in to the classroom before the trip to talk with the students about what they're going to see.
Procedure:
Discuss with the students, what goes on at an airport. Ask if they've been to one. What did they notice? What would they like to see when they go? After you have made arrangements tell them they will be seeing such things as:
- People working at LOTS of different jobs. Talk about some of them (pilot, flight attendant, porter, truck driver, food service person, flight controller, mechanic, etc.
- Airplanes--a big one and a smaller one they can examine.
- The different parts of the plane they learned about.
- The inside of a plane: Cockpit, galley, seating, etc.
- An instrument panel
- The control tower
- A hanger
- Runways
- The terminal
Ask what they know already about some of these things? what would they like to know?
Collect story books about the airport and airplanes. Read to the students the ones that are beyond their reading level and let them read the others themselves. Arrange an aviation center in the room where the books will be kept.
Make a flying bulletin board--pictures, maps, paper gliders and airplanes, etc.
Hang model airplanes and helicopters from the ceiling.
Build a model airport on a table top complete with runways, hanger, tower and model planes.
Do the other activities in this section of the Guide before you go.
Go and Enjoy.
Afterward, have students write about the experience. Have them illustrate something that especially interested them with a drawing or collage. Have them write thank you's to the appropriate people.
Have students add to the model airport, the people and things they hadn't been aware of before. Create a bulletin board of pictures and drawings showing workers at the airport. Discuss who's in charge at the airport (The system) and some of the different parts (sub-systems) that make up the whole airport.
Take an imaginary trip to a city the class chooses and put, in order, the steps one would go through and what one would see along the way. Start with arranging for tickets and end with getting into a taxi at the terminal in the distant city or being greeted by relatives in the baggage area. Make a story out of it.
Plot the miles to the distant city. Find out how much fuel a 747 uses per mile and how much it would use to get there. Find out the cost for jet fuel and compute.
THIRD GRADE - BIRDS FLY WHY CAN'T I?
- GREAT SCIENCE IS CONCEIVED AT THE BOUNDARY WHERE EXACT OBSERVATION CONFRONTS LEAPING IMAGINATION --H.F. JUDSON, AUTHOR, SEARCH FOR SOLUTIONS
27. THE FOUR FORCES OF FLIGHT
SUBJECT:
Science
GRADE:
Third
GROUP SIZE:
Small or Large
TIME:
4-60 minute periods
TYPE OF ACTIVITY:
Student Investigation
TEACHING STRATEGY:
Guided Discovery Expository
CONCEPTS:
Gravity Thrust Drag Lift
SKILLS:
Observation Measuring Experimentation
Objective: to introduce students to the concept of drag, thrust, gravity and lift.


Materials: worksheet (see preceding page.)
- For Lift. Sheets of paper. Books. Drawing of air-flow over and under airplane wing. String. 2 ping pong balls. Ruler and index card.
- For Gravity. A student. Pencil, rock, ball. Jump rope. Ruler and paper clip. Marbles. Rubber band.
- For Thrust. Fan. Small Wagon. 2 long balloons. Light-weight toy. Straws. Lightweight wire.
- For Drag. Piece of cardboard. Umbrella. Paper. Marble. Aluminum Foil. Clothes Pin. Catsup bottle cap.
Procedures:
Discuss with students the notion that people nad to wait until they could design an aircraft with sufficient power, lift and stability before a heavier-than-air craft could be developed. Discuss the four forces that act upon a plane flying in the atmosphere: Lift, gravity, thrust, and drag, and use the worksheet with the explanations on it for reference. In order to give students the opportunity to observe these forces, do the following experiments with them.
LIFT.
- Prepare a bulletin board showing how air flows over and around an airplane wing. Use for reference.
- Have students hold a piece of paper just below the lower lip. Ask them to blow across the top and observe that the paper rises as the pressure on the top of the paper is reduced by the movement of the air.
- Suspend a length of paper loosely between two piles of books. Blow across the top of the paper. What happens?
- Suspend two sheets of paper about 2.5 cm (l") apart between two stacks of books. Blow between the sheets of paper. Notice what happens. (Papers come together.)
- Use lightweight string or thread to suspend two ping pong balls about 2.5 cm apart. Using a straw, blow between the two balls. what happens? Why?
- Pull a strip of paper through the air. Observe what happens. Ask why they think it happened.
- Push a sheet of paper forward through the air and observe the paper rise as it pushes against the air. Discuss why.
- Tape or tack an index card to a ruler so that it curves like an airplane wing. Balance ruler on a 6-sided pencil with the card end slightly lower. Using a straw, blow across the curved surface of the Card. Notice what happens.
Extension: Have students do some reading on Bernoulli and how Bernoulli‘s principle came to be.
GRAVITY.
- Ask one of your students to jump into the air and stay there. Discuss why she or he can't do that. Discuss what would happen without gravity.
- Drop a pencil, rock and a ball. Discuss why they come down.
- Have a student jump rope. Discuss why the rope can be "turned,"
- Compare the speed of fall of two objects of identical size and shape, but different weight.
- Observe the change in the speed of an object (a paper clip) rolling down an inclined plane ruler) as the angle of inclination is increased or decreased. What implication does that hold for planes and rockets taking off?
- Do the Activity "Measuring the Force of Gravity."
THRUST.
- Place a fan in a small wagon. Ask students to notice the movement of the wagon when the fan is turned on. What direction does the wagon move?
- Have students blow up balloons and hold the opening tightly closed. Ask them to release their hold on the opening and notice what the air feels like on their hand as the balloon is released. What direction does the air move in? What direction does the balloon move in? Why, when it has released all its air, does it fall?
- Fasten an inflated balloon to a small, lightweight toy so that when air is released, the toy will move forward. What direction is the air moving in?
- Discuss Newton's Third Law of Motion: "For every action there is an equal and opposite reaction." Discuss what made the balloon go in a specific direction. What makes it go up? Is anyone moving the balloon? How does the balloon change after it is released? What happened to the air in the balloon? What does Newton's Third Law have to do with airplanes and rockets?
- Do the Activity "Constructing an Action-Reaction Engine."
Extension. Have students do some reading on Newton and his Third Law of~Motion. Encourage them to experiment with action-reaction with you and the class.
DRAG.
- Have students run with a large square of lightweight cardboard held flat against the wind. Repeat with the edge against the wind. Observe the difference in the amount of resistance.
- Give student a closed umbrella. Have her or him hold the umbrella behind and run. Observe the amount of drag on the umbrella. Open the umbrella, Hold it behind and run quickly. How does the amount of drag change? Ask students to think about why.
- Drop, at the same time, two identical sheets of paper one flat, one crumpled. Observe the effect of air resistance on the rate of fall. Why?
- Drop a sheet of aluminum foil and a marble at the same time. Crumble the foil into a ball, and again drop the foil and marble at the same time. What happens?
- Drag a clothespin through water, then attach a catsup bottle cap to it and notice the additional drag.
- Discuss the shape of the objects used and compare the results on drag with the various shapes. What implications does this have on the design of airplanes?
- Walk on surfaces of varying degrees of roughness (rough cement, wooden floor, highly polished surface, ice). Observe that walking is easier when there is something rough to push against. If there is too much resistance, it becomes more difficult. Discuss walking on a wet, sandy beach.
- Cut a 1" square cube out of wood. Cut 1" square pieces of various materials: cloth, aluminum foil, leather, rubber, sandpaper, styrofoam. Glue the pieces to the six sides of the cube. Set cube on a very smooth board and incline the board until the cube begins to slide. Measure the distance between table top and board. Repeat with all sides of the cube and compare the incline necessary to cause the cube to slide and see the variable that makes the differences. Talk about resistance to motion when surfaces are rubbed together (friction). Graph the results of the experiment. Discuss the implication this has to the material used for airplanes.
- Do the Activities "It's a Hold up," "Does Shape Matter?" and "Safe Landing" in the First Grade Section of the Guide.
28. MEASURING THE FORCE OF GRAVITY
SUBJECT:
Science
GRADE:
Third
GROUP SIZE:
Large
TIME:
45 minutes
TYPE OF ACTIVITY:
Student Investigation Discussion
TEACHING STRATEGY:
Guided Discovery'
CONCEPTS:
Gravity weight as measure of pull
SKILLS:
Observation Recording data Prediction
Objectives: to help student understand weight as a means of measuring the pull of gravity; to help students understand the relationship between gravity and flying; to understand a spring scale measures the pull of gravity on an object.

Materials: Pictures showing gravity at work. A strip of inner tube or very strong elastic. Shelf paper and marking pen. Scale. Various materials of different weights. Plastic pail. Hook. Teacher Back round Information; Hang long piece of shelf paper on wall and attach arge hook at the top. Gather several materials of differing weights such as sand, water, chalk, cotton, etc. Tie strip of tubing around the handle of the pail and hang on the hook.
Procedure:
Begin with discussion on children's concept of gravity. Drop object to floor and ask students what they notice and why it happens. Pour liquid into a glass. Ask why it doesn't fly out the open top. Show the pictures of gravity at work (sledding, liquids contained, people standing on the earth, etc.) Discuss what is happening in the pictures and why.
Experiment with the students.
- Fill the suspended pail with one of the heavier materials such as sand. Have a student make a mark on the shelf paper where the pail falls. write "sand" at that mark.
- Empty the pail and have students choose another material. Ask them to predict what will happen. Fill pail with second substance and mark where pail falls.
- Choose a third and ask students to predict how the weight of this material will compare to the other two. Fill pail and repeat procedure.
- Continue until all the materials have been measured.
Which material is acted on by gravity the most? which the least? Ask how this information relates to flying. Ask how they might be able to measure the actual force of gravity pulling down on each kind of material. (Weigh the pail; weigh the material in the pail; subtract the weight of the pail) Collect the data and record on charts. Discuss the idea that the pull of gravity is equal to the weight of the object-that weight is a product of gravity.
Extensions:
Ask each student to record the force of gravity acting on her or him. How? Explain they can determine their weight on the moon by dividing their earth weight by six. Ask them to do so. Ask why they weigh less on the moon than they do on earth. Ask them to make a chart that compares their earth weight to their moon weight. Discuss what they might do on the moon that would be difficult or impossible on earth.
Make a trip to the library for books on experimenting with gravity. Let students choose those that are appropriate to do in the classroom or outdoors. Do some.
Have students calibrate the homemade spring scale before you use it by choosing some small common object to use as a standard (nails, washers, bolts, etc.) After the pail has been attached to the tubing, drop in one of the standards and mark where the top of the pail comes. Add a second and mark, a third and mark, etc. Have students print a "0" where the pail came without any standard in it and then continue marking 1 through whatever length is required. Have them put in the different materials and compare the results in the standard units they have chosen.
29. GO FLY A KITE
SUBJECT:
Science
GRADE:
Third
GROUP SIZE:
Any
TIME:
40 minutes
TYPE OF ACTIVITY:
Construction
TEACHING STRATEGY:
Expository-and Guided Discovery
CONCEPTS:
Lift Balance
SKILLS:
Gathering data Interpreting data Identification of variables
Objective: to practice gathering and interpreting data relative to flight; to discover the principles of balance and lift related to the flight of a kite.

Materials: one or more of the kites described on the following two pages.
Procedure:
Any of the following investigations can be used to explore variables affecting the flight of a kite or they can be used to emphasize process skills. Don't forget to have fun.
- Measure how quickly several kites reach a given altitude when flown together. Which designs climb farthest? Fastest?
- How does the placement of the "harness" on the kite affect the flight?
- Is balance (a tail) needed on some models during different weather conditions?
- Graph the results of several experiments. Is there one overall best design?
NOTE: Remember:
- NEVER use wire for kite "string"
- NEVER climb power poles to try to retrieve a kite
- NEVER fly kites during electrical storms.
FLAT KITE
MATERIALS: string, glue, tape, kite sticks, paper or plastic
PROCEDURE:
- A flat kite may be constructed by securing sticks - in the manner shown and attach to paper or plastic.
- Attach a string from the end of each spar to the end of each keel.
- Cover the frame with glue or tape.
- Attach the bridle and flying line.

DUTCH KITE
MATERIALS: string, glue, tape, kite sticks, paper or plastic
PROCEDURE:
- Fold and crease the paper the long way. Fold and crease again (2cm) from center fold. Open so the folded section forms a ridge up the kite. (Illustration l)
- Open paper flat. Fold and crease on a line (8cm) from the top (short way). Fold and crease (2cm) from this fold. Unfold this crease and cut on heavily marked lines at the top. (Illustration 2) Open paper flat, back side up.
- Brush glue on the top and bottom sections of the long middle fold (between fold lines) but not on the cross-fold section where the H-shaped slit is located. Fold in center, spreading sides out flat, as in Illustration l, thus gluing the spine of the kite. The cut flaps on the cross fold should slide over each other, one coming out on top of the kite, the other on the back.
- Glue these flaps down (across the slit) on front and back of kite.
30. MORE WITH MODEL AIRPLANES
SUBJECT:
Science
GRADE:
Third
GROUP SIZE:
Individual Group
TIME:
2 or more 45 minute periods
TYPE OF ACTIVITY:
Student Investigation
CONCEPTS: Aerodynamic design variables
SKILLS:
Observation Collecting and Recording data Testing
Objective: to make models and design test for distance and aerodynamics.


Materials: Balsa wood. Styrofoam trays. Diagrams of models (See following 5 pages) Cardboard. Paper. Glue. Scissors. Notebook for recording data.
Procedure:
Have students construct airplanes using the models shown. Encourage making different sizes, and using various materials.
Have students test airplanes under varying atmospheric conditions, including humidity, wind velocity, temperature, and other weather conditions. Have students observe and record data, concerning effect of conditions on each type of airplane assembled. Have students draw conclusions on which type of airplane flies best under various types of conditions.
Hypothesize what changes should be made on the planes to make them perform better under adverse conditions. Redesign and test. Record data. Discuss such changes as adding flaps, moving wing forward and backward, changing the center of balance. What configuration helps make the plane fly straight and far? How can it be made to loop? To circle?
Extensions:
Have children design their own airplane on paper. Discuss each child‘s design with the class. Get input from them. Decide which designs might be best for certain conditions. Ask the class to choose four or five of the designs they feel are the best to be made into models.
Separate the class into groups and have each group build an airplane from one of the model designs chosen. Test the design and keep records of its performance under various conditions. Have each group present its plane and discuss its good and poor points.
HOW TO BUILD A MODEL WRIGHT FLYER

Materials: 1 styrofoam meat tray or 2 styrofoam egg carton tops; 1 dime; scissors, tape, carbon paper, white glue, wooden toothpicks
Procedure:
- Trace pattern onto the styrofoam.
- Cut out all parts. Shape the wings and elevators by cutting along the dotted lines.
- Push toothpicks, lengthwise, through the center of each rudder. Glue each rudder upright at one end of the body - one to the right edge and the other to the left- Then glue on the rudder top.
- Dip l8 toothpicks in glue and place the toothpicks upright on the dot marks. Dab glue on the toothpick tops and lay the second wing carefully on them, using the dots as a guide. Press together carefully. Cut a toothpick in half and glue one piece each to two middle toothpicks to look like propellers. Set aside to dry.
- Assemble the elevator by dipping 5 half toothpick ends in glue. Place the toothpicks upright on the dots. Dab glue on the tops and place the second elevator on them. Press together carefully.
- Glue the wings to the center of the body.
- Glue the elevator to the other end of the body.
- Tape a dime to the bottom of the Flyer between the wings and elevator.
- Wait for the glue to dry. Now you are ready for take-off. Kneel down and fly your model - nice and low, just like the Wright Brothers flew their first flyer.
31. JET ENGINE THRUST
SUBJECT:
Science
GRADE:
Third
GROUP SIZE:
Small
TIME:
40 minutes
TYPE OF ACTIVITY:
Demonstration
TEACHING STRATEGY:
Expository
CONCEPTS:
Thrust
Combustion chamber
SKILLS:
Observation Inference
Objectives: to have students understand that jet planes and rockets get their thrust from air molecules; to have students identify the combustion chamber as one part of an engine involved with thrust.
Materials: (For A) Balloon. Empty bottle. Pan of Water. Stove or hot plate.
(For B) Two or three wooden matches. Rubber band. Glass pill bottle. Cork. Vaseline. Magnifying glass.
Procedure:
- (A) Snap a balloon on an empty bottle and place the bottle in a pan of water on a hot stove. The heat will make the air molecules in the bottle move vigorously and bounce further apart.
As the air expands, it pushes against the bottle. What happens? Why?
- (B) In a jet, the same thing happens in the combustion chamber. The burning fuel heats the compressed air and expands it greatly. The extra air has no place to go but out, so it rushes toward the nozzle. You can demonstrate this by using 2 or 3 wooden matches for fuel. With a rubber band, tie their heads together and drop them in a glass pill bottle. Cork the bottle, after first smearing Vaseline where the cork and bottle touch (making an air tight seal).
Take the bottle outside in the sunlight. With a magnifying glass, focus the sun‘s ray on the match heads. The matches will catch fire very soon. what happens to the cork? Why? What does all this have to do with jet engine thrust?
32. WHAT DO YOU KNOW ABOUT THOSE FUNNY FORCES?
SUBJECT:
Science
GRADE:
Third
GROUP SIZE:
Individual
TIME:
Open
TYPE OF ACTIVITY:
Student Investigation
TEACHING STRATEGY:
Guided Discovery
CONCEPTS:
Lift/Gravity Drag/Thrust
SKILLS:
Experimentation Recall
Objective: to help student identify the forces involved in flying a plane; or to provide an evaluation Form for the understanding of the four forces: thrust, drag, lift, gravity.
Materials: Worksheet. Materials necessary for student to investigate or read in order to complete worksheet.
Procedure:
Dup1icate the activity sheet and distribute to each student.
- Using the materials necessary, the students should do what ever activities are necessary to complete the activity sheet.
or
- Use the worksheet as a test for recall after activities and reading have been done. Ask students to fill in the answers.
FORCES INVOLVED IN FLYING A PLANE
Write the word that fits in the b1ank, choosing from:
- LIFT, DRAG, THRUST, GRAVITY
- ________________ slows the forward movement of the plane
- ________________ gives an airplane its forward motion.
- ________________ is produced by the angle of attack
- ________________ may be produced by jets or rockets
- ________________ is the resistance the air offers.
- ________________ is a downward force.
- ________________ is an upward force.
- ________________ is caused by friction.
- ________________ is a backward force.
- ________________ is created by a power source.
- ________________ produces the weight of the plane.
- ________________ acts against gravity.
- ________________ works against thrust.
- ________________ may be produced by propellers.
- ________________ is produced by the difference in air speed over the wing surfaces.
- ________________ may be reduced by streamlining the plane shape
33. WILD AND CRAZY ROCKET MODELS
SUBJECT:
Science
GRADE:
Third
GROUP SIZE:
Individual
TIME: 45-60 minutes
TYPE OF ACTIVITY:
Construction
TEACHING STRATEGY:
Guided Discovery
CONCEPTS:
Rocket
SKILLS:
Motor coordination Design
Creative thinking
Objective: to help student develop motor and design skills;
to enhance student's creative abilities; to demonstrate some basic rocket parts.


Materials: cans, plastic bottles, cardboard, paper, wood, wire, paper clips, paper cups, tape, glue, miscellaneous materials
Procedure:
This is as much for great fun and creative endeavor as anything else. Using whatever materials can be thought of and scrounged up, have students construct a model of a rocket. The model need not be exact nor even resemble an existing rocket. It need only have some resemblance to rockets. Make it out of whatever is available and as tall or as big or as tiny or short as the student's imagination. Paint it silver or white like conventional rockets or a rainbow of colors quite unlike anything NASA has seen.
A winners-only contest might follow. Make ribbons of merit for each one giving appropriate awards for what the student has constructed. "Most bizarre," "Most colorful," "Most Unlikely to Get Off the Ground," etc. Originality is the key here. And FUN.
NOTE:
On the next 3 pages are some very basic ideas to get started. Encourage kids to use the ideas only as a start to their own way»out approach to rocket design.
ANOTHER NOTE:
Words like "stabilizer," "staging," "fairing," "cone," etc. will come up. Discuss what these things are and encourage students to look at many pictures of rockets and to discover the names of some of the other parts they see on rockets. (Check out the NASA rockets in the Kindergarten section.)
PAPER ROCKETS
Materials:
- Large plastic soda straws (the kind used in fast food restaurants). One per student.
- Sharpened thick pencils (same size as straws). One per student.
- Paper (8 x lO). Two sheets per student.
- Scotch tape. One roll per two or three students.
- Scissors. One per student.
Procedure:
- Cut a strip of paper about 8 inches long and l to 2 inches wide.
- Roll the paper strip around the pencil and tape. Roll paper strip lengthwise around pencil. Paper tube should slide easily off the pencil but not be too loose.
- Make several pointed cuts at one end of tube. See Fig. A.
- Slide the sharpened end of the pencil toward the pointed cuts. Fold the points around the sharpened end of the pencil and tape to form the nose cone. See Fig. B.
- Cut out two sets of fins. Use the pattern in Fig. C. Fold the fins on the dashed lines, in the manner shown in Fig. C.
- Using two pieces of tape, fix the fins to the opposite end of the tube from the nose cone. Insert the pencil for support in taping.
- Place the rocket over the soda straw. See Fig. E
- Select a firing range to launch the rocket such as one side of the classroom or a hallway. A high ceiling room such as an auditorium or gymnasium is best.
- Launch the rocket by blowing sharply on the straw. Be sure to aim rockets in the desired direction.

Discussion
There are many variations in the design of paper rockets Students should be encouraged to change the shape and size of Fins and the length of the tube. Different forms of nose cones should be tried as well as different placements of the fins on the tube, Large Fins can be used to turn the rocket into a glider. (See Fig. F.)
To add extra interest to the activity, competitions can be organized. Try to find out which rocket can go the highest, the farthest, and land in a designated recovery zone, etc.
SATURN V
Materials: small frozen juice can, 2 - #303 cans, use epoxy glue at joints, 2 large juice cans
Construct fairing from paper. Draw cut ends together to form cone. Experiment to find proper dimensions. Slip completed fairing over can assembly. Paint
34. CONSTRUCTION OF AN ACTION-REACTION MODEL
SUBJECT:
Science
GRADE:
Third
GROUP SIZE:
Largel
TIME: 30 minutes
TYPE OF ACTIVITY:
Demonstration
TEACHING STRATEGY:
Guided Discovery
CONCEPTS:
Action-reaction direction change
SKILLS:
Observation Inference
Objective: to better understand how rockets and satellites change direction.

Materials: Water, Cord, Coffee can, Hammer, Small nails.
Procedure:
Punch a small hole in side of coffee can near bottom. Fill can with water and observe movement of can as water spurts from the opening.
Discuss such questions as: How does Newton's Third Law apply to this investigation? How can the results of this investigation be related to "turning" a satellite by utilizing a liquid or gas (propellant)? How can one modify the apparatus to involve steam as the propellant? Where can the students look to find more information on how rockets and satellites change direction?
35. ROCKET PROPULSION I
SUBJECT:
Science
GRADE:
Third
GROUP SIZE:
Small
TIME:
45 minutes
TYPE OF ACTIVITY:
Experiment and Demonstration
TEACHER STRATEGY:
Guided Discovery Expository
CONCEPTS:
Action-reaction Rocket propulsion
SKILLS:
Observation Inference
Objective: to make a simple rocket engine to demonstrate rocket propulsion; to recognize Newton‘s Third Law of Motion.
Materials: Rubber bands, Balloons, Baking soda, Vinegar, Test tube, Two round pencils, Cork or Rubber stopper, Tissue paper.
Procedure:
(A) Divide the class into groups of three and have one child in each group blow up one balloon. Have another child tie it tightly with the rubber band. Let each in the group try to make the balloon move and/or remain still. Discuss with the group what conditions are necessary for the movement of the balloon. (Source of energy; i.e, wind, push).
Have one child in each group untie the rubber band. Watch what happens and discuss what caused this action. Difference in air pressure and escaping jet of air? Discuss how this is like a rocket engine (unequal pressures cause motion of rocket) and how it is different (rockets need different kinds of fuel to generate new energy).
(B) Demonstrate this one. Loosely wrap two teaspoons of baking soda in a small piece of tissue paper and place in the bottom of the test tube. Put two round pencils on the table, three inches apart and parallel to one another. Quickly place a moistened stopper or cork into the test tube and place test tube on pencils.
(This must be done very quickly.) What happens? Discuss why. What does mixing vinegar and baking soda produce?
What is the action? The reaction? How is this related to the movement of a rocket engine?
36. ROCKET PROPULSION II
SUBJECT:
Science
GRADE:
Third
GROUP SIZE:
Small
TIME:
30 minutes
TYPE OF ACTIVITY:
Experiment
TEACHING STRATEGY:
Guided Discovery CONCEPT:
Action-reaction Staging
SKILLS:
Observation Inference
Objective: to understand the value of staging.

Materials: Two 6" or 8" balloons, One 3 or 4 oz. Dixie cup, One Plastic straw cut in 4 equal lengths, 50-60 feet of heavy thread or fish line, 4 pieces of masking tape 4" long.
Procedure:
- Cut the bottom out of the Dixie cup.
- Extend nozzle of balloon B through the now hollow cup and stretching the balloon, inflate it. Hold balloon B between thumb and finger on B side of Cup C and pull the nozzle of balloon B against the side of cup C. Refer to illustration.
- Insert balloon A into the cup and inflate. Release balloon B. A now holds B in position.
- Holding nozzle of A closed, attach the assembly to the 4 spaced pieces of plastic straw which should have been placed on the 60 foot string by another group. Refer to illustration.
- If a stairway is available or if you are in a gym, have the Y station higher than the X.
- Release Balloon A. What happens? How does the experiment relate to rocket propulsion and staging? What is the value of staging? Discuss such things as the reduction of weight with staging. Or the construction of smaller parts rather than large cumbersome ones. Or the reduction of failure of any one component because of heat or vibration. Or the ability to vary thrust, etc. ~
Discuss the horsepower of rockets. Saturn V had 150 million horsepower. How many average size cars would be required to develop the horsepower of Saturn V?
37. BOOM!
SUBJECT:
Science
GRADE:
Third
GROUP SIZE:
Small or Large
TIME:
45 minutes
TYPE OF ACTIVITY:
Demonstration
TEACHING STRATEGY:
Expository
CONCEPTS:
Sonic boom Shock wave
SKILLS:
Observation Inference
Objective: to enable students to understand the concept of
sonic boom or shock waves by producing a miniature shock wave.

Materials: Empty can, open at both ends. (A two pound coffee can is good) Plastic lid which fits over the end of the can. (Light cardboard cut in circle and attached with masking tape works, too.) Rubber bands or string. Large balloon. Matches or small birthday cake candle.
Teacher Background Information:
When a spacecraft slashes back into the earth’s atmosphere, the force and speed of its re-entry creates shock waves. The effect is an immediate build-up of frictional heat of such intensity that the capsule might disintegrate were it not for the design of the spacecraft whose forward area is shaped specifically to deflect the shock waves. Thus deflected, the shock waves--searing hot in themselves--form a protective cushion between the vehicle and the of the surrounding atmosphere.
Another kind of shock wave is of trans-sonic aircraft of sound (760 miles per traveling at this speed of it until they form a creasing its speed, the and rockets hour at sea even higher temperatures created when the speed approaches the speed level). A vehicle piles up molecules of air in front wall of high vehicle can pressure. By increasing its speed, the vehicle can penetrate this wall but it will be buffeted as if in a violent storm.
Aircraft and rockets which travel faster than the speed of sound drag a compressed air barrier behind them similar to the wake that follows a speed boat. As the wake of the boat slaps against other objects in the water and against the shore, just so does the compressed air barrier trailing a supersonic craft hit the ground with the familiar boom often heard as such a vehicle travels through the skies.
Procedure:
To experience the effect of a compressed air barrier, cut a small slot (like in a piggy bank) in the center of the plastic lid. Cut the large balloon far enough back of the nozzle to allow the open end of the balloon to fit over one end of the can. Fasten the open end of the balloon over the can by working rubber bands around it or tieing it with string.
Fit the plastic lid over the other end of the can. Grasp the balloon in the center and pull it back while holding the can firmly with the other hand. Release the balloon and listen. What happens? Why? Light a small candle and aim the slot in the can lid at the candle flame from about 18" away. Pull the balloon back and release it. What happens to the candle flame? why?
Extensions:
- Experiment with effect on the candle flame by releasing the air in the can slowly then at increasing rates
- Study the effects of various sizes and shapes of openings in the plastic lid.
- Study the effects of various shapes and positions of baffles placed in front of the opening in the can lid. The baffles can be made of heavy paper or light weight cardboard.
- Light a number of the small candles and place them in a row at right angles to the can lid and produce a boom. Does the boom spread after it leaves the shock wave generator?
- Search for answers to such question as:
How hot does it get during re-entry? what sort of insulating materials can be used? What sorts of problems can sonic boom cause?
38. WEATHER PICTURES
SUBJECT:
Science
GRADE:
Third
GROUP SIZE:
Large
TIME:
30 minutes
TYPE OF ACTIVITY:
Discussion
Creativity Activity
TEACHING STRATEGY:
Guided Discovery
CONCEPTS:
Weather Variables
SKILLS:
Observation Drawing Conclusions
Objective: to establish the relationship between sky conditions and basic kinds of weather.
Materials: Construction paper. Drawing paper. Crayons. Paint. Chalk.
Teacher Background Information:
This lesson is designed to have students observe and record data about sky conditions in order to see correlations between those conditions and certain weather patterns. It is important to give children a chance to record and express data in several ways. Some students may wish to make graphs or keep charts with written data. Others may prefer to do pictures or other art representations. No one way is the best way if the children understand the meaning of their graphics. This understanding is maximized when they choose a representation they feel comfortable with.
Procedure:
- Begin with a discussion of sky conditions on a very basic level. Examples: What does the sky the look like just before a big storm? What does the sky look like when it is full of lightning? What does the look like after rain?
- After a discussion, lead children into creating a picture of a sky for various weather conditions such as: "Lightning and Rain," "The Storm Gathers Above Us," or "Cold and Snow in winter."
- Have the students make graphs of the sky conditions on one side of a piece of paper and the resulting weather on another side. Have them draw conclusions and make predictions after several weeks of observations about daily weather based on their observations.
Try again after several months of observation. What happened to the accuracy of the predictions?
39. SIMPLE WIND VANE
SUBJECT:
Science
GRADE:
Third
GROUP SIZE:
Large or Small
TIME:
45 minutes
TYPE OF ACTIVITY:
Construction TEACHING STRATEGY Guided Discovery
CONCEPTS:
wind Constructing Testing equipment
SKILLS:
Observation Inference Construction
Objective: to construct and utilize a student made device to detect the source of wind direction.

Materials: For each student:4"x4" square of cardboard, Clay, Paper straw, Pencil with Eraser, Straight pin, Construction paper 2" X 2", Scissors, Glue, Model airplane, An electric fan for the class.
Procedure:
Discuss the importance of knowing wind direction, when flying a plane. Ask why it's important know direction for take offs and landings. Suggest their own individual device to determine wind direction with the materials you have given them. Give them some time to discuss how it might be done with what they have in front of them and to experiment a bit. For those who need more direction, tell them to:
- Cut a pointer and tail out of the construction paper.
- Flatten ends of the straw. Glue pointer and tail to these ends. Let dry.
- Stand pencil point in a mound of clay which has been centered on the cardboard.
- Determine the center of gravity of the straw. Push pin through it and into the eraser of the pencil.
Let students observe the movement of the arrow with an electric fan as the wind source. Discuss applications of the wind vane in flying model airplanes. Use the wind vane to fly planes outside.
Extension: Use the wind vanes in weather-reporting activities.
Use to teach wind directions.
40. SOCK IT TO ME
SUBJECT:
Science
GRADE:
Third
GROUP SIZE:
Small
TIME:
40 minutes
TYPE OF ACTIVITY:
Construction
TEACHING STRATEGY:
Guided Discovery
CONCEPTS:
Construction of a model
SKILLS:
Observation Inference Collecting/Recording Data
Objective: to construct and observe the operation of one kind of wind direction indicator (windsock)

Materials: Heavy cloth, about 36" x 24"; four lengths of heavy wire, about 10" each; wire coat hanger; pole, about 36" long; large nail; wooden spool; needle; heavy thread.
Procedure:
- Form the hanger into a loop about nine inches in diameter.
- Attach the four wires to this circular hoop at four equi-distant points on its circumference.
- Cut the cloth into a sleeve (see illustration).
- Sew the sides together making a cone, and sew the larger ends of the cone to the loop and bind the exposed ends of the wires to the spool.
- Place the nail through the spool so that the spool may pivot freely on the nail. Hammer the nail into the end of the long pole.
- Place the pole outdoors and nail it to a tall post or to a rooftop, away from obstructions, so that the sock may swing freely with the wind.
- Discuss the notion that pilots need to take off and land into the wind. Figure out why. Explain that pilots remember which way the wind is coming by putting themselves in the sock and flying out of the big end. (Mentally, of course!)
- Over a period of time, have students check each day to find the direction of the wind and chart the results.
- Discuss not only wind direction but wind speed. Can students see a difference in wind speed with the sock? How? By observing what other objects? How accurately can wind speed be noted? Make a simple anemometer or ... purchase one and record wind speed.
41. MEASURING THE WIND
SUBJECT:
Science
GRADE:
Third
GROUP SIZE:
Small or Large
TIME:
45 minutes
TYPE OF ACTIVITY:
Student Investigation
TEACHING STRATEGY:
Guided Discovery
CONCEPTS:
Wind Speed
SKILLS:
Measurement Data Collection Inference
Objectives: to use an anemometer to record wind speed in non-standard measurement; to relate wind speed to flying conditions.

Materials: plastic funnel, sharpened pencil a bit taller than the funnel, 2 cardboard strips with a hole punched in the center of each, masking tape, scissors, 4 open boxes made from graph paper, marker, stopwatch or clock with second hand.
Procedure:
(Teacher) Make an anemometer using the directions on following page or have students make them.
Have students create a breeze by blowing into the boxes. Count the number of times the colored box passes a marked point. (Do it for 15 second time periods and then convert to kilometers. A count of 30 in 15 seconds (2 counts per second) would be approximately the same as a wind speed of 6 to 7 kilometers per hour.) Have students blow softly and count, and then blow more strongly and measure. What happens? Use a fan or hair dryer and measure. Test it outside in various winds. Talk about the differences and fly paper airplanes to test when the wind speed causes problems.
Headwinds. Have students throw their paper airplanes into the wind (outside or toward a screened fan). Have them throw their airplanes without any wind. Discuss the differences in the speed of the planes. Ask if there is a 20 mile an hour headwind and a plane is flying directly into it at 100 miles an hour, how fast is the plane actually flying over the ground?
Crosswinds. Experiment with throwing the paper airplanes to a specific target with a crosswind as a problem. What do they have to do to get the plane to go where they want it to go? Investigate with different wind speeds.
WHAT TO DO....
- Put the pencil point through the hole in the funnel
- Place the center hole of each cardboard strip on the pencil point. Put the strips at right angles and tape them together
- Color one of the open boxes
- Tape the boxes to the ends of the strips. Make sure the box openings are facing the same direction - either clockwise or counterclockwise
42. TEMPERATURE TAKING TIME
SUBJECT:
Science
GRADE:
Third GROUP SIZE:
Individual
TIME:
45 minutes first day/10-15 minutes for next 4 days
TYPE OF ACTIVITY:
Student Investigation Discussion
TEACHING STRATEGY:
Guided Discussion
CONCEPTS:
Temperature Variables Data Collection
SKILLS:
Observing Recording Inference Data
Objective: to provide an understanding of temperature and some of the ways temperature may affect flying.
Materials: thermometers, daily newspaper forecast, chart for recording week's temperature readings.
Procedure:
Attach a thermometer outside the window. Make a bulletin board with pictures of different temperature conditions. As students do this activity, have them add their own pictures or drawings to the board. Have students check the temperature at opening and closing of school and record on the chart. Provide the daily forecast each day and compare their reading with forecast. Is there a difference? Why might there be?
Have students place other thermometers in various sunny to shady parts of the school yard and check the differences in temperature. Discuss variables when collecting data. Ask how two students might come up with different air temperatures depending on where they placed their thermometers. Make some predictions about the higher or lower temperatures of various places around the school based on location and time of reading.
Discuss flying and temperature. What temperature conditions might affect flying? How might very hot weather affect the flight characteristics of a plane? What are the dangers in very cold weather when flying? What kind of mechanisms are available to large commercial planes that make them safe to fly in very cold weather that are not generally available to most small plane pilots? Where is it coldest - close to the ground or high in the air? How does the temperature of the air differ over water as opposed to land? Devise methods to test for some answers to these questions WITH the students.
Extension:
While on temperature you might get into the connection between temperature and wind. Ask why temperature is important to the idea of wind. (When wind blows, it‘s usually because cooler air is pushing aside warmer air.) Ask why there is usually a heavier wind situation in winter than in summer. Find a map of the hemisphere showing the prevailing wind pattern for our locale. Discuss windchill.
43. WEATHERPERSON FOR A DAY
SUBJECT:
Science
GRADE:
Third
GROUP SIZE:
Individual Small group TIME;
45 minutes
TYPE OF ACTIVITY:
Student Exploration
TEACHING STRATEGY:
Guided Discovery
CONCEPTS:
Air movement Highs and Lows
SKILLS:
Observation, Drawing conclusions, Interpreting data, Making predictions
Objective: to become familiar with the procedures used in predicting weather.

Materials: Copies of weather maps from newspaper or from the local weather service.
Procedure:
Distribute copies of the weather maps. Discuss the charts and the symbols used. Discuss air movement from high to low pressure areas. Discuss the circular pattern. Talk about certain clouds as forerunners of particular weather conditions. Ask how predicting weather fits into a discussion of flight.
Have each student record the present weather using the station model for references. Discuss what the weather will be like for the next 24-hour period given the available information. What will the weather be like where student lives? Would they fly?
NOTE: Charts and maps can be obtained airport FBOs (Fixed Base Operators), pilot supply stores or online sources - search for aeronautical or sectional charts.
44. WEATHER CENTER
SUBJECT:
Science
GRADE:
Third
GROUP SIZE:
Individual
TIME:
5 - 10 minutes per day
TYPE OF ACTIVITY:
Student Investigation
TEACHING STRATEGY:
Guided Discussion
CONCEPTS:
Weather Variables Data Collection
SKILLS:
Observing, Recording data, Predicting
Objective: to give students opportunity to record data of various elements of the weather and to look for patterns in that data as well as to do some simple weather predicting.
Materials: weather vane, anemometer, windsock, barometer, rain gauge, thermometer, charts for recording elements. (Following two pages for teacher.)
Procedure:
Set aside a portion of the room near a window for the Center. Attach the various instruments where appropriate and provide a bulletin board with the various charts displayed. Provide library books on weather for the Center and drawing paper for drawing representations of observations.
Keep accurate records each day by rotating the responsibility for measurement between students. Have students note the kind of moisture that prevails. Using the two following pages on "Clouds" and "Rules for Amateur Weather Prediction" as a start, talk with students about what they observe and what patterns they are able to see. Make some predictions about rain or temperature or high winds, etc., and see if predictions improve over period of time.
Discuss the connection between flying and the weather. Ask students how thunderstorms affect the small plane, the commercial pilot? What does the pilot need to know about wind? or Clouds? Why is prediction important to the pilot? Why might it be important for a pilot to know how fast a thunderstorm is moving?
Extension: See if you can arrange for a pilot and a weatherperson to talk with the students, on the same day if possible.
RULES FOR AMATEUR WEATHER PREDICTION...
- A falling barometer indicates an approaching low with a storm.
- A rising barometer indicates the passing of the low and the approach of a "high" - fair weather.
- The passing of the low in summer will be followed by warmer weather.
- Cirrus and cirrostratus clouds coming from the west with a gray sky indicate the approach of a low with accompanying storm
- A bright blue sky with cirrus wisps and with wind in the west or north west will be followed by fair weather for twenty four to forty eight hours or longer.
- Conditions of strong convection currents that produce thunderstorms may also be expected.
- If the lightning of a thunderstorm appears to the north, east, or south the thunderstorm will not reach the observer.
- If the lightning of a thunderstorm appears to the northwest, west, or southwest the thunderstorm will come nearer the observer and perhaps pass overhead.
- One can calculate the distance of the lightning flash, that produces the thunder, by counting the seconds between flash and the accompanying thunder and allowing five seconds for each mile the sound travels.
- The thunderstorm travels on the average about 25 miles per hour; if the cloud is in the southwest, west, or northwest, one may estimate when the storm will strike by calculating the distance away.
- A wind vane points in a general direction to a high pressure area.
- Rainy weather or snow may come when the wind shifts in a counter clockwise direction.
- Winds from a "low" will blow in a direction opposite to that of the "low's" movement because of the counter-clockwise swirling of the winds in a "low."
CLOUDS....
| NAME | DESCRIPTION | SIGNIFICANCE |
|---|---|---|
| CUMULUS | Fluffy, billowy floating 2,000 - 4,000 feet elevation |
A fair weather cloud |
| ALTOCUMULUS | Like wool packs or big lumps of cotton. 10,000 - 16,000 e1evation |
Fair weather clouds |
| CIRRUS | Thin, wispy, feathery and silky. 18,000 - 52,000 ft. | If clouds look feathery good weather often follows |
| STRATUS | A heavy grey blanket over whole sky. Really a heavy fog which has risen. Mostly below 5,000 ft. | "Low ceiling" Rain not necessary but probable |
| CIRROSTRATUS | A thin, whitish blanket through which the sun shines producing halos. Around 25,000 ft. |
Usually with forecasts of rain or snow within 24 hrs |
| ALTOSTRATUS | Smooth, gray blanket that blots out sun. Around 25,000 ft. | If clouds start thin and grow thicker, rain or snow often follows |
| STRATOCUMULUS | A high cloud, flat beneath and rounded at the top. Soft gray with darker parts. 2,000 - 6,000 | May produce light rains |
| CUMULONIMBUS | Bases may almost touch the ground. Anvil shaped top. 2,000 - 4,000 | Storm clouds lightning rain, hail. Also produces tornadoes |
2012.11.24 This page has been accessed 3,339 times.