Chemistry/Lab Aide Training
Contents
- 1 PART I : GENERAL DUTIES
- 2 PART II : SAFETY–RELATED INFORMATION
- 3 PART III : CHEMICAL DISPOSAL
- 3.1 Some Important Resources for Chemical Disposal
- 3.2 General Comments
- 3.3 Some Specific Concerns
- 3.4 Preparation Instructions for "PREPARATION OF STANDARD SOLUTIONS AND USE OF A SPECTROPHOTOMETER TO MEASURE THE CONCENTRATION OF AN UNKNOWN SOLUTION"
- 3.5 A SIMPLE SEPARATION OF COBALT AND NICKEL SALTS
- 3.6 RECYCLING SILVER WASTE
- 4 Silver (Ag) Metal Ag Metal
PART I : GENERAL DUTIES
The laboratory aide must definitely have a good knowledge of the basic, practical and experimental chemistry beforehand, that is, almost all the experiments which can be carried out in the lab should be known.

Practical Chemistry
Practical Chemistry1


Practical Chemistry2
Practical Chemistry3


Practical Chemistry4
Practical Chemistry5


Experiments
The lab aide must be very well aware of each and every possible practical that can be done in the lab, be it the easiest one to the most complicated one.
Apparatus1
Apparatus2


Apparatus3
Apparatus4


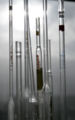
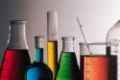
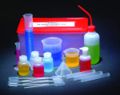
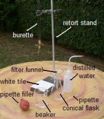
- Common apparatus and basic techniques: all the names of the glasswares, plastic wares, apparatus and pieces of equipment to be used in the lab must be known; their good use, calibration, corresponding errors and maintenance and repair (optional) also is a must.
Salt Separation1

Solvent extraction2


Solution
Solution1


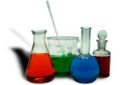
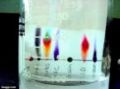
- Salt and Chemical Analysis: all the colours of compounds and solutions, the solubility of all salts, the individual separation of cations and anions, the actions of heat on different solids, and mostly all the necessary and required steps to carry out an analysis and separation must be known.
Titration1

Titration2


- Titrimetric Analysis – quantitative chemical analysis carried out by determining the volume of a solution of accurately known concentration (standard solution) which is required to react quantitatively with a measured volume of a solution of the substance to be determined. The concepts, principles, and procedures of the simple titrations (neutralization, complexation, precipitation, redox), potentiometric titrations, amperometric titrations, spectrophotometric titrations should be known.
Balance
Balance1


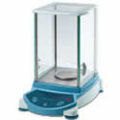
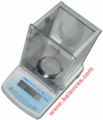
- Gravimetric Analysis – the process of producing and weighing a compound or element in a form as pure as possible after some form of chemical treatment has been carried out on the substance to be examined. Some issues need to be considered when trying to accurately weigh: wet object is heavier than a dry object, a dirty object is heavier than a clean object, fingerprints have weight, and hot items are lighter.
Thermal analysis apparatus

Thermometers


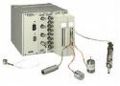
- Thermal Analysis – changes in physical and/or chemical properties of a substance are measured as a function of temperature. Thermogravimetry (TG), differential thermal analysis (DTA), differential scanning calorimetry (DSC), evolved gas analysis (EGA), are some of the thermal analysis which should be known (elective).
Chromatography
Chromatography1


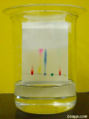
- Chromatography – separation and analysis of mixtures quantitatively and qualitatively. Paper; ion exchange; affinity; thin-layer; gas, liquid; high performance liquid; gel filtration chromatography are those whose principles and procedures which re to be known but not all of these are carried out in labs.
Nuclear Magnetic Resonance Apparatus
Nuclear Magnetic Resonance Apparatus1


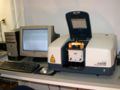
Infrared Apparatus

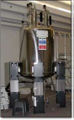
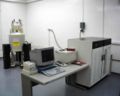
- Spectroscopy – Atomic Absorption Spectroscopy (AAS); Atomic Emission Spectroscopy (AES) : Flame Emission Spectroscopy (FES), Direct Current Plasma (DCP);Molecular electronic spectroscopy; Nuclear Magnetic Spectroscopy (NMR); Infra-Red Spectroscopy (IR) – some forms are very fundamental but some due to lack of apparatus in some labs are not performed.
Preparation and Setup of Demonstrations and Laboratory Experiments
- Demonstrations usually involve a small number of pieces of equipment and/or chemical solutions. If possible, the teacher should supply the lab aide with a sheet listing all materials needed for each demonstration. Adoption of a standardized format for such demonstration sheets is preferable, with one copy for the aide and one for each teacher doing the demonstration. If solutions are required, the instructions should give directions for how much of each solution is required and how to prepare each solution. If a chemical must be prepared fresh rather than being stored from year to year, the instructions should give this information also.
- Where possible, a separate labeled tote tray should be used for each demonstration. Equipment and chemicals for the demonstration should be kept together as much as possible, including “dedicated” beakers, test tubes, etc. Inclusion of an extra copy of the equipment list in the tote tray is optional.
- In cases where there is only one or two pieces of equipment, so that a separate tote tray is not justified, one or more drawers labeled “SPECIAL DEMONSTRATION EQUIPMENT” should be established.
- Because teachers tend to run in at the last minute, grab equipment and fail to return it to its proper place, the problem of equipment return must be solved according to the resources available. Not being able to find needed equipment or solutions is frustrating. Duplication of frequently used demonstration equipment is optimum, but expensive; sign-out systems work as long as equipment is actually signed out; setting aside a place for equipment that teachers are finished with also may be considered.
- Chemistry experiments should likewise have one or more sheets giving clear instructions regarding
a)the solutions needed, and b)the equipment needed
- Many solutions are used in large amounts throughout the year. The chemistry preparation room should routinely stock several litres of each of the following solutions. (At KSS we routinely stock about 2-300 different solutions for “off-the-shelf” use.)
- Acids: 1M H2SO4 , 1M HCl , 0.1M HCl
- Bases: 1M NaOH , 0.1M NaOH , saturated Ca(OH)2 (lime water)
- Salts: saturated NaCl , buffer solutions: pH = 3 to 11
- The following resources should be available in each chemistry preparation room.
- Merck Index
- MSDS sheets for all chemicals in storeroom
MSDS, Material Safety Data Sheet, is a form containing information regarding the physical and chemical properties of a particular substance. It includes the details of the reagents being used - the substance's form and formulae, its physical data (melting point, boiling point, flash point,density, specific gravity, water solubility etc.), reactivity, stability, safe handling and storage and disposal, identification of principle hazards and toxicity, potential health effects, first aid measures, protective equipment (personal and lab users), and spill handling procedures.
- Handbook of Chemistry and Physics
- Safety / disposal manuals
Trying Out New Demonstrations and Experiments
Ideally, teachers should test out new demonstrations and labs themselves, but this task frequently falls on the lab aide. The following points should be considered.
- The aide must be comfortable with the idea of “experimenting”. No hazardous reactions should be carried out. (If the teacher chooses to perform a hazardous demonstration, the responsibility and liability lies solely with the teacher.)
- There must be clear verbal, or preferably, written instructions which detail exactly what is to be done.
- If the aide is not familiar with a chemical, the Merck Index should be consulted to established and known hazardous properties. (The Merck Index is easier to get information from than MSDS sheets.)
- Careful notes must be kept, stating what has been seen or the data that has been obtained. These notes are invaluable when trying to evaluate the results obtained from the demonstration or lab.
- Appropriate safety equipment such as gloves, goggles and fume hoods must be used.
Lab Cleanup, Storage and Equipment Maintenance
Glassware Safety
- Keep glassware away from the edge of the bench top.
- Always clamp reaction flask and suction flask securely to a ring stand to prevent from falling over.
- Check each piece of glassware for hairline or star cracks before using it for prolonged time.
- When doing a distillation, clamp each piece of glassware securely.
- When break of glassware, do not leave it in sink or on the bench top because someone may inadvertently get cut. Wearing thick gloves, use a brush and dustpan to sweep up the broken glass.
- If reaction requires the use of a heating mantle or steam bath, glassware or the clamps used to hold glassware can become hot enough to cause a thermal burn on the skin. Heavy gloves must be worn to prevent this.
- Cuts can be also prevented by wearing thick gloves, especially while washing glassware.
- At the end of the experiment, all work surfaces and equipment must be cleaned (with detergent powder), rinsed, and dried.
- The hands must be washed with soap and water after performing all experiments.
- Glassware should be cleaned using Alconox lab detergent.
- If infrequently–used glassware, such as large flasks, is stored in the open or on top of cabinets or shelves, an aluminum foil “cap” should be made to prevent dust accumulation inside.
- Establish a dependable chemical re-ordering system. Suggestions include:
- keep a clip-board and pen in the chemical store room to write the name of bottles which been emptied or are almost empty.
- keep emptied bottles in a tote tray and record the names of the chemicals on a regular basis before washing off the labels or disposing of the bottles.
- Potassium permanganate solutions deposit a brown stain of manganese dioxide on glassware. Any solution containing iron salts leaves a yellow stain on glassware. Both types of stains can be removed with a little concentrated hydrochloric acid (use a fume hood).
- Bottles containing concentrated hydrochloric acid and concentrated ammonia constantly give off fumes, even when tightly capped. These solutions should be stored as far apart as possible to avoid the formation of a hairy growth of ammonium chloride on the bottle caps.
- After cleaning, glassware is dried on a drying rack or in a drying oven; do not use towels because cloth towels leave lint and paper towels are acidic (pH about 4-5) and contaminate the inside of the glassware.
- When glassware is found to be chipped, either discard the item or set the glassware aside for repair by “fire polishing” (see later).
Inventory Control
- A complete inventory must be established of all chemicals, including:
where the stock bottle is kept
- how much is left
- storage code (general, flammable, health hazard, oxidizing agent, corrosive)
- chemical formula
- purity grade
- alternate names for the chemical
- Bottles of prepared solutions do not have to be included in the inventory.
- An inventory of important and major equipment should also be maintained. This inventory must be updated periodically as new equipment is received and old equipment discarded.
- Inventories must be accurate in the event of a fire or other catastrophic loss so the school board can be made aware of what has to be replaced. (Note that schools in B.C. are NOT insured against fire, etc.)
- When new bottles of chemicals are received, they should be labeled with the date received.
- All stock bottles must have coloured tape attached to indicate the storage code. Bottles should be stored alphabetically in each storage section, although some exceptions will apply to large containers. Every school should have a printout of the storage codes for all chemicals in their possession.
- grey = general
- red = flammable (must be in steel cabinets with safety doors)
- blue = specific health hazard
- yellow = oxidizing agent
- white = corrosive (acids and bases; acids must be stored separately from bases and acids should be stored on the lowest shelves possible in case bottles drop from shelves)
- Special areas may be established for groups of substances that are best stored together. For example, acid–base indicator dyes should be stored as a group and metals should be stored as a group (such as aluminum, lead, cadmium, zinc, iron, tin, etc.)
- Potassium metal can be very dangerous because of a tendency to form explosive peroxides on its surface. Only small quantities of potassium should be kept on hand. To check for the presence of peroxides, mix and shake a few millilitres of the kerosene surrounding the potassium with a few millilitres of 10% potassium iodide solution. If the colourless solution turns a faint yellow, peroxides are present and disposal of the potassium should take place. If the potassium has a yellow coating, this yellow-coated metal can explode on contact with a knife. Disposal of potassium should be done according to the procedure on page 967 of the Flinn disposal manual.
Preparing Chemicals, Solutions and Equipment
a) Personal Safety Considerations when Handling Chemicals
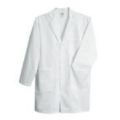
Lab Coat
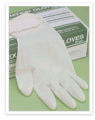
Gloves


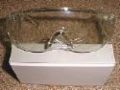
Safety Goggles
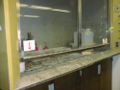
Fume Hood


Personal protection equipment in the teaching laboratory includes safety goggles, gloves, and lab coats and aprons (optional) which MUST be worn EVERYTIME when working in the lab with chemicals and reagents. Respirators are used when handling very toxic chemicals
- Chemical spill protection safety goggles must be flexible fitting, hood ventilation goggles. Contact lens must not be worn in the labs, even under goggles. Soft lenses can be affected by solvent vapors, possibly even fusing to the eye. Contacts also make it difficult to rinse the eyes quickly and properly in case of spill. If any chemical at all gets in the eye, immediately begin rinsing it in the eye wash, holding the eye open.
Eye Wash

- Clothing worn to lab is part of the personal protection equipment. One must be covered from the top of the shoulders to well below the knees. The feet must be covered–sandals are not appropriate in the chemical lab. Very loose fitting garments, such as ties and wide sleeves, as well as long unrestricted hair, dangling jewelry pose a hazard and must be restrained.
- Lab coats should be worn when you handle chemicals. Spills of chemicals on clothing should be washed off immediately. (A relatively harmless spill of a dilute chemical can become highly corrosive as the water in the solution dries and the remaining chemical becomes highly concentrated.) In addition, properly fitting protective gloves should be worn; disposable examination gloves are best.
- A fume hood is frequently the best area for preparing solutions, although numerous obvious exceptions exist. Solutions of ammonia, hydrochloric acid and nitric acid must always be prepared in a fume hood because of the highly toxic fumes given off by the stock bottles.
- Never pick up broken glassware with your hands; use a broom and dustpan instead. (Cuts from chemically–contaminated broken glass can inject chemicals into your flesh and blood stream.)
- Each lab MUST have a specially designated waste bucket for broken glassware. Teachers MUST train students to use the special buckets only for broken glass and custodians must be made aware of the hazard from the glassware. Under NO CIRCUMSTANCES should anyone put broken glass in the general garbage containers. This MUST be a part of student safety training.
- Lab aides should read the accompanying pages copied from the Flinn Scientific “Chemical & Biological Catalog Reference Manual 1999”, pages 907–927.
b) Preparing Solutions
Ideally, the teacher requesting a solution should give detailed instructions for solution preparation (see Section 1. “Preparation and Setup of Demonstrations and Laboratory Experiments”).
Unless instructed otherwise, ALWAYS use distilled water to prepare solutions. Therefore, always have substantial amounts of distilled water on hand — 20 to 50 L is reasonable. To accurately deliver 10 mL or 25 mL portions of liquid, use 10 or 25 mL pipettes. Always use a pipette bulb to suck up the liquid in a pipette — never pipette by mouth! If volumes up to 50 mL are needed, other than 10 mL or 25 mL, use a burette. To deliver volumes in the range 50 mL to 1000 mL, graduated cylinders must be used, although they are not as accurate as pipettes or burettes. The markings on the side of beakers should only be considered as rough approximations.
How precise? For most high school applications, a precision of 1% is usually sufficient so that a high precision balance, good to 0.0001 g, is not required. The teacher requesting a solution should inform you how much precision is needed: if only approximate concentrations are required, do not waste time dispensing a chemical to the nearest 0.01 g and to the nearest 0.01 mL. “Quick and dirty” solutions can have masses and volumes off by 10% without affecting the results obtained by students.
Which solutions can be stored from year to year?
If properly stored in tightly capped bottles, most solutions can be stored from year to year and re–used until the bottle is empty. The only potential problem is the small amount of evaporation that occurs even from tightly–capped bottles, increasing the concentration slightly.
Exceptions to year–to–year storage are ammonia solutions and hydrochloric acid solutions, which are solutions of dissolved gases in water, and solutions of sodium hydroxide or potassium hydroxide. Solutions of ammonia and hydrochloric acid can change in concentration by up to 90% over the course of a year and should probably be prepared fresh just before being used. Potassium and sodium hydroxide tend to get “white floaties” in them which are probably carbonate compounds and compounds resulting from a reaction with the glass container. Small amounts of this white stuff may not be objectionable but the more white stuff present, the less reliable the concentration. In extreme cases, the bottle is so corroded it is impossible to clean.
A SPECIAL NOTE ABOUT HYDRATES: Some substances, such as sodium carbonate, Na2CO3 , are available in several different forms.
Example: Na2CO3 = anhydrous sodium carbonate, molecular weight (“MW”) = 105.99
- (“anhydrous” means the formula does not have water, H2O, attached)
- Na2CO3•H2O = sodium carbonate monohydrate, molecular weight = 124.00
- Na2CO3•10H2O = sodium carbonate decahydrate, molecular weight = 286.14
Therefore, when taking a chemical off the shelf always check to see that the compound has the correct chemical formula.
If you have one hydrate form of a chemical, but not the form required by some printed recipe, use the following procedure.
Example: Assume you calculate that you need 11.15 g of MnSO4•4H2O (MW = 223.06) to make up 500 mL of 0.1 M manganese(II) sulphate, but only have a bottle of MnSO4•7H2O (MW = 277.10) available.

How to Weigh Out Dry Chemicals
In a chemistry lab, the mass of an object is determined by weighing with a balance. Some issues need to be considered when trying to accurately weigh an object: a wet object is heavier than a dry object; a dirty object is heavier than a clean object; fingerprints have weight; hot items are lighter.
The electronic balance is also a factor in obtaining an accurate measurement, such that: balances should not be moved; nothing but glass or metal objects should ever be placed on the surface of a balance; the balance should be cleaned after use.
First, either use a plastic weighing boat or weigh directly into a beaker. When pouring out of a bottle into a weighing boat, hold the bottle such that the mouth is over the boat, with the mouth tilted down and gently roll the bottle back and forth so that a controlled flow of chemical goes into the boat. When you are within a gram or so of the required amount, get some of the chemical from the bottle using a scoopula or spatula and gently tap the scoopula handle with your free hand. The chemical will enter the weighing boat very slowly — sometimes a grain at a time — to allow you to get the exact mass without “overshooting” and having to remove excess chemical. Once the exact mass is obtained, wash it from the weighing boat into the receiving flask or beaker using a squirt bottle.
i)Solutions made from solid chemicals
- Look on the bottle and find the molecular weight. For example, the molecular weight of sodium chloride is 58.44.
- Decide on the total volume of solution needed. This is normally one of 50 mL, 100 mL, 250 mL, 500 mL, 1000 mL (1 L), or a multiple of 1 L. If some “odd–ball amount is required, round the amount needed UP to one of the previously–listed volumes.
- Decide on the concentration needed. This will normally be given as something like 0.1 M, 1 M, 0.025 M and is referred to as the “molar concentration” or “molarity”. A solution labeled “0.5 M” is pronounced “0.5 molar”. (If the concentration is given as a percentage, see below.)
- Calculate the mass of chemical to be weighed out as follows.
Example: The mass of sodium chloride needed to prepare 500 mL of 0.25 M sodium chloride is found as follows.
- Since 1000 mL = 1L then 500 mL = 0.5L
- Therefore, mass of sodium chloride needed = 0.5 x 0.25 x 58.44 = 7.305g
- (This value can be rounded off to 7.31 g unless you know that you require very high precision AND you have a high precision balance that reads to 0.0001 g.)
- Finally, finish the preparation of the solution as follows. Place the dry chemical into a 500 mL volumetric flask (because you wanted to prepare 500 mL of solution), add distilled water until the flask is about half–full, securely stopper or cap the flask and shake until the solid is dissolved. Next, remove the stopper or cap, being careful not to lose any liquid, and fill the flask until the liquid level is a few centimetres below the line on the neck. (At this point, I normally re–stopper the flask and shake again to mix the solution well before completing the next step.) If the flask has become warm as a result of the chemical dissolving in water, let the flask cool to room temperature or cool the flask under cold running water. Finally, use a dropper or squeeze bottle to add exactly enough distilled water to bring the meniscus of the water (the bottom of the curved water level) to the line on the neck of the flask. Stopper and shake the resulting solution.
SAFETY NOTE: Some chemicals are notorious for the fact that they produce a massive amount of heat when dissolved; in fact, so much heat that preparing these solutions presents serious potential hazards.
- sodium hydroxide and potassium hydroxide: when dissolving these compounds, the water gets very hot and can cause the air in the flask to get so hot it expands and blows the top off the flask. It is strongly urged that you dissolve these chemicals by filling the flask half–full of distilled water, add the solid and gently swirl the flask with no stopper or cap. If very high concentrations (over 2 M) are required, consider dissolving the solid one portion at a time. In addition, you may find it advisable to cool the flask under cold running water. When dissolved and cooled, the solution can be diluted without any further hazard.
- sulphuric acid: This liquid can cause water to boil and spurt out of the flask into your face. It is strongly urged that you cool the flask in cold or even ice water, fill the flask about half full of water and add the concentrated sulphuric acid a few millilitres at a time with constant swirling and cooling. UNDER NO CIRCUMSTANCES SHOULD YOU ADD WATER DIRECTLY TO CONCENTRATED SULPHURIC ACID; THE SOLUTION GETS SO HOT THAT HOT ACID SPRAYS OUT OF THE FLASK! As with sodium hydroxide and potassium hydroxide, no cap or stopper should be on the flask. When dissolved and cooled, the solution can be diluted without any further hazard, although the solution may get warm.
ADDITIONAL NOTE: Some chemicals, such as potassium hydroxide and sodium hydroxide, are usually much less than 100% pure. For many applications, this impurity may not be important, but if the concentration is important you will have to “correct” the calculated mass to be used in order to allow for the impurities. Such a situation exists every time you have to prepare a solution to be used for a titration lab.
The correction process is as shown below.

Example: You are required to prepare 2 L of 0.100 M NaOH. The label on the bottle tells you the NaOH “Minimum assay” is 97% pure.
The calculated mass = 2 x 0.100 x 40.00 (MW) = 8.00 g

- To Make a Solution Whose Concentration is Expressed as a Percentage

Example: To prepare 250 mL of 5% sodium chloride –
- mass of sodium chloride needed = 5% of 250 g = (5/100) * 250g = 12.5g
- Complete making the solution as usual (dilute to exactly 250 mL).
ii) Solutions made from liquid chemicals or other solutions
To prepare solutions starting with liquids, the instructions will require a particular volume of the starting liquid to be diluted to a required volume. Use either the information on pages 941–2 of the Flinn catalog or the accompanying sheet: “Dilution of Acids and Ammonia”.
- Example:To prepare 5 L of 0.1 M hydrochloric acid, the tables indicate you should dilute 8.6 mL to a total volume of 1 L. In order to prepare 5 L, you should prepare two–2 L portions of solution by diluting 17.2 mL each time, and prepare a further 1 L portion by diluting 8.6 mL to 1 L. Finally, combine all the solutions in a container that will hold at least 5 L and stir well to make sure the mixture has a uniform concentration.
c)Miscellaneous
- Neutralizing Solution: The chemistry prep area and all student lab areas should have neutralizing solution available. The solution is 0.1 M in both acetic acid and acetic acid and is made by diluting 13.6 g of sodium acetate trihydrate, NaC2H3O2•3H2O,and 5.7 mL of glacial acetic acid to 1 L.Typically, each lab should have two 1 L containers of neutralizing solution and a 4 L reserve in the chemistry prep area.
- To cut glass tubing or glass rod: Use a good file to make a fairly deep scratch on the glass at the point where a break is desired. Wet the crack with a drop of water and grasp the glass in both hands such that the fingers on each hand circle the glass on either side of the scratch. Press one thumb on each side of the scratch so that the fingernails are directly on the scratch. Quickly press on the scratch with your fingernails while simultaneously moving your wrists outward so as to pull the two halves of the glass apart. If done correctly, the glass will part perfectly and look as if it was cut and polished. If a small “blade” of glass is connected to one piece where the pieces split apart, use a file to remove this razor–sharp piece. If you are nervous about this procedure, wrap the glass in a cloth before attempting to snap the tube. CAUTION: Do not attempt to break any tube or rod bigger than 10 mm diameter. Larger sizes require either a carbide glass cutter or a glass–blowing torch.
- To fire polish a pyrex glass tube or rod, you will need a very hot flame, such as that provided by a Meker burner (or a glass torch). Soda glass can be fire polished with a hot bunsen burner flame. Hold the glass in the flame until the glass melts slightly, rounding the sharp edges. This method can also be used to fire polish a broken lip on a flask or beaker, but in this case a Meker burner will definitely be required. Also, the neck of the beaker or flask must be heated slowly to prevent the glass from cracking.
- An alternative to fire polishing is to use a file to remove sharp edges.
- To distinguish between pyrex glass rod/tube versus soda glass, look at a cut end. If the glass is dark green, it is soda glass; if the glass is pale green, it is pyrex. An additional test is to place the end of the glass in baby oil. If the glass appears to “disappear”, the glass is pyrex whereas if the glass is still clearly visible it is soda glass. Soda glass melts at lower temperatures by cracks easily if heated suddenly, whereas pyrex glass melts at higher temperatures but resists cracking when heated.
- Be extremely careful when handling 30% hydrogen peroxide (or more concentrated solutions). If concentrated hydrogen peroxide contacts your skin it will cause an extremely painful burn.
- All chemical burns should be considered serious but if sodium hydroxide or potassium hydroxide contacts your skin you must use neutralizing solution on the area. These chemicals get underneath the skin and can cause very painful burns that cannot be helped by simple washing with water.
- Sodium hydroxide pellets are very “hygroscopic”, meaning they rapidly absorb water from the atmosphere. As a result, you have to weigh out sodium hydroxide as fast as possible to avoid having the pellets gain weight from absorbed water. In addition, bottles must be kept tightly closed to slow down the absorption of water when on the shelf.
PART II : SAFETY–RELATED INFORMATION
General Comments
- Personal responsibility is indispensable in the laboratory.
- All written and verbal instructions must be duly followed.
- Food, drink beverages, or chew gum are strictly prohibited in the laboratory.

Safe Person

- Your safety is a personal responsibility and a personal commitment.
- If in doubt as to the safety of some aspect of your job, discuss your concerns with the teacher, administration or WCB. Unsafe conditions should immediately be brought to the attention of the school’s safety committee.
- Copies of safety booklets or manuals MUST be available in the chemistry prep area at all times. Some recommended safety manuals are:
a)Laboratory Health and Safety, a small blue booklet published by the WCB. b)Hazardous Chemicals: A Manual for Schools and Colleges, a thick yellow book. It contains the hazards, handling, storage, disposal and spillage information on many chemicals, and first aid treatment on exposure to the chemicals.
First Aid and Accidents
The hazards of each chemical in use must be known so that what level of caution to use when handling it can be deduced.
Flammable Chemicals (examples: diethyl ether, acetone, hexanes, ethanol, methanol; in case of fire:
- Everyone should turn off burners and prepare to help if needed.
- If clothes catch fire, immediately drop to the floor and roll to smother the flames and call for help if required.
- If a compound or solvent catches on fire, quickly cover the flames with a piece of glassware
- If it is feasible, use a fire extinguisher to put the fire out.
- Do not put water on an organic chemical fire because it will only spread the fire.
- If the fire is large, do not take chances: evacuate the lab and the building.
- If dangerous fire, the fire alarm in the hallway must be pulled.
- If the fire alarm sounds for any reason, leave the room immediately and exit the building.
Volatile Chemicals (examples: hexanes, acetone, methylene chloride, diethyl ether):
- If they are accidentally inhaled, they can cause irritation of the respiratory tract, intoxication, drowsiness, nausea, or even central nervous system depression.
Spill of Chemical on someone:
- Immediately rinse the affected area with lots of water.
- Use soap (optional), but never try to "treat" the spill with another solvent or chemical
Hazards of Corrosives (examples: hydrochloric acid, sulfuric acid, phosphoric acid, nitric acid, sodium hydroxide:
- If spilled on skin, they cause a chemical burn. They are very harmful to the eyes. If big whiff of vapors breathed, a burning in your nasal and respiratory passages is felt.
- Corrosives must be handled with great care so as not to spill them or inhale their vapors.
- A job requirement is that all lab aides be Industrial First Aid certified.
- Every lab prep area should have an adequate first aid kit.
- You should be familiar with the location and usage of the eyewash fountain, the safety shower, the fire blanket and all fire extinguishers in the lab area.
- Broken glass must be cleaned up immediately. Spilled chemicals, both liquid and solid, should be cleaned up as directed by Hazardous Chemicals: A Manual for Schools and Colleges. Although most chemicals can be cleaned up with water, a few such as sodium metal and thionyl chloride can explode or release hazardous gases when exposed to water.
- If large amounts of a concentrated liquid chemical, such as acids or solvents are spilled, special “spill control” pillows should be used to absorb and stabilize the chemical. If a 4 L bottle of acid or solvent breaks, such a spill must be considered as an emergency and containment must take place as soon as possible.
- Carrying 4 L bottles of dangerous chemicals between labs is hazardous. Special “Acid/Solvent Bottle Carriers” are available from Northwest Scientific (cat # 17–5160B) and should be used for this purpose.
- Mercury cleanup takes special cleanup and equipment. The use of “Merconvap” and “Hg Absorb” is recommended.
- If a fire occurs, do not attempt to put it out unless it is obvious that it can be put out quickly and safety. A fire in a beaker can be put out quickly by inverting a larger beaker over top of the flaming beaker. Do not use a fire extinguisher on a beaker containing burning solvent; the blast from the fire extinguisher can throw burning liquid all over the lab without putting out the flames. If the fire cannot be put out quickly and safely, evacuating and immediately pulling the fire alarm is generally the safest thing to do. Chemical solvents can explode if their containers are heated by flames.
Additional Comments on the Safe Usage of Chemicals and Equipment
- ALWAYS ACID must be SLOWLY added TO WATER, with slow stirring and swirling, being careful of the heat produced, particularly with sulfuric acid.
- Unused chemicals must never be returned to their original containers.
- Mouth suction must never be used to fill a pipette, use a pipette bulb or pipette filler.
- Flammable liquids must never be dispensed anywhere near an open flame or source of heat.
- Chipped or cracked glassware must be avoided to use and dirty glassware also. Hot glassware must not be immersed in cold water; it may shatter.
- A lit burner must never be left unattended; anything that is being heated or is visibly reacting must not be unattended. The burner or hot plate must be turned off when not in use.
- Heated metals, glass, and ceramics remain very hot for a long time. They should be set aside to cool on a trivet and then picked up with caution. Tongs or heat-protective gloves must be used, if necessary. The degree of hotness of an object is determined by bringing the back of the hand close to it prior to grasping it.
- It should be obvious that eating or drinking in a laboratory is hazardous if there is any chance that the food or drink can be contaminated by contact with lab benches, chemicals or equipment. Food should never be stored in any refrigerator used to contain chemicals or biological supplies.
- NEVER taste a chemical; many chemicals are very poisonous and some can be absorbed directly into the blood stream through the tissues of the mouth even if the chemical is not swallowed. (Note that liquid dimethyl sulfoxide is absorbed directly into the bloodstream through the skin.)
- Be careful not to inhale the fumes being given off by concentrated chemicals. Undiluted hydrochloric acid, nitric acid and ammonia can cause severe lung damage if their vapours are inhaled. During the process of diluting these chemicals, large amounts of fumes are given off.
- If in doubt as to the safety of a chemical, wear gloves when handling the chemical. Caustic chemicals such as sodium hydroxide and potassium hydroxide feel slippery because they turn the skin to SOAP!
- Whenever handling hazardous solutions, you should always wear safety goggles. You may have noticed that occasionally a droplet of liquid sprays out when you pour a liquid. If a single droplet of 1% sodium hydroxide were to fly out of a solution into your unprotected eye, you would be blinded in seconds.
PART III : CHEMICAL DISPOSAL
All the chemicals' and wastes' (present in the lab) hazards and warning signs and lables must be known and present. Some of the main hazard signs are shown below:
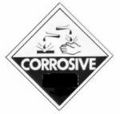
Corrosive
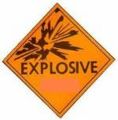
Explosive


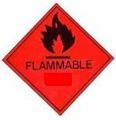
Flammable
Harmful


Inflammable
Irritant


Oxidising
Toxic


Some Important Resources for Chemical Disposal
a) Hazardous Chemicals: A Manual for Schools and Colleges
b) Pages 960 – 995 of Flinn Scientific “Chemical & Biological Catalog Reference Manual 1999”.
General Comments
Conversations with personnel from the Ministry of the Environment reveal that many chemicals can be disposed of by simply flushing them down the sink with copious amounts of water. The toxicity and amounts of chemicals used in high school labs is not a serious concern in many cases, and does not justify extensive and expensive procedures for disposal.
The school district has made arrangements for once–a–year collection of unwanted or waste chemicals, provided that the chemicals are labeled with a detailed list of the contents. Chemicals to be disposed of in this manner should be set aside until the end of the year.
Some Specific Concerns
- Disposal of used chemicals is a time consuming process. If disposal poses a special problem that the teacher is not aware of, the lab aid should talk to the teacher and bring forth the concern. Many demonstrations and labs can be done with alternate chemicals that do not pose serious disposal problems.
- Every chemistry prep area and chemistry lab is supposed to have a limestone neutralization pit through which all waste water flows. This rocky material (theoretically) neutralizes any acids flushed down the sink.
- Some physics labs use radioactive sources that contain extremely low levels of radioactivity. Conversations with Ministry of the Environment personnel reveal that the hazard from these radioactive sources is so low that they recommend disposal with the general garbage, where it will end up in a landfill.
- Many science teachers love to create large carbon cylinders by reacting concentrated sulphuric acid with sugar. The resulting chunk of carbon is extremely porous and completely saturated with sulphuric acid. Dispose of the carbon by breaking it into small chunks (thick rubber gloves!) and soaking in a tub or tote tray full of water. After three or four washings, add either baking soda or sodium carbonate (washing soda) to neutralize any residual acid. When the “fizzing” stops and the water tests slightly basic to either litmus or universal indicator paper, the water can be drained and the carbon chunks thrown into the garbage. CAUTION! If the carbon cylinder is disposed of without adequate treatment, your custodian could get severe acid burns.
- All silver waste can be recycled using the procedures outlined in the attached sheet “Recycling Silver Waste”.
- If the teacher is using “microscale” labs, involving plastic “well plates”, no special disposal methods have to be used. Just wash everything down the sink. The amounts of chemicals used are so small that the few micrograms of even toxic chemicals used pose no hazard when diluted.
Routine and Personal Checklist for Hazardous Waste Generators: (VERY IMPORTANT AND OBLIGATORY TO WORK OUT!!!)
ALL hazardous waste containers must comply with ALL of the following requirements at ALL TIMES.
- Is the container sound? (No cracks, rust or deterioration permitted).
- Is the container compatible with the waste? (No metal cans, in particular).
- Are the contents of the container compatible with each other?
- Is the container properly labeled, including the words Hazardous Waste and a date?
- Are the contents of the container clearly listed?
- Is container closed with a properly fitting cap? (Not left with a funnel inserted.)
- Is the waste container located in the lab (not in a hallway or storeroom)?
- Is there less than 55 gallons of waste in the laboratory?
- Is the waste located away from floor drains or sinks?
- If the container is full, it is being taken to the stockroom for disposal?
| | ||||||||||
| Chemical | % Present | Conc. M | 0.1 M | 0.25 M | 0.5 M | 1.0 M | 2.0 M | 3.0 M | 6.0 M | 12.0 M |
|---|---|---|---|---|---|---|---|---|---|---|
| HCl | 37 | 11.7 | 8.6 | 21.4 | 42.7 | 85.5 | 170.9 | 256.4 | 512.8 | — |
| HNO3 | 70 | 15.6 | 6.4 | 16.0 | 32.1 | 64.1 | 128.2 | 192.3 | 384.6 | 769.2 |
| H2SO4 | 96 | 18.0 | 5.6 | 13.9 | 27.8 | 55.6 | 111.1 | 166.7 | 333.3 | 666.7 |
| CH3COOH | 100 | 17.6 | 5.7 | 14.2 | 28.4 | 56.8 | 113.6 | 170.5 | 340.9 | 681.8 |
| NH3 (NH4OH) | 28 | 15.1 | 6.6 | 16.6 | 33.1 | 66.2 | 132.5 | 397.4 | 794.8 | — |
| | |||||||||||
| Acid | Conc M | 1000 mL | 800 mL | 750 mL | 600 mL | 500 mL | 400 mL | 300 mL | 250 mL | 200 mL | 150 mL |
|---|---|---|---|---|---|---|---|---|---|---|---|
| HCl | 6.0 | 512.8 | 410.2 | 374.6 | 307.7 | 256.4 | 205.1 | 153.8 | 128.2 | 102.6 | 76.9 |
| HNO3 | 6.0 | 384.6 | 307.7 | 288.5 | 230.8 | 192.3 | 153.8 | 115.4 | 96.2 | 76.9 | 57.7 |
| CH3COOH | 6.0 | 340.9 | 272.7 | 255.7 | 204.5 | 170.5 | 136.4 | 102.3 | 85.2 | 68.2 | 51.1 |
| H2SO4 | 3.0 * | 166.7 | 133.4 | 125.0 | 100.1 | 83.4 | 66.7 | 50.0 | 41.7 | 33.3 | 25.0 |
- 3.0 M H2SO4 = 6.0 M H+(aq)
Preparation Instructions for "PREPARATION OF STANDARD SOLUTIONS AND USE OF A SPECTROPHOTOMETER TO MEASURE THE CONCENTRATION OF AN UNKNOWN SOLUTION"
Chemicals required for 1 class of 24 students:
- 50 g Copper sulphate (fine reagent grade crystals) in a beaker.
- 4 L of 1% nitric acid (dilute 20 mL concentrated nitric acid to 2 L)
Unknown solutions:
NOTE: Try to get as close as possible to the masses mentioned, but record the exact masses used.
- Solution A = 3.125 g copper sulphate diluted to exactly 250 mL
- Solution B = 6.875 g copper sulphate diluted to exactly 250 mL
- Solution C = 9.375 g copper sulphate diluted to exactly 250 mL
- Solution D = 10.625 g copper sulphate diluted to exactly 250 mL
- Solution E = 5.625 g copper sulphate diluted to exactly 250 mL
- Solution F = 11.875 g copper sulphate diluted to exactly 250 mL
- Solution G = 4.375 g copper sulphate diluted to exactly 250 mL
- Solution H = 8.125 g copper sulphate diluted to exactly 250 mL
Apparatus needed:
- 12 volumetric flasks with stoppers (100 mL)
- 8 wash bottles filled with 1% nitric acid
- dropping pipettes
- Spectrophotometer
- Cuvettes
- stoppers for cuvettes
- Kim Wipes
- weighing boats
A SIMPLE SEPARATION OF COBALT AND NICKEL SALTS
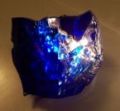
Raw Cobalt Metal

Cobalt Pebbles


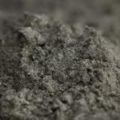
Nickel Metal Powder
Nickel Coin


CODE NAME
- Unit III: Ion separation
EQUIPMENT
- 250 mL separatory funnel
- ring and stand
- 2 – 25 mL graduated cylinders
- 100 mL graduated cylinder
CHEMICALS
- 100 mL of 2–butanone (methyl ethyl ketone)
- 2 vials containing 0.6–0.7 g potassium thiocyanate, KSCN
- 100 mL 1% CoCl2(1.0 g CoCl2•6H2 O / 100 mL)
- 100 mL 4% NiCl2 (4.0 g NiCl2•6H2O / 100 mL)
|
PROCEDURE |
RECYCLING SILVER WASTE
-

Silver (Ag) Metal
-
Ag Metal
Silver (Ag) Metal
Ag Metal
Silver (Ag) Metal
Ag Metal


Note: AgNO3 stains fingers, fingernails and clothing a dark brown colour. Always wear protective gloves when handling silver nitrate! If you get a silver nitrate stain, immediately rub the affected area with a paste of NaI crystals.
A. Recycling Silver Metal
(This method has been used successfully to recycle between 10 g and 1 kg amounts of silver metal into silver nitrate having a purity of over 99.8%.)
Collect and save the waste silver metal until at least 10–25 g has accumulated; the more the better. In a fume hood, dissolve the silver metal in the minimum amount of concentrated nitric acid possible. If large amounts of silver are used, a colourless mass of thin rhombic silver nitrate crystals may accumulate and bring the reaction to a premature halt. In this case, add just enough water to dissolve the crystals. Extra nitric acid may then be required. Note that too much silver nitrate hampers the formation of good silver nitrate crystals and produces a white paste of crystals that absorbs impurities and lowers the quality of the product. When the reaction has dissolved all the silver, dilute the resulting mixture with enough distilled water to increase the volume by about 50%. Vacuum filter the resulting solution to eliminate any insoluble impurities. Collect the filtrate. Wash the filter flask with a little water to get all the silver out and combine the wash water with the filtrate. Note the volume of the combined filtrate and boil the solution down to about one half the original volume. Let the solution slowly cool to room temperature and then cool in ice or the freezing compartment of a refrigerator for about 15 minutes. Collect the first crop of beautiful, colourless rhombic plates, using vacuum filtration. Wash the crystals with a few millilitres of ice–cold distilled water. (Care: silver nitrate is extremely soluble in water.) Save the crystals, collect the filtrate and boil the liquid down to about 75% of the original volume, let cool to room temperature and then cool to ice temperature. Collect the crystals and repeat the process (evaporate to 75% volume) to collect a third crop of crystals. At this point the impurities in solution are usually too concentrated, and acidic, to risk further collection of silver nitrate crystals. Because the solution is so acidic, reclaim the remaining silver ions by diluting 10–fold with water and bring the silver out of solution by reaction with copper wire. Save the silver metal collected for subsequent recycling. Powder the silver nitrate crystals in a mortar and pestle — care: use gloves and avoid scattering the fine powder over the work surface. Always wash all containers and work areas thoroughly after processing silver.
B. Recycling Silver Chloride
(This method has been used successfully to recover Ag(s) from between 10 g and 1 kg of waste AgCl.)
Fresh silver chloride works best for this procedure, but dried and “aged” silver chloride also works with a bit more effort. In a fume hood, place the silver nitrate into a large beaker and add about 3 times the volume of concentrated ammonia. Heat the beaker on a hot plate until the maximum amount of silver chloride has dissolved. If heated to boiling, some product may deposit on the sides of the beaker; a little product is OK but don’t heat the solution so much that it “scums over”. With fresh silver chloride, almost all the solid will dissolve; with “aged” silver chloride as little as 25–30% may dissolve. Pour off the liquid into a separate beaker and to the remaining solid add three times the volume of ammonia. The liquid that was poured off will probably “scum over”; this is normal. Again, heat the remaining solid (and ammonia) until as much as possible has dissolved and repeat the procedure until all, or almost all, the solid has dissolved. Discard any small amount of “stubborn” undissolved solid. Dissolve about 5 g of ascorbic acid in water. The volume of water is not critical; get the cheapest ascorbic acid possible – try health food stores or Northwest Scientific. Stir the ascorbic acid solution into the ammoniacal silver solution. A yellowish–brownish–grey precipitate of silver metal deposits. Dissolve another 5 g of ascorbic acid in water. Let the silver solution settle for a minute or so and add a few drops of the silver solution to the ascorbic acid solution. If no additional precipitate forms, all the silver has been deposited. If additional precipitate is formed, add the ascorbic acid solution to the silver solution and repeat the procedure of preparing extra ascorbic acid, and testing the silver solution. When finished, filter off the silver metal and save for eventual recycling to silver nitrate. If the actual moles of silver is known, you should count on one mole of ascorbic acid for every two moles of silver ion.