VirtualMV/Internet and Web(1)/Activity/Multimedia/graphics and images
| Internet and Web(1) | ||
|---|---|---|
| Multimedia | graphics and images | Connected media | Audio | Video | |
Learning objectives - Web graphics
- to add graphics in
- the web page
- the background
- to understand the different graphic web formats and when to use them
- to understand where to source graphics for you web site, and realise copyright issues apply.
Download sample graphics for this page by going to graphics.htm
In a web page
Create the following html file: graphic.htm
<html>
<head>
<title>**’s graphics’ page</title>
</head>
<body>
<h1>**’s graphics</h1>
<h2>Fern</h2>
<img src = "mmedia/b_fern.gif" alt="fern" title="fern" width="42" height = "40" />
<h2>Home</h2>
<a href = "index.html"><img src = "mmedia/b_home.gif" alt="home" title="home" width="16" height = "16" /></a>
</body>
</html>
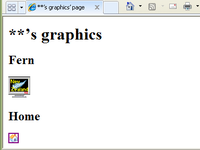
Save then ... Copy the graphics below (by right clicking and putting into a mmedia folder in the same folder as the html web page), then ... Viewing in the web browser this should look something like;
Example graphic.htm
Note that the home button is clickable, and has a border by default.
The img tag
The syntax for adding a graphic to a page is:
<img src = "image filename" alt="fern" width="42" height = "40" .. other container tags>where:
- img is the tag, and stands for image
- src is an attribute, standing for source
- "Image filename" is the location and filename of the image
- alt="fern", will display the image name before it is loaded and will show if the user has graphic display turned off. It is also considered an essential accessibility feature for partially sighted surfers who are using readers to view their web pages.
The alt tag often serves as a tooltip in some web browsers (like Internet Explorer). Unfortunately this is not a W3C standard so Firefox requires you to include the title attribute if you want a tooltip (just repeat the alt tag contents for the title. - width=42 height=40 : Makes for quicker loading of the graphic and should always be used. This is the size of the graphic. Generally the height amd width should be the actual height and width of the graphic. Distortion will occur if you shrink or enlarge the graphic using the height and width attributes. If an image needs to be made smaller it is best to do this in your drawing program first. An exception to this is if you intend for the page to be printed on hardcopy. Enlarging a small image will cause pixelation (blockiness). Both Frontpage and Dreamweaver allow for image resizing (or resampling), however always work with a backup as the original is often permenanty resized.
- border=1 : border values can be = 0,1,2,3,4 etc
Positioning an image
To align an image to the right use the float style, for example:
<img src = "image filename" alt="fern" style="float: right" />..or a fuller example shows some additional style features
<html>
<head>
<title>Positioning images</title>
</head>
<body>
<h1>Positioning images</h1>
<h2>Fern</h2>
<img src = "mmedia/b_fern.gif" alt="fern" title="fern"
  style="float:left;width:42px;height:40px;margin:5px" />
<p>This text is on the right of the image<br />
and so is this</p>
<div style="clear:both"></div>
<p>The floats are cleared and the text flow continues...</p>
</body>
</html>
where
- float:left = images can be floated left. You can make several float next to each other
- margin:5px = makes sure there is some white space around the image
- clear:both = stops the floating and lets the text flow normally.
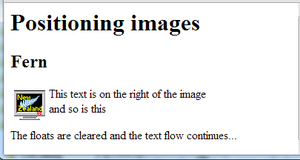
and it should look something like
Note: The style is usually put into a class in a style sheet, and will be covered later under Cascading Style Sheets (CSS).
Hypergraphic
Using the <a href> tag, words can be used as hyperlinks. If we use this tag and then have the graphic as the link instead of the word, we have a visual link to another page using a graphic instead of a word or phrase. The original link syntax is :
<a href="link.htm">next page</a>
The syntax for add a graphic to the page is
<img src="b_fern.gif" />We will replace the text next page with the a graphic. We will use the fern graphic. The result is
<a href="link.htm"><img src="b_fern.gif" /></a>The graphic is now the link. By default images that are links have a border, although you can remove it if you want by using the attribute border=0. e.g.
<img src="b_fern.gif" border="0" />Using folders to aid organisation
Before we can use graphics in a web page we must have them on our file system. Unlike programs such as MS-Word, web pages link to graphics rather than embed them into the web page. If we use a program such as Corel Photopaint, PaintShop Pro or Windows Paint and create a gif or jpg file to create an original graphic, this graphic needs to be saved in a folder accessible to the html web page. Although it is easy to have the html file and the graphics in the same folder, as the number of pages increases the folder becomes a jumble of html files and multimedia files. Therefore it is suggested that the multimedia files be kept in their own folder under the folder where the html files are stored. In the example above I have used a directory called mmedia to store the multimedia files.
Adding a caption
HTML5 introduced the <figure> tag to improve the connection between the image and its caption.
<figure>
<img src="b_fern.gif" alt="Fern image" width="50" height="40">
<figcaption>Figure 1: Fern image</figcaption></figure>
Capturing graphics files
Graphics are easily captured from existing web pages. Obviously, copyright and ownership issues need to be considered.
- Capturing graphics using Internet Explorer
- right click on the graphic,
- select "Save Picture As", and
- use the Windows dialog box to save the file.
- Capturing images displayed on the computers screen.
- For images /or parts of images that are displayed on the screen you can also use the [Print Screen] button or [Alt]+[Print Screen] if you only want to capture the active window.
- This places the captured area in the windows clipboard.
- Open up your image editor (eg. PaintShop Pro) and paste the image from the clipboard (usually [Control]+[C]).
- Manipulate the image and save as a gif or jpeg.
Adding a background picture
A background picture can add another dimension to your page. The loading of your page will be slower so we need to keep the image as small as possible. If the image is smaller than the dimensions of the page, it will be tiled. i.e. repeated to fill up the screen. Add background = "mmedia/woodgrn1.jpg" to the body tag, (make sure you copy woodgrn1.jpg to the mmedia folder.
<html>
<head>
<title>**’s graphics’ page</title>
</head>
<body style="background-image: url('mmedia/woodgrn1.jpg')">
<h1>**’s graphics</h1>
<h2>Fern</h2>
<img src = "mmedia/b_fern.gif" alt="fern" width="42" height = "40" />
<h2>Home</h2>
<a href = "index.html"><img src = "mmedia/b_home.gif" alt="home" width="25" height = "22" /></a>
</body>
</html>
Example graphicbak.htm
If you want to control how a background image is displayed refer to Gradient background
 References
|
virtualMV | Superquick wiki guide | Please give me some feedback |
VirtualMV/Internet and Web(1)/Activity/Multimedia/graphics and images. (2025). In WikiEducator/VirtualMV wiki. Retrieved February 18, 2025, from http:https://wikieducator.org/VirtualMV/Internet_and_Web(1)/Activity/Multimedia/graphics_and_images (zotero)
|

