Using Windows Live/Using Spaces
TECHINICAL TIP - If your mouse has a scroll-wheel, try clicking this when you point at the next link you want to open. This has the same effect as right clicking and opening in a new tab.
Contents
What is Spaces?
Have a quick look at Microsoft's promotional video explaining what Spaces is all about.
Confused? If you are, then you probably don't have a Facebook or Bebo account. Windows Live is essentially Microsoft's attempt to take control of the social networking market. In spaces they offer a range of services that are similar to other social networking sites.
We plan to use it in the course, so it will pay you to get somewhat familiar with the basic functions.
Starting back at the homepage, click on Spaces.
This will take you to your Spaces home page. If anything major is happening with the people that you know on Windows Live, you will be informed of it here.
Now to go to Your Space which link do you think you should click on?
Customizing Your Space
Setting your web address
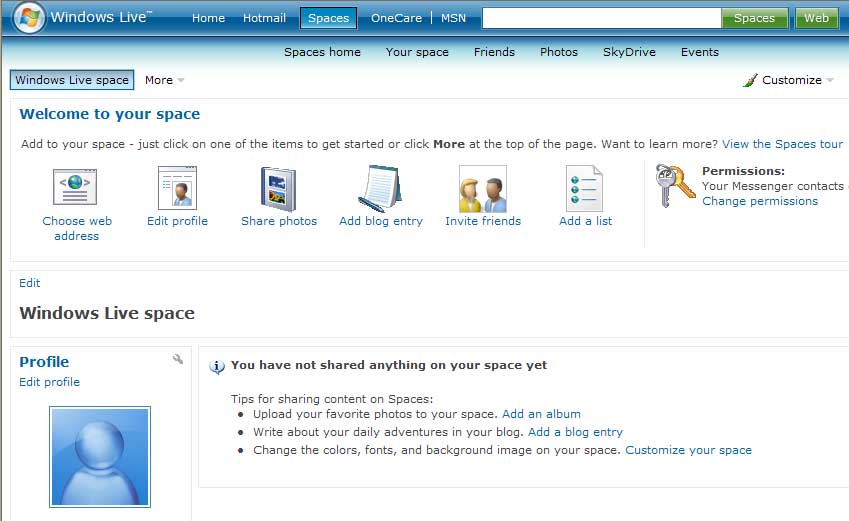
The first thing to do once you've found your way to Your Space is to set up your web address. Everyone's space has a URL assigned to it. Click on the button on the left called Choose web address. You will then be prompted to build a URL for your space. I recommend that you use something similar to your name for the purposes of this course.
Now click on Edit Profile
Updating your profile
Filling in your profile is pretty much like filling in a form.
Make sure that you click on the photo space & upload a representation of yourself to make it easier for your classmates to identify you.
Don't forget to save your changes before you move on.
Once you've done this, have a look at the space underneath Profile. You should see two other areas that you might like to fill in - Messenger appearance, and Contact Info.
Further Customisation
To customise the look of your space, click on Customize and select Change the theme. Select which ever theme you like. This can be changed again at any time.
Now do the same thing, but select Change the layout. Have a look at the options and decide if you would like to change the layout of your space or not.
You might have noticed some other options there. Add modules can be used to add different types of functionality to your page. If you have a look at the options, you can see that there are many different options here. Scroll down to Photos, music & video - Photos and click on Add. You have now added a photo module to your profile.
If you have a look on your space you should find a module titled Photos. Click on Add Album. You will then be prompted to upload photos from your computer. Choose some photos that you would like to show your classmates so that they can get a better picture of who you are in your life. Upload them to the web with a suitable album name. Remember to save and close.
If you would like to move any of the current modules that you have on your space, you need to click on Edit on the Title Bar (probably titled "My space" unless you've changed it). Once you've done this, you will be able to click and drag any of the modules to the place on the screen that you want it. Remember to save your changes before you move on.
Adding Friends
If you know someone who has a Windows Live account, you can add them as a friend. This means that you are then able to visit their space, and are informed whenever one of your friends makes a significant change to their space.
To add someone as a friend click on Invite Friends. You can either
- Enter their email address
- Add from your contact lists (either Hotmail, or Messenger)
Add in everyone from the course that you have the contact details for.
Next
And now it's time to have a look at MSN Messenger, the last piece of the Windows Live package.
