User:Suedavis/My sandbox
So this is my sandbox, it is time to play!
Contents
Why format?
Last May/June I facilitated a 6-week course on Online Facilitation at my college and we discussed formatting messages (email, discussion board, handouts, etc.) and we discussed formatting messages in order to make them easier to read and in order to provide more clarity for the message.
One way to have text stand out is to use bold, italic or underline tools. As you can see in the previous sentence, the use of these tools adds visual interest to the message and draws your attention to particular words. If I were setting up a time for a synchronous discussion with a group I might use these tools to make the time and date stand out.
Example
We are now in our second week of the Online Faciitation course and I thought it might be a good time to practice synchronous communication in our chat room in Blackboard. I know that everyone has different schedules so I have set up three chat sessions with hopes that each of you will be able to participate in one of them. The topic for our session will be "What are the advantages and disadvantages of online learning?"
Please choose one of the following time slots to join us for the chat. Send me an email to let me know which session you will be attending.
- Tuesday, August 3rd, from 10:00 am to 11:00 am
- Wednesday, August 4th from 2:00 pm to 3:00 pm
- Thursday, August 5th from 7:00 pm to 8:00 pm
Headings Practice
In the section above I discussed the use of bold, italic and underline tools. I have created a new section in my sandbox by using "headings". Once more, the use of formatting helps me organize the information on my page. In the heading above, Headings Practice, I used Heading 1. This provides a new section in my sandbox. It stands out nicely doesn't it?
Let's take a look at the other headings available. In the directions for this activity it states that I should type "My first header", then highlight the text and choose Heading 2. I will do that now.
My first header
So what is the difference between this heading and the one titled Headings Practice? It appears that it is a bit smaller therefore it does not stand out as much. However it still stands out quite a bit more than normal text. I will go on to the next activity which is to type "My second subheading", highlight it and choose Heading 3. I'll do that now.
My second subheading
So what is the difference this time? The heading is bolder, smaller and has no line beneath it. So I could use this subheading in a section without breaking it into a completely new section. It may take a bit more practice to see which type of heading to use when editing a page but I can now see the differences between the three types of headings. Thanks for the practice exercise; I learn better when I can do it and see it on my own :-)
External Links Practice
In today's lesson I am going to look at creating links (external and internal). I will be starting with an external link where I type in the full URL. I will try a couple of them below.
First I will use the example provided in the lesson. http://www.google.com
Just for fun, I will add the address for my blog (and admit that I have not blogged for a while so this might encourage me to blog sometime in the next week or so).
http://ripplesineducation.blogspot.com/
Now I will click 'save' and see if my external links will work.
Insert Edit/Link Button
OK, that worked fine and was very easy to do. Now I'll move on to the next practice assignment, learning to use the insert edit/link button.
First I will provide a link to Google and next a link to my blog, Ripples in Education. Let's see how this works.
This appears to have worked fine so I will add one more external link. Here is the link for theNew Brunswick Community College. I work at the Saint John campus.
Internal Links Practice
Learning4Content In this link I am practicing linking to an "internal" page. I will preview now and see if this works. It works! Gotta love success at the first attempt.
Part two of this assignment is to edit the words for the internal link. So I will have another go at it by typing The largest wiki training program in the world, then highlight the text and then click the insert edit/link button, and finally typing in Learning4Content.
Finally, I will see if I can connect to the Canada page in WikiEducator. I see that the WikiEducators consider this page to be 5% complete.
Interwiki Links
Just a few moments ago I created a new page, Sue Davis' Twitter Tips and added it to my User Page. Now I am about to experiment with Interwiki Links.
Goodness there are a lot of places for Interwiki links, places I have yet to explore: Wikibooks, Wikiversity, Wikiquote, Wikitionary, and Wikimedia. The only one that I am familiar with is Wikipedia.
For my first interwiki link activity I have been asked to link to a Wikipedia article on dogs. Here goes ... Dog Ok, that worked. Now I will make a link to pages that are of interest to me. Twitter Tweetdeck and Web 2.0
Adding Images
In this lesson we are learning about adding images and which images can be used legally, an important point indeed. The first task is to find an image on Wikimedia Commons that interests us and then to see if we can upload it. I decided to see if there were images of Saint John, New Brunswick as this is where I work. There were only two images: one of the skyline and one of a map. This makes me wonder how images get uploaded to Wikimedia Commons. Could I add more images that I have photographed of the city? That is perhaps a question for another session.
So first I am to enter the URL for the image and click save. Here goes
http://commons.wikimedia.org/wiki/File:Sjnb-skyline.jpg
It seems that there is a problem with the skyline image of Saint John that I had picked. It is not showing up when I paste in the information. So, I will look for another image, I will try the map of Saint John. http://commons.wikimedia.org/wiki/File:SaintJohn1894.jpg This did not work either and I don't know why. I entered just the 'SaintJohn1894.jpg' data and nothing showed in the preview. Hmmm a bit frustrating. So I will search for another image, one of Cape Enrage in NB. Still no luck, what am I doing wrong? Sea_Cliffs.JPG The flag of New Brunswick did not work either! Flag_of_New_Brunswick.svg I am getting frustrated. Will watch the screencast again to see if I can figure out what is up.
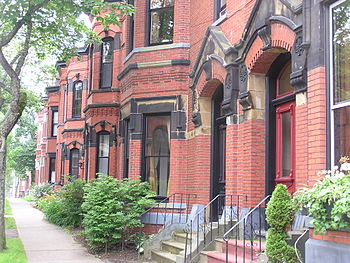
Finally I have been able to upload an image. This is one of Germain Street with a fine example of architecture. Now let's see if I can do another one.
OK, I seem to have it! For some reason I seem to need to click in the box that says "no images found". Here is a picture of the skyline of Saint John from Wikimedia Commons.
Right-aligned image at 350 width
Reverting
I am removing the 'vandal' entry via editing because using "undo" would have taken away my work on the images in the section above. I believe that I know how to use the 'undo' feature when necessary.
Uploading Teaching Materials
In this tutorial we have been shown how to upload a document that we have been working on using the OOo Converter. I will start by uploading a bit of Twitter info that I worked on this morning.


