User:Mackiwg/Sandbox/E-tivity boiler plate
From WikiEducator
< User:Mackiwg | Sandbox
Boiler plate
Start here
Tasks
Example
Start here

Tasks
- Log in / Create account. Go to the WikiEducator signup page (If you already have an account on WikiEducator, click on the log in link in the top right corner). When creating your account we recommend that:
- you provide an email address which you should confirm (check your inbox and spam folder for the confirmation email.)
- you provide your real name in the corresponding field which is used to attribute your contributions in the wiki.
- Create your personal sandbox page. First be sure you are logged in to WikiEducator:
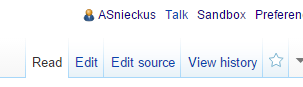 Screenshot of top right area of WikiEducator page showing "Sandbox" link third from left
- Click the "Sandbox" link at the very top of the page. (See image at right for help with locating the link.)
- On the page that displays, type something in the large empty box, for example "Welcome to my Sandbox".
- Click the "Save page" button at the bottom left of the page (below the box). Your page is now available via the "Sandbox" link at the top.
- Publish your first edits. On your sandbox page:
- Click on the "Edit" link (near the top of your screen) which will open the VisualEditor.
- Type some text and apply bold and italics, for example, "Hello world! This is bold and this is italics."
- To save your work:
- Click on the green "Save page" button (on the far right of the toolbar).
- In the dialogue window, type an edit summary, for example, "Practice edit" and click on the green "Save page" button (on the bottom right).
- Practice layout features using the VisualEditor. On your sandbox page:
- Create text with different heading levels (from the "Paragraph" pull-down menu).
- Add Bullet lists and numbered lists.
- Increase the indent to create sub-bullets and nest bullets within a numbered list.
- Practice inserting links. On your sandbox page:
- Create an external link
- Highlight the word(s) you want to link.
- Click on the link icon.
- Type the full destination url, for example: http://www.oeru.org, into the dialog box (overwriting the text in the box).
- Create an internal link to another page in WikiEducator.
- Use the same process as for the external link, but type the name of the WikiEducator page in the box and then select it from the list of available pages.
- Create an external link
- Practice inserting an image from the Commons. See Wikipedia instructions for details. On your sandbox page:
- Insert an image from the Wikimedia Commons.
- Add a caption.
- Use the advanced settings to practice changing the position, size and borders for your image.
- Familiarise yourself with how wikitext works. The purpose of this task is to see how wiki markup is used to publish wiki pages - you are not required to remember all the wiki markup. It is helpful to download and print a copy of the Cheatsheet for reference. On your sandbox page:
- Click on the "Edit source" link (next to the "Edit" link).
- Study the text to identify the wikitext formatting. (You may find it useful to open the published view in a separate tab for easy comparison.) A major advantage of a wiki is that if you see a feature you like, it is a simple process to cut and paste the wiki markup for reuse on your own pages.
- Try out using some wikitext to do simple formatting tasks.
- Upload a personal image. For this task you will need a personal photograph for your user page. Note that this must be openly licensed (CC-BY or CC-BY-SA). If you don't own the copyright of the image, have a friend, colleague or family member take a photo and request them to license this openly. Publishing an image on the wiki is a two step process. First you must upload a copy of the image on the server (assuming the image does not already exist on WikiEducator). Second, you must embed the image on the page where you would like it to appear.
- Click on the Upload file link under Tools on the left hand side of the screen which will launch an upload wizard.
- Work sequentially through the screens completing the relevant metadata and licensing information.
- Note that the name of your file will prefill using the filename of the image. We suggest naming the image file using a phrase which reflects the actual image.
- Once you have uploaded the image, return to your sandbox page, and using the VisualEditor, click insert media and type in the exact words you used to name the uploaded file. (Note that if you copy and paste the name from the image's page, be sure to include the extension, e.g., ".jpg".)
- Click on your image from among the images displayed.
