Module 6: Open Office Impress/Basics of Using Impress/Subsection 5 Closing
Contents
Tutorial 5 - 6.1.2 Saving and Exiting a Presentation
In this tutorial we will:
|
Saving a Presentation
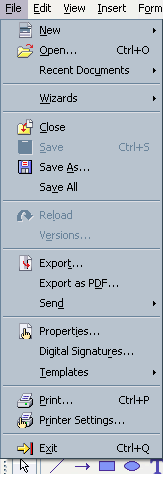
You must save and assign a distinguishable name to every presentation that you create in Impress. If you don't name the file, you won't be able to open and update it in the future. The first time you save a presentation, Impress will prompt you to assign a name through the Save As operation. You can make additional changes to a file -- add a slide, change text, add a picture, etc. -- by using the Save operation.
To save a new Impress presentation:
- Choose File Save As from the menu bar.
- The Save As dialog box appears.
- Click on the Save In: drop-down menu and locate where you want to save the file. Choose 3 1/2 Floppy (A:) to save the file to a floppy disk or Local Disk (C:) to save the file to your computer.
- Type a name for your file in the File Name: box.
- Click the Save button.
To save changes that you've made to an existing presentation:
- Choose File Save from the menu bar, or
Click the Save button on the Standard toolbar.
It is a good idea to Save frequently when working in Impress. It is never fun to lose information! You can quickly save your presentation by using the quick-key combination Ctrl + S.
Closing an Impress Presentation
To close an existing presentation:
- Choose File, then Close from the menu bar. The presentation in the Impress window is closed.
Impress prompts you to save your work if you have made any changes to the presentation between the last save and the time the file is closed.
Exiting Impress
To exit the Impress software:
- Choose File Exit from the menu bar.
