CS4ODFL/Knowing your ODFL communications ecosystem/Creating
Overview
The ability to create media is a key component of the definition of media literacy. In this learning pathway, we focus on developing digital skills for different media modalities in preparation for creating a multimodal presentation.
The create media learning pathway is assembled as a progression from simple to more complex objectives that will enable you to:
- Create static images (remixing scalable vector graphics to produce a diagram)
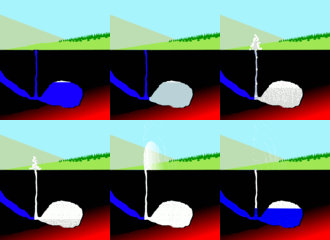
- Create moving images assembled from static images (GIF animation for visual interest or explanation of a concept)
- Generate a sequence of static and moving images for a web-based presentation (using the Reveal.js framework for online presentations)
- Record and remix audio (generating an audio file from multiple tracks for inclusion in a video)
These component skills will enable you to assemble and remix a multimodal online presentation.
Overview
The ability to create media is a key component of the definition of media literacy. In this learning pathway, we focus on developing digital skills for different media modalities in preparation for creating a multimodal presentation.The create media learning pathway is assembled as a progression from simple to more complex objectives that will enable you to:
- Create static images (remixing scalable vector graphics to produce a diagram)
- Create moving images assembled from static images (GIF animation for visual interest or explanation of a concept)
- Generate a sequence of static and moving images for a web-based presentation (using the Reveal.js framework for online presentations)
- Record and remix audio (generating an audio file from multiple tracks for inclusion in a video)
These component skills will enable you to assemble and remix a multimodal online presentation.
Choose a subject and draft a plan
In this learning pathway, we will focus on digital skills for creating media.If you are planning to take the assessment for this course for formal credit, we recommend that you read the requirements for Task 4 of the assignment so that you can re-use the outputs of the mini-learning challenges in this learning pathway for incorporation into your presentation.
The assignment for Critical media literacies and associated digital skills (LiDA104) requires that you create a multimedia presentation saved as a video file that incorporates an audio track plus at least two other modalities such as text, static images, animations or video. The mini challenges in this learning pathway will support you in developing your digital skills in each of these modalities. We recommend that you now select a topic or subject for the multimodal presentation so that the outputs you generate from the mini challenges can be incorporated into your final multimedia presentation. We also recommend that you now select an authentic use case for your presentation so that you have a defined target audience. This also means that the time you spend on this course can be used productively in the real world.
Tasks
- Choose a topic or subject for an authentic presentation, that is something you can use in the real world, for example:
- Educators can choose a subject to produce an online presentation that you can use in your own teaching;
- Employees can choose a subject for use in a business presentation for colleagues or clients;
- Entrepreneurs can produce a short presentation to market a product or service;
- Product support employees can generate a help resource showing how to use a product or service;
- If you're unsure, you can create a help resource for any learning pathway or topic for the Learning in a digital age (LiDA) micro-courses. Outputs which are licensed with a Creative Commons Attribution or Creative Commons Attribution-ShareAlike license could be incorporated into future offerings of the LiDA courses. This is a good way to give-back to the OERu learning community.
Note: If you are planning to complete the assignment for this micro-course, be aware that the assessment requirement is to create a multimedia presentation "on any topic that expresses the outputs of your learning or a resource to support learners studying a topic of your choice, for e.g: a multimedia presentation summarising the outputs of one of your assessment tasks or learning activities; or a learning resource to support a topic from the Learning in a Digital Age course."
- Plan a rough outline for a 3 minute multimodal presentation (Note: this is an initial draft, so don't spend too much time preparing a detailed plan. Producing media is an iterative process and for now, you only require a rough outline).
- Specify the purpose of your presentation
- Draft a simple story board to outline the sequence and approximate timeline for your presentation.
Diagram remix
Start here
Tasks
- Visit the Inkscape homepage, and download and install the official release package for your operating system.
- Note: We recommend using an official release package.
- Make sure that you download the version for your operating system, i.e. Windows, Mac, or Linux.
- If you are not sure how to install software, search for "How to install Inkscape" or seek advice from a friend.
- If you are more comfortable using slideshow software, you may prefer trying LibreOffice Impress, which is part of the LibreOffice suite. You can download and install the latest stable version of the software for your operating system. LibreOffice supports the import and export of SVG files (see here).
- Other software options:
- Gravit Designer is a free but proprietary vector based authoring solution. With Gravit Designer, you can either work online or download local versions of the software.
- You are free to use any software package which supports the import and export of open SVG file formats.
- Launch Inkscape, Gravit Designer or your preferred tool and explore the software.
- If you are new to using graphics software, search YouTube for Inkscape tutorials. You will find extensive resources; for example, the Derek Banas introduction to Inkscape tools or the playlist for Inkscape tutorials for beginners published by Davina and Caroline.
- Note: You are not expected to become an intermediate or advanced user of graphics software. All that is required are basic skills to add text, squares, and rectangles; to change colours;and to import/export SVG graphics.
- Conceptualize a chart, diagram, or graphic for inclusion in the learning pathway you are planning to develop.
- Revisit the stimulus resources above to generate ideas.
- Draft a freehand version of the concept for the diagram on a separate piece of paper.
- Conduct a search for SVG graphics that you could potentially copy, reuse, and remix for inclusion in your diagram. A few suggestions:
- Search on Wikimedia Commons, and include the string "SVG" in your search. A good starting point may be the category SVG icons.
- Visit Pixbay's SVG collection - there are a large number of images you can download in SVG format.
- Conduct a web search for openly licensed SVG images.
- Record the urls of the pages of the SVG graphics you would like to download, as well as the names of the authors and license types of the images, all of which will be required when attributing your derivative work.
- See, for example,the attribution of the SVG icons included in this graphic illustrating the structure of an OERu course. Note that this is a SVG graphic, which you could download, modify, and reuse for your own purposes.
- Download and save the SVG graphics you would like to reuse and incorporate in your own diagram.
- Remember to record the url and relevant metadata for attribution in your derivative work.
- Please share your learning journey with our community by posting regularly on WENotes below.
Animated GIF

Start here
Tasks
- Think about an authentic application for your animated GIF, which could be used in your multimodal presentation assignment for this microcourse. For example:
- A cinemagraph for subtle visual interest in a professional presentation.
- A diagram or graph where changes in colour can be used for emphasis or attention during a written or verbal explanation.
- A short screen cast showing how to navigate a website with text inserts or highlights to provide support.
- An animation for marketing promotion in social media, for example a Twitter post.
- Note: There are online web services that will automatically convert video files into animated GIFs. You shouldn't use this approach because the learning output actions require a blog post showing examples of the still image frames you used to generate the animation.
- You are free to use any graphic software package with the capability of generating animated GIFs from still frames. GIMP is a good open source software option. Download the correct option for your operating system and install the software.
- You can use graphic software that you are familiar with to generate the images, and then open them in GIMP to generate the animination. In GIMP, select all the image files you created (these should be number sequentially, e.g Imagename01, Imagename02, Imagename03 etc) and use: File -> Open as layers.
- Search online for help resources and tutorials if you're not sure what to do.
- Export your image sequence as a GIF following the instructions provided in the stimulus resources above.
Outputs
HTML Slideshow
In this section we explore web-based slideshows which are coded in HTML. This enables the slideshow to be viewed and presented using a web browser, with the advantage of supporting responsive design for mobile devices and applying styles using CSS (Cascading Style Sheets). Together with JavaScript (JS) it is possible generate dynamic and professional presentations authored natively for the web.In this course, you are not required to learn how to code slide shows in HTML, but you will develop associated skills in web-based slideshows using the Slides.com web-service. This web-service generates the underlying HTML for the open source Reveal.js framework for web-based slideshow presentations.
Note: If you choose to complete the formal assignment for this micro-course, you may choose which slideshow software to use; it is not a requirement to use Slides.com. We suggest that you complete the research on various software options in the Recording your presentation mini challenge before finalising your choice of presentation software for the assignment.
Start here
Tasks
- Signup for a free account on Slides.com to trial the web service. (Note: Using the free account option, your presentations will be public and storage is limited to 250MB. Paid subscriptions provide additional features, but are not needed for this mini-challenge.).
- Create a short presentation of approximately 5 slides. You can use this mini-challenge as a draft for planning the structure for the multimodal presentation assignment for this microcourse.
- Your presentation should incorporate the following:
- One slide using a background image
- One slide including an image on the page
- One slide that uses "fragments" to build up the text
- One or more nested slides (that is, incorporating the down / up navigation option)
- Experiment with applying different:
- Font styles
- Slide transitions
- Colour templates
- Optional:
- Inserting your animated GIF
- Embedding a video
- Embedding an iframe (that is, embedding a live third party website into your online presentation)
How did you go? Share your thoughts by posting a comment on WENotes below.
Outputs
Record and mix audio
A multimodal presentation requires an audio track. Learning how to edit and mix audio snippets is a valuable skill for creating online presentations with an audio. In this mini learning challenge you will learn how to use Audacity to record voice and mix an music track into the recording.
Start here
Tasks
- Download a copy of Audacity (Be sure to select the correct version for your operating system.)
- Install the Audacity software. (If you are unsure how to do this, you can search "How to install Audacity" on Youtube or Google for your operating system, review Audacity's FAQ page or ask a friend or work colleague who is familiar with installing software.
- Select and download a suitable music file which is openly licensed for reuse for the prelude of your audio mix project.
- Be sure to check the license of the audio track before downloading. The license is usually displayed on the homepage of the music file. Some sites, like Jamendo below, also host music files which are not openly licensed. It is your responsibility to check the usage sites. Keep a record of the source url and license which you will need for attribution purposes.
- Sites: Free music archive, Free Music Public Domain, Jamendo (be sure to click on the free download section of the site) or search for Creative Commons licensed music.
- Open Audacity, import your music file and record your voice track.
- Edit your music clip so that it fades into your voice recording.
- Edit the audio tracks as appropriate, for example clipping, amplifying, reducing volume etc.
- Save your project file as *.aup (so you can edit this later)
- Export your audio file in a suitable format for playback.
Record your presentation
By this stage, you have a visually engaging slideshow and maybe a sound track to go with it. You are also likely to want to add voice narration for each slide. There are several ways of doing this, depending on what software you choose to use.In this mini learning challenge you will research different tools for recording narration for your slideshow and then create your own video presentation.
As a learner in a digital age, there are likely to be many occasions when you need to find and work out how to use unfamiliar software. For this reason, this mini challenge only points you in the direction of some suitable tools and how to find instructions - this is an opportunity for you to explore and develop confidence in using digital tools which are new to you.
Start here
Tasks
- Use the internet to research how to add narration to your slideshow and create a video. For this you will need to find out:
- What digital tool, or combination of tools, is suitable for the task (use the stimulus resources above to get you started) and
- How to use those tools
- Record your narration, create your video presentation and save it in a suitable format for playback.
Outputs
Publish your video presentation
At last - you have completed your presentation and saved it as a video! Well done. Now we encourage you to upload your presentation to a video-sharing platform such as Vimeo or YouTube and share it with your fellow learners.Note: If you choose to do the formal assessment for this micro-course, you are encouraged, but not obliged, to upload your presentation to a public video platform. If you wish to keep your presentation private, you may share the video privately with the assessor instead.
Start here
Tasks
- Decide which video-hosting platform you wish to use for your video.
- Create a free account on that platform, if you do not already have one. (There are paid options available for both YouTube and Vimeo, but you do not need to use them for this mini challenge or the assessment.)
- Search on the internet for instructions on how to upload a video, change the settings on your video and share a link to it.
- Select the licensing, privacy and other settings that you wish for your video.
- Obtain the sharing link and share with your fellow learners through Mastodon, WENotes or your learning journal blog.
Outputs
Quiz
The questions which follow provide a basic knowledge test of selected concepts covered in this learning pathway: Create media.The questions published at the end of each learning pathway are re-used for the knowledge test for learners interested in earning a digital badge or certificate of participation for the Communication skills for open, distance and flexible learning (CS4OFDL) micro-course. Please consult the Certify participation page for more information.
