Creating a blog

- The published version of the blog, that is, the posts which are published to the internet which visitors will see when viewing the website; and
- The dashboard of the blog which provides the administration features which the registered blogger will use for managing preferences, settings and preparing draft blog posts before they are published to the website.
Contents
Administration features of a blog site
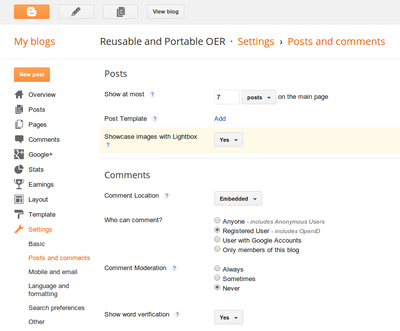
The dashboard is the web interface which the author uses to manage the blog site. The dashboard will not be visible to the general public and can only be accessed by the registered user(s) of the blog. The dashboard includes options for:
- Managing posts that is, drafting, publishing, editing and deleting published posts.
- Manipulating layout or appearance, for instance, choosing themes, adding widgets and customising the look and feel of the published blog.
- Managing preferences, for example: allowing comments, determining who can comment, setting moderation preferences, determining access to published blog posts etc.
Creating a blog
Creating a blog involves the following steps:- Step 1: Choosing a blog service provider
- Step 2: Creating an account with the blog provider
- Step 3: Configuring your blog (layout and preferences)
- Step 4: Drafting and publishing your first blog post.
Choosing a blog service provider
Learners are free to create a blog using any provider ranging from free hosting to paid services. When creating a blog to support and document your learning for an open course, using a provider which offers free hosting services should be more than adequate for these purposes.
If you are planning to blog professionally or host your blog using your own domain name, there are a number of considerations to take into account when choosing your service provider. However, these considerations fall outside the scope of this introductory support tutorial. Should you want to research this question further, conduct a web search for "choosing a blog host" and "host your own blog site".
Before making your final choice, we recommend that you read the respective terms of service before creating your blog to confirm that you are comfortable with the agreement. Note that free blog hosts typically place limits on storage space for local images and media (which are usually adequate for personal blogging) and other limitations, for example, the ability to export blog content or retaining the rights to display advertisements on the website.
In this tutorial, we have designed the E-Learning activities for creating a free blog from two mainstream providers:
- Wordpress.com based on open source software developed by the Wordpress community (Use this e-Learning activity to create your blog on WordPress.)
- Blogger.com, owned by Google. (Use this e-Learning activity to create your blog on Blogger.)
When creating a blog, you will be allocated a unique URL address for your site as follows: www.nameyouchoose.blogspot.com or www.nameyouchoose.wordpress.com.
Choosing between WordPress or Blogger (Optional reading)
For the purposes of creating a course blog, a detailed product comparison is not necessary. If you want to save time, feel free to choose anyone of the options and progress directly to the e-Learning activity to create a blog on WordPress or Blogger. However, if you would like to research further, you can read these reviews to assist with your decision:
| ||||||
e-Learning activity to create a blog
You next step is to complete the e-Learning activity on creating a blog and publishing your first post:
- For WordPress, use this e-Learning activity.
- For Blogger, use this e-Learning activity.
