CCNC/CCNC Module 6/Slide Shows and Previews/Subsection 5 Animation Effects on Text and Objects
Contents
Tutorial 5 - Animation Effects on Text and Objects
In this tutorial we will:
|
Animation Effects on Text and Objects
You can apply preset animation effects to text and objects on your slide. These are the same effects that you can use to animate slide transitions, and you can apply them to text and objects on the slide. You can use these effect along with or in place of slide transitions.
To define animation effects on text or an object:
- Select the text box or object that you want to animate.
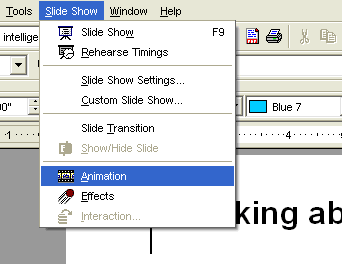
- Choose Slide Show Effects from the menu bar.
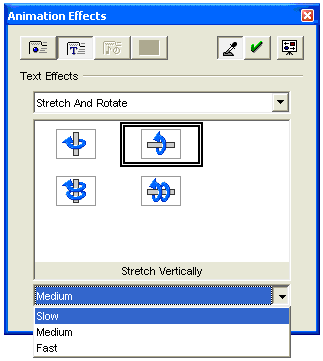
- The Animation Effects dialogue box opens.
- Click on either the Effects button (if animating objects) or the Text Effects button (if animating text).
- Depending on the button that you selected in the previous step (Effects or Text Effects), either the Effects or the Text Effects drop-down menu opens.
- Click in the drop-down menu and review the effects that you can use in the slide. Effects include:
- No Effect
- Cross-fading
- Fly in
- Short Fly in
- Stretch
- Stretch and Rotate
- Fade
- Open / Close
- Wavy Line
- Spiral
- Laser
- Other
- Review the thumbnail effects that aer available within the Effects or Text Effects category. Select the effect that you want to apply to the slide(s).
- Click in the Speed drop-down box and select one of the available choices (Slow, Medium, Fast) to set the speed of the slide transition.
- Click the Preview button to preview the transition.
- The Preview dialogue box opens on the screen.
- Click the Assign button to watch the transition previewed in the Preview dialogue box.
- Click the Update button to assign the transition to the slide.
Managing the Order of Animation Effects
Assuming that you have defined multiple animation effects on the slide, you can manage or define the order in which the different objects or text are animated.
To change the order of the Animation Effects:
- Select the text box with the text that you want to animate.
- Choose Slide Show Effects from the menu bar.
- Click the Order button on the Animation Effects dialogue box.
- Every object or text that you animate is listed in the Animation Effects dialogue box in the sequence that you initially created them in.
- Left-click an object and drag it to its new location in the ordered list. Notice the vertical rule in the list. It moves as you drag the object down through the list. It reflects the proposed new location for the object.
- Click the Update button to save the change.
Creating an Animation on a Slide
When you animate images on a slide, you have to add movement to text or to objects on the slide. Animation can help create a livelier and more interesting slide show. In the remainder of this module we’ll discuss how to create an animation using the three images contained on the following slide.
To animate slides using Animation Schemes:
- Display the slide where you want to incorporate animation.
- Click to select all images (clip art, graphics, Gallery objects) that you want to animate. To select multiple images, hold the Shift key down and simultaneously click on every image that you want to animate.
- Click Slide Show Animation on the menu bar.
- The Animation dialogue box opens as a floating window on the screen. With the image selected, click on the Apply Object button in the Animation dialogue box.
- The selected thumbnail image is located in the upper half of the Animation dialogue box.
- Click the Apply Objects Individually button to add an image for each selected object. Otherwise, click the Apply Object button if you want to apply animation to the selected object(s) are to be added to the animation as a single image, or a single collection of images.
- In the Animation Group field, click to select either Group Object, which assembles the images into a single object so that they can be moved as a group, or Bitmap Object, which combines the images into a single bitmap.
- In the Alignment field, click the drop-down menu and select the alignment of images in the animation window. For example, the animation will be as large as its largest picture. If there are smaller images included in the animation, then perhaps you might want to center all images in the animation.
- Click the Create button to create the animation.

