VirtualMV/Flash12 (CS6)/Basic/Video
| Flash12 (CS6) | ||
|---|---|---|
| Overview | What is Flash? | Resources | History | Quick reference | Upgrading | Design Examples | Journal | Troubleshooting | |
| Basics | Media Basics | Text | Graphics | Animation ( Timeline | Classic tween | Shape tween | Object tween | Motion guide | Movie clip ) | Audio | Video | |
| Text | Scrollbox | Stop Movie | Importing HTML | TLF Features | |
| Graphics | Spraybrush and Art Deco Tool | Fast Loading Photo Album | |
| Audio and Video | Audio ( Adding Sound to a button | Toggle Background Music | Toggle sound using buttons ) | Video ( Advanced Techniques | Alpha Channels | Video Resources ) | |
| Animation | Complex Animation | Mouth Animation | |
| Navigation | Introduction | Joke Book ( Adding Buttons ) | Journal Navigation | |
Overview
By the end of this sestion you should be able to:
|
Some of the ideas have been covered in earlier chapters. If you have forgotten the steps look back for instructions. |
Video basics
Note: As Flash (and Director) both use the term Movie to indicate an application I will use the term “Video” to represent a file such as a windows avi, wmv or QuickTime(mov).
Working with video
Video was not part of Flash in its early days. Flash 4 allowed QuickTime Video to be imported, and was able to create a QuickTime mov file that could be viewed with the QuickTime 4 (or higher) player. Flash MX introduced an embedded video format.
Before you can use video in Flash it must be created. The better the original and edited video is the better your Flash video will be.
Probably the simplest way to create original video is by using a video capable Digital Camera or web cam, as the video is created in a digital format. The quality of these videos varies considerably. Downloading video from the Internet, or capturing video from TV/Video or DVD has extensive copyright problems, and does not follow the general rule often applied to text of 10% for fair use. It is safer to create your own video. Capturing video on a Video camera will give better results. From about 2005, video cameras that capture direct to Hard Disk or DVD have become popular.
Tape base video cameras are still being used extensively as their quality is probably still the best, but conversion to digital requires specialized hardware and software. Basically the video is played in the camera and streamed to a PC, the PC software then converts the analog video to digital. If your hardware cannot keep up (for example another program occurs while video is being captured – such as a virus scan - or the hard drive needs to find another sector) frames can be dropped.
Once the digital video is created it needs to be edited before inserting into Flash. Flash 8 does allow for some basic editing such as chopping off the start or end of the video, so any “in-video” editing needs to be done separately from Flash.
Flash 10 allows video to be imported or linked. You can link a QuickTime video if you have your publish settings to Flash 3,4 or 5. Use the online help for more information.
Video tips
Just a few tips to improve your video.
- Use a tripod. This cannot be underestimated. When digital video is created, to allow it to be smaller it creates a keyframe, then records the changes to that keyframe rather than storing all of the frames following (this is known as temporal compression). So if the camera is steady this will significantly reduce the size of your digital video.
- Be aware that when you are holding the camera you are very near the microphone. So if you do want to record yourself talking, keep your volume down!
Flash video (FLV) format.
When a video is embedded into a Flash Movie, it is saved in the library as an FLV (Flash video) file. So Flash needs to convert the video that you have captured into an flv format.
Compressing a video then decompressing for playback or editing is the job of a video codec (compressor-decompressor). Video formats such as Microsoft’s Audio Video Interleave (avi) or Apple’s QuickTime (mov) can use several different codecs. If the codec is not available on the computer the video it will not play!!. Compression can be temporal (interframe) or spatial (in-frame). Temporal, creates a keyframe then for successive frames stores the changes, whereas spatial means that a single frame is compressed by losing some information such as colours that are very similar.
Flash 10 supports three different video formats
- H.264 (F4V)
- introduced from Flash 9)
- Best compression but no alpha channel support.
- Cue points possible but needs modification to XMP metadata and ActionScript.
- Cannot be embedded into a flash swf file.
- On2 VP6 (FLV)
- introduced from Flash 8
- Higher quality/better compression than Sorenson Spark.
- Supports an 8-bit Alpha channel (means you can have transparent backgrounds)
- Supports cue points
- Sorenson Spark (FLV)
- introduced from Flash MX/6
- If you want backwards compatibility to Flash Player 6/7 or you think your movie will play on older computers (requires less computational power than the other two)
(Digital video and Flash, n.d.)[1]
Compressing video can take a significant amount of time, so a Video Encoder was available from Flash 8, and may be available in your system. This allows you to create a list of video files to compress and do them as a batch.
Source a video file
- Use a digital camera to take a short movie, or download one from the Internet and place in your Journal Folder.
Sample videos
This videos have been saved with a txt extension to avoid being firewalled. Download it then rename the .txt to .mov
Create a new Flash document
- Create new flash document, reset the layout to the default Classic view. Save as jnlVideo.fla
Convert your movie to an flv file
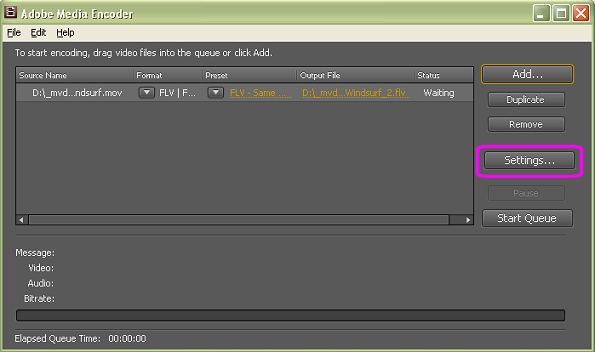
Using Adobe Media Encoder CS4 convert your mov file to an flv file (Same As Source (Flash 8 and Higher)).
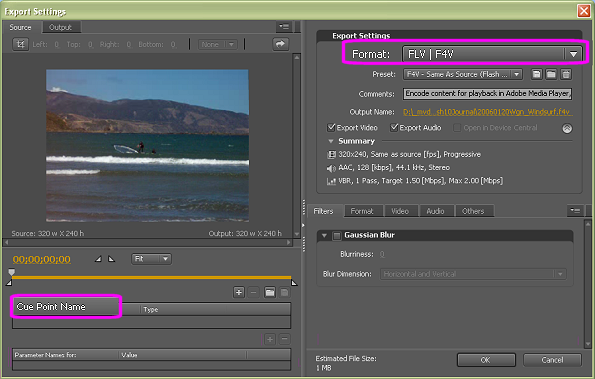
Clicking on [Settings] will show:
- The Format drop box allows you to select from the many different formats
- The Preset drop box allows you to select the different formats (use this to change to an flv file)
- You can set cue points, where the movie (or sound) will pause while any other animations catch up (useful for karaoke type applications to synchronise sounds to words).
Save the resulting file into the same folder as jnlVideo.fla
Inserting video
There are two ways that we will look at including video into our movie (there are others)
Embedding a video
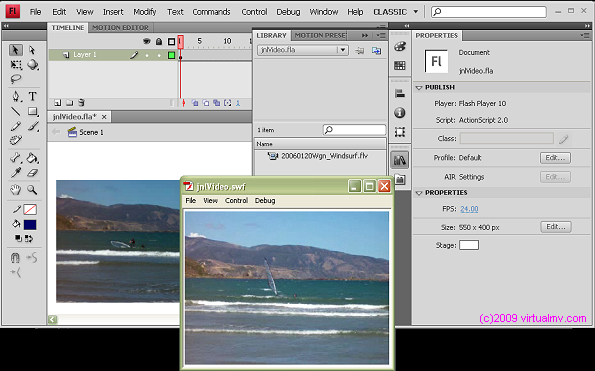
Embedded into the flash movie. This is generally not recommended unless the movie is short as it will increase the size of your Flash movie. Embedding the movie into Flash was initially a big advantage over other formats as if you could play Flash, the movie would play (as the Flash codec came with Flash). Embedding allows you to add special effects such as clickable areas onto the running video.
To embed a video use
- File > Import > Import Video >
- then On your computer [Browse] to the flv file you created,
- If you choose another format (e.g. .mov) you will be prompted to use the media encoded first
- select Embed FLV in SWF and play in timeline, then click [Next]
- In the Embedding Window, for Symbol type choose Embedded video (and leave other defaults)
- In the Flash Video Import window choose [Finish] and the video will be embedded into your swf file
- Finally test the movie to check that the video has embedded correctly ([Ctrl]+[Enter])
Linking a video
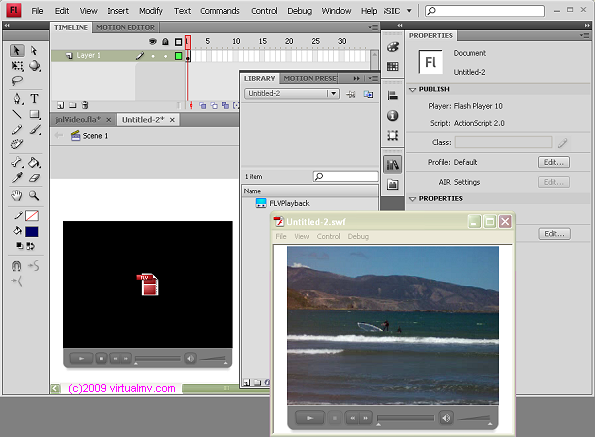
Flash also gives you another way to include video in your Flash Movie, Loading external video with playback component
This has the advantage of keeping your video external to your Flash movie, allows you to choose f4v formatted video, keeping the swf file much smaller, and has improved playback. The wizard also allows you to choose from a range of templates to add video and volume controls to the stage.
If you choose this option you will find additional files are created on your working directory. These will need to be copied to the web server (along with the flv file) for the player controls to be included.
Trouble shooting
Movie doesn't play when swf copied to another location
There appears to be a pathway problem with this method in Flash CS4. When attempting to play the video back on another computer that does not have the video in the exact pathway as the initial computer it will not play.
- First, import the video as above and save the .fla file (do not test the movie).
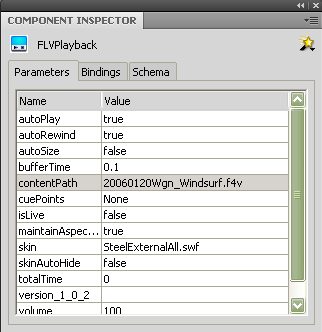
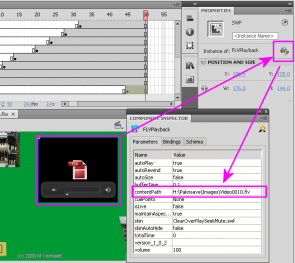
- Now go to the Component Inspector panel (Window >Component Inspector} and change the contentPath parameter from the full pathway to the relative pathway.
In this example, I'm changing D:\_mvdata\_Data\Wiki\FlashCS4\...f4v.
Now test and publish as before, and your video should play as expected on other computers.
Alternatively you can use the buttons to bring up the component inspector:
Task
- Create jnlVideo1.fla and use this method to add an external video file.
 References
- ↑ Digital video and Flash (n.d.) Retrieved August 12, 2009 from http://help.adobe.com/en_US/Flash/10.0_UsingFlash/WS9222D73A-676D-41cd-9222-A4884858BBA3.htmlv
|
virtualMV | Superquick wiki guide | Please give me some feedback |
VirtualMV/Flash12 (CS6)/Basic/Video. (2024). In WikiEducator/VirtualMV wiki. Retrieved April 18, 2024, from http:https://wikieducator.org/VirtualMV/Flash12_(CS6)/Basic/Video (zotero)
|
