VirtualMV/Flash12 (CS6)/Basic/Animation/Classic Tween/Content
Contents
Overview
By the end of these exercises you should be able to:
 |
Animation basics


- The Timeline manages all of the animation in Flash.
- Animations are organised on layers. The layers are organised top to bottom, so the top layer is in front of the next layer and so on, allowing objects to move in front of each other.
- Folders can be used to organise layers. (Right click in the layer area to create a folder then drag the layers you want into the folder).
- Current Frame displays the Playhead’s current position its frame number.
- Frame Rate displays frames per second (fps) at which the movie tries to play in a browser. Double click to access Movie Properties.
- Elapsed Time displays time between Frame 1 and the current Playhead position.
- Frame View allows you to change how the Timeline is displayed.
- A Frame is an empty place you can use to fill in time until an object becomes active, or can have content placed in it.
- Blank Keyframes are empty places on the Timeline that are ready to have content placed in them.
- Keyframes are places in the Timeline where actions or animation changes occur.
- Playhead indicates the current frame you are viewing in the Timeline. You can click and drag (scrub) the playhead to preview your animation.
Activity
Create and prepare a new Flash document
Create a Flash movie to animate a circle by:
1. Copy the flash file jnlGraphics.fla to jnlAnimation.fla
2. Open jnlAnimation.fla
Animating the ball
Remove all artwork on the stage. We will now make the movie more interesting by animating the ball to move across the Stage.
To create an animation with the ball:
1. Drag one of the pool balls from the library onto the left of the stage.
Note: You may need to zoom out your stage to see all the sides. (Ctrl + - and Ctrl + =)Alternatively use Magnifier on the View area of the Tools panel and you can zoom the stage in and out using Ctrl + Shift + Mousewheel (Stage must have focus).
2. Click Frame 40 of Layer 1 in the Timeline.
3. Right click and select Insert Frame. ( or select Insert > Timeline > Frame or press F5). Flash adds frames from 1 to Frame 40, which remain selected.

4. With Frame 40 still selected, right click and select Insert Keyframe ( or select Insert > Timeline > Keyframe or press F6). A keyframe is added in Frame 40. A keyframe is a frame where some property of an object is explicitly changed. In this new keyframe, you will change the ball's location.
5. Making sure you have the Selection Tool active, and with Frame 40 still selected in the Timeline, drag the ball to the right of the Stage area.
6. Select a frame between frame 1 and 40 (around 20) (notice how the ball goes back to the left of the stage)
7. Right click on a middle frame of Layer 1, and choose 'Create Classic Tween'.

An arrow appears on the timeline in Layer 1 between Frame 1 and 39. This step creates a tweened animation of the ball moving from its position in the first keyframe in Frame 1 to its new position in the second keyframe in Frame 40.
8. In the Timeline, drag the red playhead back and forth (scrub) from frame 1 to frame 40 to preview the animation.
9. Select File > Save
10. Press [Ctrl]+[Enter] or Select Control > Test Movie to test the FLA file
11. Close the Test Movie window.
Rotating the bouncing ball
Now that you can move the ball, we really should make it more realistic. First we will show you how to rotate the ball, then add some more keyframes to make it bounce around on the stage.
To rotate the ball
1. Click on a middle frame (around 20), then in the Property Inspector, select the Rotate drop down list and choose CW (Clock Wise). CCW = Counter Clockwise if you are wondering!. The number of times to rotate is in the times box (just to the right of the Rotate list). Leave it as 1. Note how the ball is rotated.

2. In the Timeline, drag the red playhead back and forth from frame 1 to frame 40 to preview the animation.
3. Select Control > Test Movie to test the FLA file.
4. Close the Test Movie window.
Bouncing the ball by adding keyframes
1. In the timeline, click on frame 10. Then, right click and select Insert Keyframe.
2. Repeat, and Insert a keyframe in 20 and 30.
3. In the Timeline, drag the red playhead back and forth from frame 1 to frame 40 to preview the animation. Notice that the rotation is now weird!! So
4. In between each keyframe, fix the rotation to CW and 1 time. And test with playhead.
5. Now make the ball bounce around the four sides of the stage. Do this by selecting each keyframe on the timeline and moving the ball to the four sides of the stage. Move the ball in keyframe 40 to the same place as the ball in frame 1. This will make the ball appear to move continuously around the stage. Note: You may need to zoom out your stage to see all the sides. (Ctrl + - and Ctrl + =)

6. Test your movie.
Save, Test and Publish your document
1. Save jnlAnimation.fla 2. Test ([Ctrl]+[Enter]) and Publish the flash document.
Add a second ball
1. Create a second layer (Click on Layer 1, then right click > Insert Layer) and using one of the other ball assets and create a second ball that bounces in the opposite direction.
Video Tutorial
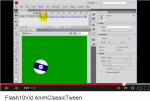
YouTube: (2009) Flash10: Classic Tween
To start Verhaart(2010)[1] from virtualMV gives a video introduction to a classic tween animation [3.5 min]
Cite error: <ref> tags exist, but no <references/> tag was found