Word processor is a computer program that can help make it easier to write.
A document is what you typed. It can be letter to a friend a story a poem.
When you make changes to your writing it is called editing a document.
OpenOffice.org Writer, Microsoft Word, Word Pro, WordPerfect, and WordSmith
are popular word processing programs.
Starting the Word Processor
You can start the word processor in different ways.
One way you can start the word processor is by double-clicking
the word processor program icon on the desktop.
The word processor program icon may look like a little page.
When you type you create a document.
Writer is the word processing in OpenOffice.
Open a New Text Document
- Find the word processor program OpenOffice.org icon on your desktop.
- Double-click the icon
 .
.
- A welcome OpenOffice screen appears on your screen.
- Click Text Document.
- A text document appears on your screen.
- Place your fingers on the home row keys, and begin typing.
<flvplayer autoplay=false width=500 height=400>startwordprocessor.FLV</flvplayer>
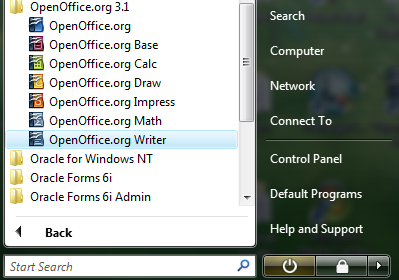
Another way to open the word processor program:
You can start the word processor in a few different ways. One way you can start it by Double-Clicking the word processor icon on the desktop.
- Click start

- Click All Programs.
- Click OpenOffice.org 3.1.
- Click OpenOffice.org Writer.
Using Menus and Toolbars
Word processors have a menu bar at the top of the screen.
A menu bar is a list of commands that you can use to help create a document.
When you click a word on the menu bar you see a menu with more commands.
<flvplayer autoplay=false width=500 height=400>Menusandtoolbars.FLV</flvplayer>
Saving a Document
You can save the document to be sure you do not lose your work.
When you save a document,
you can save it with the same file name and write over the original document
or you can save it with a new file name.
When you save a document with a new file name you use the Save As command.
This way the original document is still there for you.
<flvplayer autoplay=false width=500 height=400>Savedocument.FLV</flvplayer>
Cutting, Copying, and Pasting
After you type a document you can work with the words or numbers that you typed.
The words you type in a document are called text.
Word processors let you move, change , add or delete text.
Before you can work with text,
you need to select it to tell the computer with which text you need to work.
Selected text is highlighted text.
The easiest way to select text is to drag the mouse pointer
throgh the text you want to select.
You also can use your clicking skills to select words and sentences.
When you type in a word processor,
sometimes the words or sentences may not be in the order that you want them.
A word processor makes it easy for you to move text from one place to another.
To move text:
- Select the text.
- Cut the text using the Cut button
to remove it from the place you do not want it.
- Place the insertion point
where you want the text to go.
- Click the Paste button.
<flvplayer autoplay=false width=500 height=400>cuttingpast.FLV</flvplayer>
Changing the Font
Formatting Text
<flvplayer autoplay=false width=500 height=400>formattext.FLV</flvplayer>
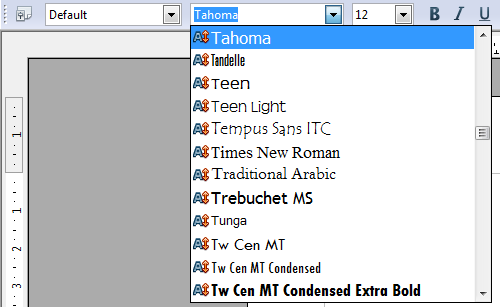
<flvplayer autoplay=false width=500 height=400>Fontname.FLV</flvplayer>
Inserting Clip Art
<flvplayer autoplay=false width=500 height=400>insertclipart.FLV</flvplayer>
Using the Undo Button and the Delete Key
<flvplayer autoplay=false width=500 height=400>useundo.FLV</flvplayer>
<flvplayer autoplay=false width=500 height=400>printdocument.FLV</flvplayer>


