Chapter2

From WikiEducator
Jump to: navigation, search
Road Works.svg Work in progress, expect frequent changes. Help and feedback is welcome. See discussion page. Road Works.svg
Home.png
Gradefour.png Computer Education pict3 Grade4.png
100
1. Adding Design to a Slide
2. Adding Background to a Slide
3. Adding Pictures to a Slide


Adding Design to a Slide

Background designs fill the entire slide helping give the slides a uniform look and style. OpenOffice.org Impress comes with design templates and color schemes that you can apply to give your presentation a professional look. A design template applies to part to art, font styles, and backgrounds that have been designed by professionals. A color scheme is combination of colors that works well together. You can put more than one piece of clip art on each slide or you can put clop art and text on a slide.


Adding Background to a Slide

Open the file that you created in the previous chapter.

  1. Click the Gallery button on the Drawing toolbar at the bottom of the screen.

Gallerybutton.png

  1. A selection of Backgrounds themes is displayed.

Selectionofbachgrounds.png

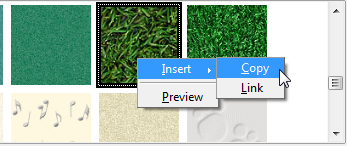
  1. Click on one of the background Images to put it on the slide.

Insertclip.png

  1. Click the right button of the mouse then Click Insert then copy the image is inserted to the slide.
  2. Point to the middle of the Image the pointer changes shape.

imge:middleimage.png

  1. Drag the image to change the position on the slide.

Resizing.png

  1. The small squares on each corner of the image are called sizing handles. You drag the corner sizing handles to make the image bigger or smaller.
  2. Drag the sizing handles of the image until the image is size of the slide.
  3. The text will be behind the image you entered.
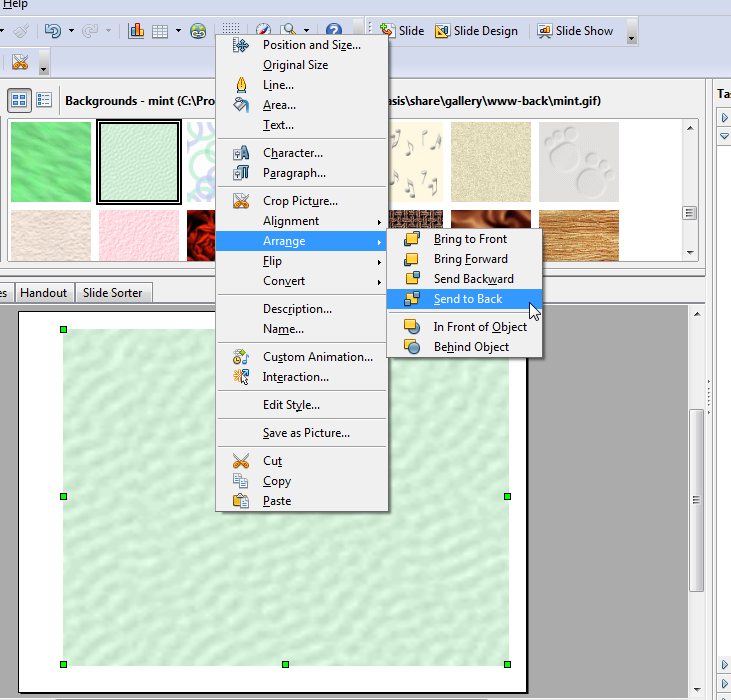
  4. Select the image Click the right button of the mouse then click Arrange then Send to Back.

Sendback.png

  1. Now you have a back ground in your first slide (Click the Gallery button the list of the backgrounds will disappear).


Adding Pictures to a Slide

  1. Click the From File button on the Drawing toolbar at the bottom of the screen.
  2. A selection of pictures and clip art is displayed. Your school might have a good selection of clip art from which to choose.
  3. Click one clip art image or even your photo to put on the slide.
  4. You can drag the image and resize it using the sizing handles as it explained before.
  5. Click the Slide Design button on the Formatting toolbar to open Slide Design task pan.
  6. You will get this window click load.
  7. Click a category from the categories box.
  8. Click Presentation Backgrounds.
  9. Click a template from the Templates box.
  10. Click the button arrow to view all the Templates box.
  11. Click White Blue and Lightnings template.
  12. The design applied to all slides in the presentation.
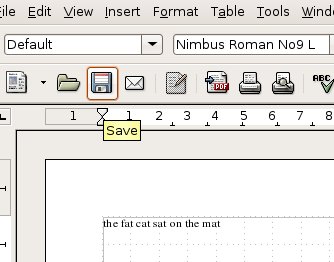
  13. Click the Save button on the Standard toolbar.

Oo-Writer-File-Save2.jpg