Locating the components of the Calc screen
| Working with Spreadsheets in OpenOffice.org Calc | ||
|---|---|---|
| The application | Making a spreadsheet | The Calc screen | Saving | Handling worksheets | Practice | Summary | |
Let's explore the tool as displayed on your screen upon opening Calc.
Columns, Rows and Cells
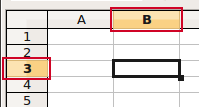
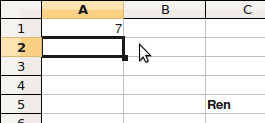
The main feature of a spreadsheet is that it is organised into columns and rows. The columns run horizontally from the left to the right of the work area and are named by the letters of the alphabet, at the top of each column. The rows run vertically from top to bottom and are numbered 1, 2, 3, 4, etc, to the left of each row.
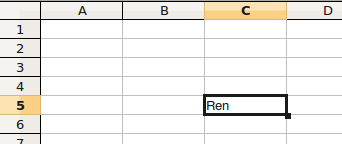
The cell is located at the point where the row and column intersect or cross each other. For example cell C5 is the cell lying at the intersection of Column C and Row 5. C5 is also referred to as the address of the cell.
Toolbars
Running across the top are a set of four toolbars each of which displays a series of icons or buttons you will click on when you want to perform certain tasks. To put it another way, you click on these buttons when you want to execute specific commands. The four toolbars are:
The Menu Toolbar
The menu toolbar displays the names for categories of basic commands many of which are found in the other OpenOffice.org applications. For example, the File menu consists of a set of commands related to file operations such as opening an existing file, creating a new file, closing files, and so on.
The Function Toolbar
The second bar is the function toolbar. It contains icons (pictures) to provide quick access to commands found in the drop down boxes on the menu toolbar, e.g., New, Open, Print, Copy, Paste, etc.
The Formatting Toolbar
The third bar is the formatting toolbar. It contains icons and drop down menus for commands used to format cells, e.g., to select a font, font color, alignment, number format, border option and background color.
The Formula Toolbar
The fourth bar is the formula toolbar. It contains the Name Box drop down menu on the right (which contains the address of the cell, or range of cells, that is currently selected, e.g., C1:D5, if a block of cells is selected) and a long box called the Input Line on the right (which serves as an entry point for the data to be entered in the highlighted cell).
- When you place your mouse cursor over an icon on a toolbar, the name of the function appears on your screen.
- Selecting the >> drop down menu on the far right of the function and formatting toolbars opens a menu of options for customizing the toolbars.
Before we move on, here's a practice activity.
Tabs
Now let's turn our attention to the bottom part of the Calc sreen.
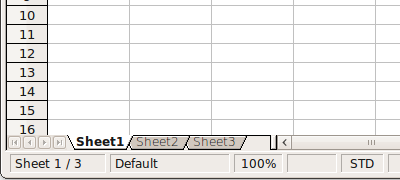
Each spreadsheet file consists of one or more sheets (also called worksheets). These can be accessed by clicking on the tabs at the bottom left of the work area. By default, there are 3 sheets, named Sheet 1, Sheet 2, Sheet 3. When you click on a tab, its worksheet is displayed. The work area that we have been looking at thus far is essentially the work area of a single worksheet displayed on the Calc screen.


