Help:Editing using a text editor
Contents
Introduction
Many people use a text editor to do most of their writing.
The purpose of this document is to show you how to use a text editor to write text specifically to use in a wikieducator. It will show how to use different editors to edit. It will assume that you already have some basic knowledge of mediawiki syntax.
Rationale
Using a text editor has the following advantages:
- You can concentrate on the content, instead of needing to worry about how it looks. This allows you to work faster with less distractions and worry about the important part (what you want to say)
- It allows you to use the full power of markup languages (which is what mediawiki is). You also have more control (not needing to rely on getting the correct conversion).
- It is easier to add the formatting as you type.
- Text editors allow you to use the keyboard and avoid the mouse. This makes the editting quicker and reduces the strain on your hands and wrists. (You can still use the mouse if you need to).
- Most word processor have many excess features which are designed for advanced design work and are used little for simple text applications.
- They load faster, run quicker, and use less memory than word processors.
Features
Some of the features that most good quality editors share:
- Customization
- Ability to set keybindings, background and foreground colors, and other options. Comment: Do not be afraid to spend time customizing your editor to your comfort. It will save time in the long run.
- Modes
- Having different modes for different types of files. For example: plain text, outlines, [math]\mathrm{L\!\!^{{}_{\scriptstyle A}} \!\!\!\!\!\;\; T\!_{\displaystyle E} \! X} \,[/math], or wikipedia modes.
- Syntax highlighting
- This means that specific parts are set in a different color or font-type (like italics). For example, headings may be red and lists given in bold. They are usually mode-specific. Syntax highlighting is very useful, especially for markup languages.
- Multiple files
- able to open multiple files in different windows, in split windows, or in tabs.
- Split windows
- the ability to split the visible window into two (or more) parts - horizontally or vertically.
Editors
The rest of this document discusses different text editors.
If you are new to text editors, you may wish to skim the remaining sections and then pick an editor. The best way to learn how to edit is simply to do it. This document can be considered a "mini-tutorial" explaining basic features in order to get you started.
In the below descriptions I will use italics to show input into the program for editing, etc.
For keys C-‹key› means to hold the Control (Ctrl) key and the ‹key› at the same time. Similarly, M-‹key› means to hold the Meta key (on most modern computers this is labeled Alt) and the ‹key› at the same time.
If you have questions leave them on the Talk page.
Notepad
Notepad is the common Microsoft editor. It has almost no features and is of very limited use.
Emacs/XEmacs
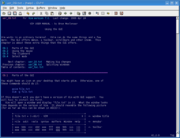
Emacs can be best described as a text editor with the kitchen sink. It is one of the two most used editors (the other is vi/vim/gvim). It was originally developed by Richard Stallman - founder of the free software movement.
XEmacs is a fork of the original emacs - for the purpose of this document they are the same.
Emacs can be ran from the console or in a window system (Linux, Mac, or MSWindows).
Keybindings
First, before we discuss using emacs we need to discuss keybindings. One of the most significant aspects of emacs is the standard keybindings which it uses. Many people are used to using the control key for cut and paste, for example. Emacs takes this concept some steps further! First of all you can do anything - even only moving the cursor - with the control and alt keys (see below). Secondly, it uses keychains - for example, C-x C-s saves a document. (Hint: this last command can be typed quickly by holding down the ctrl key and then press x and then (still holding down ctrl) press s.) Lastly, any command can be run by M-x ‹command›.
Starting
Now start emacs (the command is simply emacs). You should now see the emacs startup screen. To open a file, type C-x C-f. To open a new file also use C-x C-f and type a name for the new file. Since we are editing a wikieducator document, give the filename a .wiki suffix (you will see why below). Now type some text.
Moving around
To move the cursor inside the text you can use the following: C-f goes forward one character, C-b goes backward a character, C-n goes to the next line, C-p goes to the previous line, C-a goes to the beginning of a line, and C-e goes to the end of a line, etc. Try this for yourself -- hold down the control key and press f, b, p, n, a, e.
Yes, you can still use the arrow keys; however, the emacs bindings are actually quicker to use because your hands do not need to move from the main keys.
Cut and Paste
One thing that is also different about emacs is that the traditional cut and paste is somewhat different. In fact emacs calls it kill and yank. Place your cursor at the beginning of a line and then press C-k (kill). That will then kill the line. Then move to the place you want that text to go and press C-y (yank).
You can also kill from any place in the middle of a line to the end of the line, simply put the cursor where you want it and again press C-k.
You can also kill and yank a region. Place your cursor at the beginning of the region you want. Then press C-Space. This is called setting the "mark". Now move the cursor to the end of the region. You will notice that the region will be highlighted. Now kill the region with C-w. To yank the text you again type C-y. (Tip: select all is C-x h)
Note: If you have emacs version 23 (currently the development version) you can also select a region by using shift and the motion keys mentioned above.
Now save your document by typing C-x C-s. To exit emacs type C-x C-c.
Emacs has a built-in tutorial. You can get to the tutorial by typing C-h t.
Wikipedia Mode
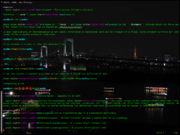
Emacs (and many other editors) have many modes depending on what type of file you are editing, for example, text mode or html mode.
Especially, useful for wikieducator users is wikipedia mode. Note that you may need to add a package to your version of emacs - see your OS/distribution on how to do this. You can get the mode package at the emacswiki (this is a good place for finding things about emacs).
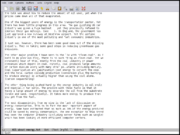
To use this mode either (1) type M-x wikipedia-mode after opening the file or (2) create a file with the .wiki suffix. You will notice that the word Wikipedia appears just below the file.
Now open a file in wikipedia mode. Wikipedia mode uses by default longlines mode, which is what most programs call word-wrap. However, in Emacs 23.1+ a better way of word wrapping is to use visual lines mode. To get this type first M-x longlines-mode and then M-x visual-lines-mode
Now type a headline (for example ==Emacs==). Notice that the headline will now be in different color. This is an example of syntax highlighting. As a further example type ‘‘‘this line is bold‘‘‘
Wikipeida mode also adds some useful keybindings. Type a line of text and then press M-‹enter›. As you see this adds a numbered list. Pressing C-‹enter› adds an unnumbered list. To see all the additional bindings type C-h m when inside wikipedia mode. This command gives you mode-specific information for whatever mode you are in.
Split Windows
As many text editors do, emacs can split the window.
Type some text, then type C-x 2. You will see this splits the window into two parts, one above the other. At this point both parts will be the same file. Now type C-x 3 This splits this part in two , each one beside the other. Now type C-x o a couple of times. This switches the cursor between the parts of the windows.
Now type C-x 1 and the splits disappear. A related command is C-x 0 which removes only one split (note these are the same if their is only two splits).
Note in the emacs documentation you will see that a window is called a frame, and the parts of a frame are confusingly called "windows"
Buffers
Of course, in emacs you can open more than one file. Each file is in an object called a buffer.
Start by opening a second file (remember that is C-x C-f). Now There are many ways to change buffers. Typing C-x b will prompt you (at the bottom section, called the minibuffer) for the buffer (file) name. If you press enter the buffer in parenthesis will be shown, otherwise type the name and then press enter. C-x C-b gives a list of buffers; place the cursor on the file you want and hit enter. C-x ‹left› and C-x ‹right› moves to the previous and next buffer, respectively. Try all of these methods to find the one that is better for you.
(Hint: if you want an scratchpad type C-x b and give an non-existant name -- this gives an empty buffer).
Snippets
Another useful tool for using emacs with wikieducator is to use what are called skeletons or snippets. These are pieces of already set text which can be pasted into the document. For example, a snippet might be &lsaquospan style="color:"&rsaquo&lsaquo/span&rsaquo, you can then insert the color and your text into this snippet.
The normal method emacs uses is difficult to understand and implement. A better alternative is to use yasnippet (yet another snippet). See their website for information on how to use them.
Other Modes
Some other modes in emacs are also interesting. Here is a short description of some other modes - check the documentation for more information.
Often people which to look at difference between to files. The ediff mode allows you to compare two files side by side. Type M-x ediff. It will then prompt you for the two file names.
Outline mode is for making outlines and allows things such as being able to show only headlines or expand only certain headlines. If you are in wikipedia mode this can be toggled on by the menu bar.
Org mode is a planner, organizer, and todo list built on outline mode.
Help!
Finally, there is an extensive help system called the info system. C-h r enters the info system help on emacs. Pressing h inside the info system will give help on navigating info.
Vi/Vim/Gvim
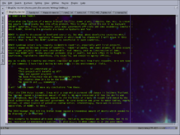
Vi (pronounced vee-eye) is another famous text editor. Vim is vi modified - basically the same as vi with a few changes. Gvim is a graphical version of vim.
Modes
The most important thing to understand about vi is that there are two "modes" (here the meaning of mode is somewhat different than for other editors) - normal mode and insert mode. The editor behaves differently in each mode.
Insert mode is for typing (inserting) text.
Normal mode is for everything other than typing text. Deleting text, copy and paste, moving within the text, searching, etc.
Basic Operation
Begin by opening an empty file in vim or gvim by typing vim ‹filename› or gvim ‹filename›, respectively, where ‹filename› a new file name (vim will create the file).
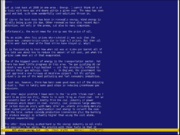
You start vim in normal mode. First type i. This puts you in insert mode. You will notice the line "--INSERT--" at the bottom of the screen. Now type one or two paragraphs of text. Then press the ESC key. This puts you back in normal mode.
In normal mode :w saves a file. To save and exit vim type :wq and to exit without saving type :q!. The ":" prefix means to enter a command.
Moving Around
In normal mode you can move the cursor around with the following keys h to move left, j is down, k is up, and l is right. Try these keys to get a feel for moving around. The idea of these keys is to keep your hands on the keyboard.
One note is that you cannot move the cursor beyond the end of a line. If you get to the end of line it will not wrap around to the next line.
Deleting
Now move you cursor to the beginning of a word. Type x to delete the character under the cursor. Then type dw to delete the rest of the word. Finally, type dd to delete the entire line.
Now move the cursor to somewhere else a then type p (put) to paste the text most recently deleted.
To undo any command just type u.
Copy and Paste
To copy a region move the cursor to the beginning of the region you wish to copy. Now press v, this puts you in visual mode. Now move the cursor and you will see the region being highlighted. When you have the region you want now type y (yank). This copies the region. Go to where you want the text and type p to paste it.
Vimtutor
Vim comes with a tutorial. From the command line or prompt type vimtutor. It will let you practice the above commands and some other not listed above.
Syntax Highlighting
To get syntax highlighting to work with wikipedia files in vim, you need to install the wikipedia.vim syntax file. Then vim will automatically use mediawiki syntax if the filename ends in .wiki. (Note: without wikipedia.vim vim will use the flexwiki syntax, which is similar)
Jedit
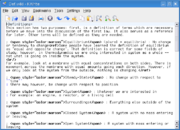
Jedit is a full-featured text editor written in Java.
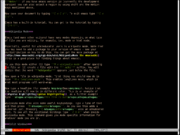
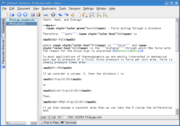
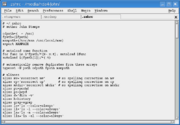
Open jedit. If you are going to use it for wikieducator, we recommend first setting the word wrap to soft. To do this go to Utilities --› Global Options in the menu. Then click on Editing in the left column. Then in the dropdown list "word wrap" on the right select "soft". Hard wrapping inserts a newline at the end of each wrapped line, soft wrapping does not.
Keybindings
Jedit uses the CUA keybindings (the ones used by MS Word or OpenOffice). It also has alternative bindings and can be fully customized. Go to Utilities --› Global Options and then Shortcuts to view or customize bindings. Note that jedit extends the CUA bindings by using C-e as a prefix key. For example, C-e C-w closes all open buffers.
Plugins
Jedit allows you to extend its features by using Plugins. These are similar to "extensions" used by firefox. To download plugins, in the menu go to Plugins --› Plugin Manager. If you now click on the Install tab, Jedit will check the web for the most available plugins. Select the ones you what and Jedit will install them.
Syntax highlighting
To get syntax highlighting for jedit you need to use the mwjed plugin. But note you need to have Jedit version 4.3pre12 or later in order to use it. Check the website for installation instructions.
Splits, Tabs, and Sessions
Open a second file. You should now see the second file displayed. Press C-‹PageUp› and you now see the first file.
Each file is in an object called a buffer. Pressing C-‹PageUp› switches forward through the buffers and C-‹PageDown› switches backward through the buffers. Note that both commands will wrap around the list of buffers.
Now type C-2. This will split the screen into two panes - one above the other. Type M-‹PageUp› and the focus will switch to the bottom pane. Then type C-‹PageUp› and you will now see two different files in the two panes.
You can split the text area into two panes side by side by typing C-3. Type C-1 to remove all splits. If you have more than one split typing C-0 removes one split (with only two splits C-1 and C-0 are equivalent).
Some people prefer to use tabs when they have multiple files open. To use tabs in Jedit use the BufferTab plugin. Once you install the plugin go to the menu Plugins --› BufferTab. This toogles the tabs. Clicking on a tab will bring up that buffer. Right clicking brings up a special menu. Go to Plugins --› Plugin Options. Then click on BufferTab. You can then change the location of the tabs, color tabs, etc.
There are also other plugins which add other ways of switching between buffers. You can explore them on your own.
You can also group specific files together as a session using the Sessions plugin. This is especially powerful used combined with BufferTabs. Sessions are useful, for example, if you have a group of files related to wikieducator and another group of files related to your blog.
Desktop Editors
Here is a short description of some editors which are designed for use with specific desktop environments.
Most of these use the CUA bindings.
KWrite
KWrite is the intermediate level text editor for KDE.
To do syntax highlighting chose from the menu Tools --› Highlighting --› Markup --› Wikipedia.
Kate
Kate (K advanced text editor) is the advanced editor for the KDE desktop.
Layout
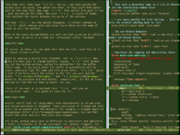
You will notice than when you start Kate you will notice that the screen has at the left a list of Documents. Unlike Kwrite if you open a new file it does not create a new window but puts the file in the same window. Switch files by selecting it in the Document window.
Click on the right-hand tab "Filesystem Browser" and you will see a file manager instead of the document list. Click on a file and kate will open it.
You will also notice two tabs at the bottom. Click on "Find in Files" for a window for searching. Click on "Terminal" and you will get a built-in console. Using the combination of text window, built-in file manager, and built-in shell console can at times be very useful.
Sessions and Windows
Kate has the features of Kwrite plus some others. First is sessions. In fact when you opened Kate it should of asked you which session you wanted. A session is a collection of files which you may be working on for a project on say non-formal education.
The second additional feature is the ability to split windows. From the menu select Window --› Split Vertical or Window --› Split Horizontal.
Gedit
Gedit is a lightweight text editor for the GNOME desktop.
Other Graphical Text Editors
Nedit
Nedit is a multi-purpose text editor.
Nedit by default uses tabs instead of separate windows.
Command Line Editors
These are editors which are used directly from the command line or inside a console. They are very useful if you want to change a small amount of text.
Small emacs clones
These are all based on a subset of emacs. They use emacs keybindings. They also allow for multiple files and split screens.
Jove (ftp) (Jonathon's own version of emacs)
What these allow is for you to edit small documents quickly without needing to load a larger file manager.
Joe
Joe (Joe own's editor) has word star type keybindings for those who still remember and like those.
Nano/Pico
Pico is the default editor that goes with the pine e-mail package. It is non-free.
Nano is a free editor based on pico but with additional features. It is very lightweight editor. When you start it you will some of the keybindings listed at the bottom (note: ^R means C-R). To get a full list type C-G.
Jed
Jed uses S-Lang (or slang) interface. S-Lang is very similar to the more popular ncurses. Jed by default uses emacs keybindings but can be configured to use word star bindings. It also allows split windows. Also you can change the color scheme if you wish (from the menu).
MozEx
MozEx is not actually a text editor, but is a firefox extension which allows you to use your favorite editor inside a text area on a web page, including wikieducator. It is very handy if you need to edit a paragraph or two.
After installing the extension, go to preferences and click on the Textarea tab. Then put in the command for your editor.
Note for emacs users: If you use emacs, mozex it will open a new emacs instance each time, which is annoying. Open emacs first, then run M-x server-start to start emacs server. Then in mozex use the command emacsclient instead of emacs.
It's All Text!
It's All Text! is another Firefox extension that adds a small edit button to each text area, allowing you to open it in your preferred text editor.
