Create and manage files/Document formatting/Shading and borders
| Create and manage files | |
|---|---|
| Document formatting | Introduction | Paragraphs | Pages | Shading and borders | Key points | Assessment |
Contents
Shading
Apply Shading to Text
Applying shading to text is an easy way to emphasise text by adding colour to the background of your text. Use the steps below to apply shading:
- Key in the text to your document.
- Select (highlight) the text you wish to apply the shading to.
- Click on the Home Tab.
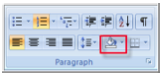
- In the Paragraph group select the Shading button down arrow:
- A menu containing a palette of colours will appear. You can choose from the palette the shading you would like to apply to your text.
- Select your colour by clicking on it.

Remove Shading of Text
- Select (highlight) the text you wish to remove the shading from.
- Click on the Home Tab.
- In the Paragraph group select the Shading button down arrow:
- A menu containing a palette of colors will appear.
- Tick the No Colour box.
Page borders
Inserting a Page Border
Inserting a page border is a great way to add a finishing touch to a document. Microsoft Word provides a wide variety of borders which you can apply to your document. You are also able to customise borders.
- Choose the Page Layout Tab
- Select Page Borders. The Borders and Shading Dialog Box will appear:
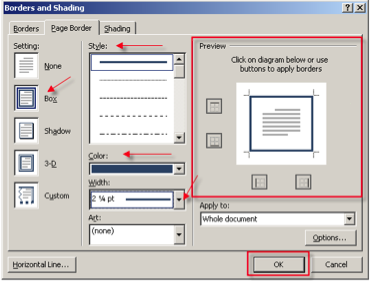
- Select the Box setting
- Choose a Line Style
- Choose a Colour
- Change the Width (thickness)
- Click OK

Applying a Border to a Selection of Text
You are able to apply a border not only to an entire page but also to a selection of text.
- Select the text you would like to apply a border to.
- Choose the Page Layout Tab, select Page Borders
- Select the Box setting
- Choose a Line Style, Colour and Width
- From the Apply to drop down arrow select This section
- Click OK
Text boxes
Text boxes allow you to place text anywhere in your document. You are able to apply formatting to text boxes, such as styles, shading, 3-D and shadow effects.
|
Please note: the following tutorial will open in a new window/tab. When you have finished the tutorial, simply close the window/tab and you'll return to this page. To complete this section, please work through the following tutorial: The tutorial includes a short video demonstration.
|